|
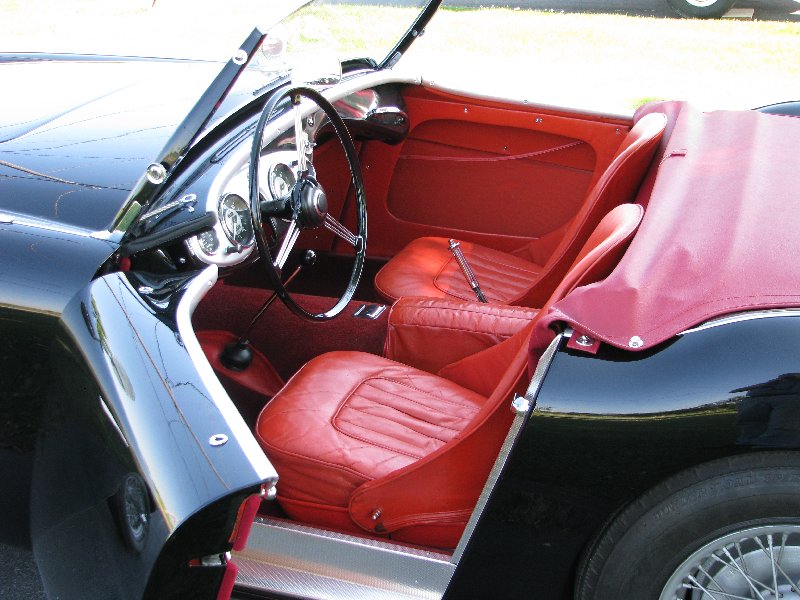
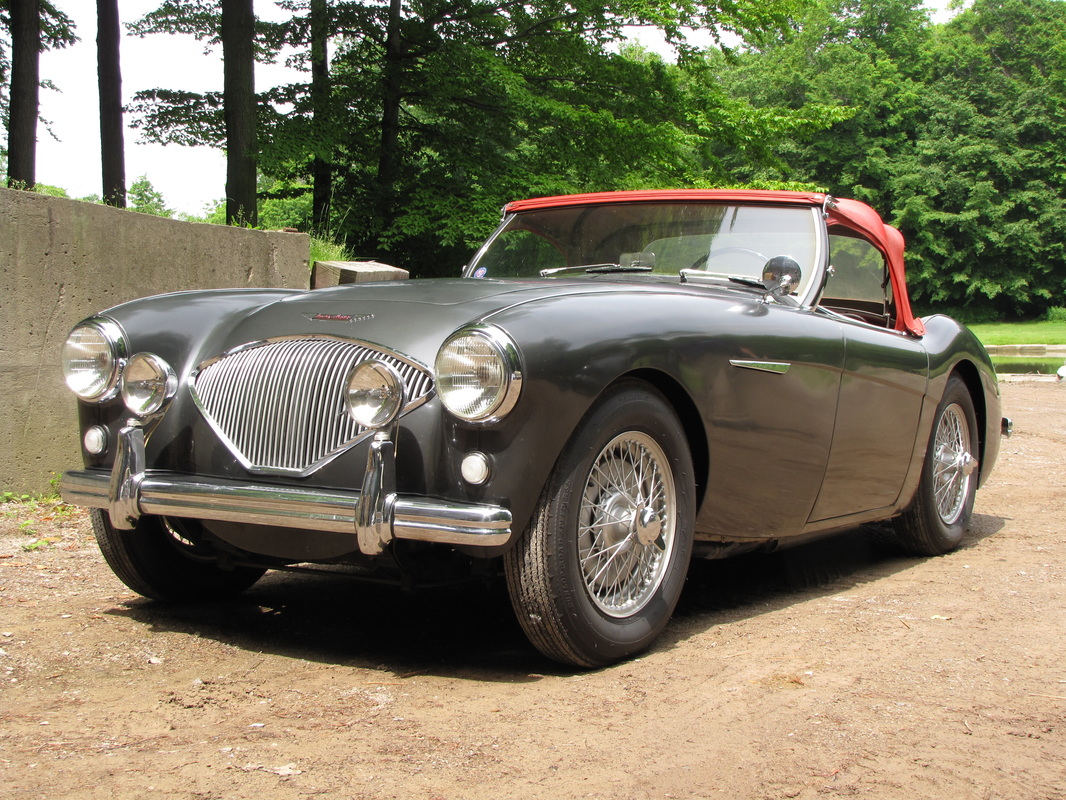
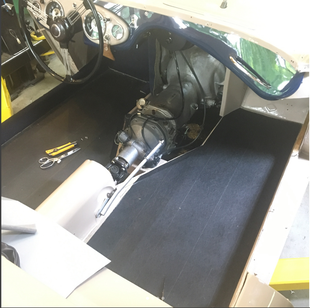
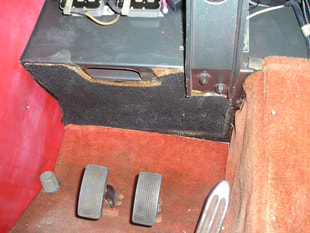
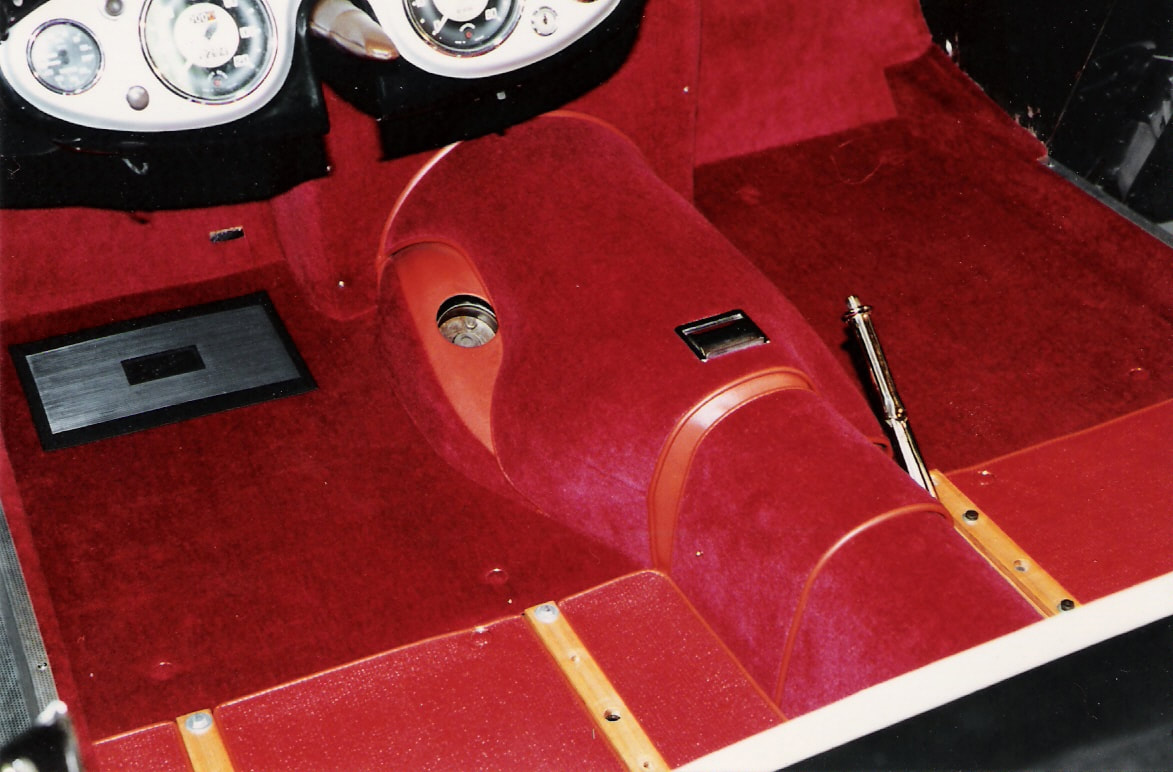
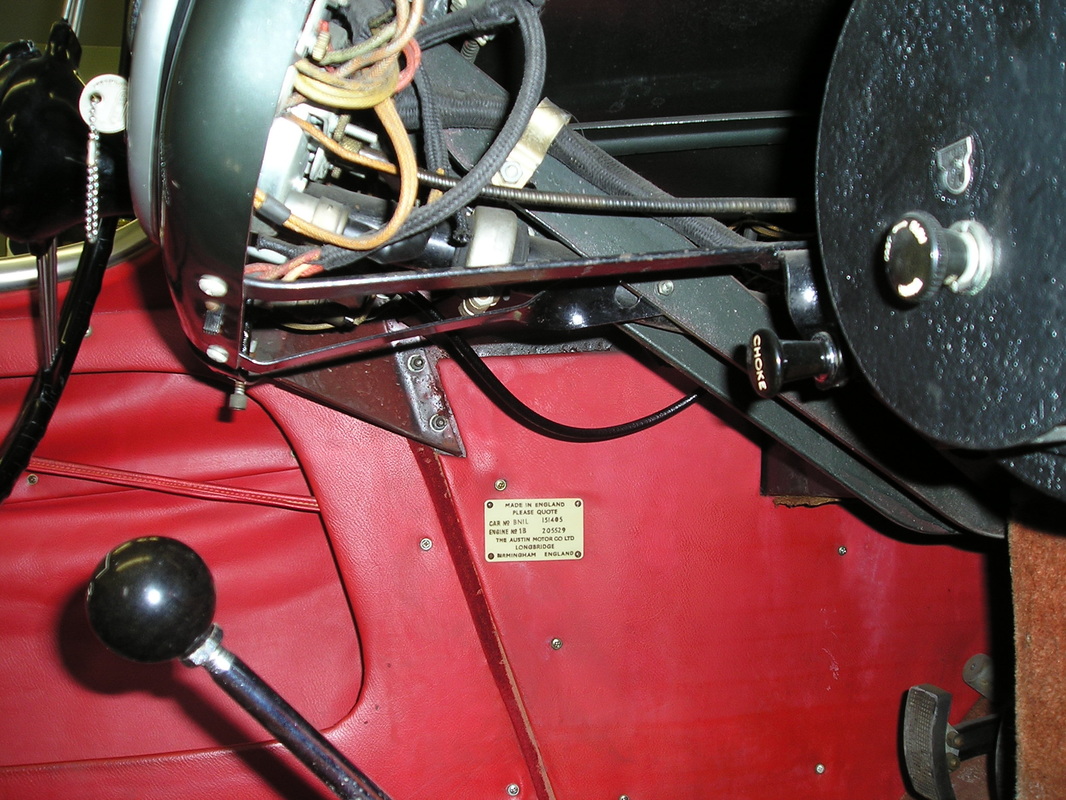
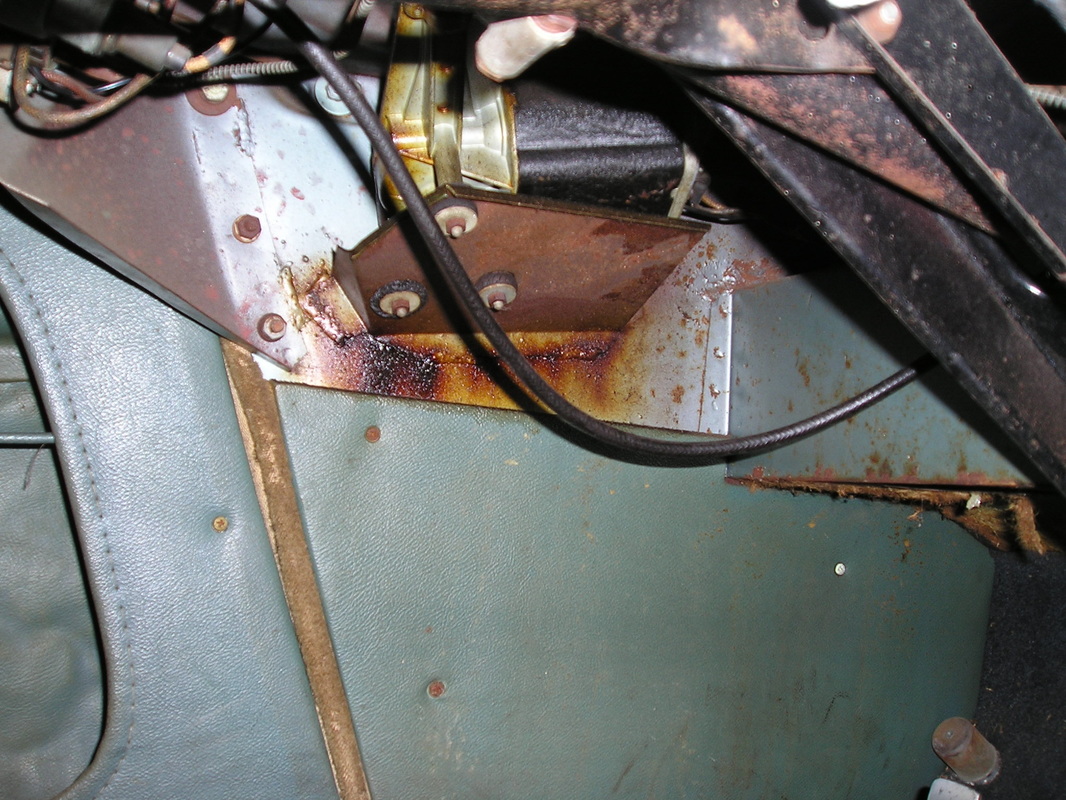
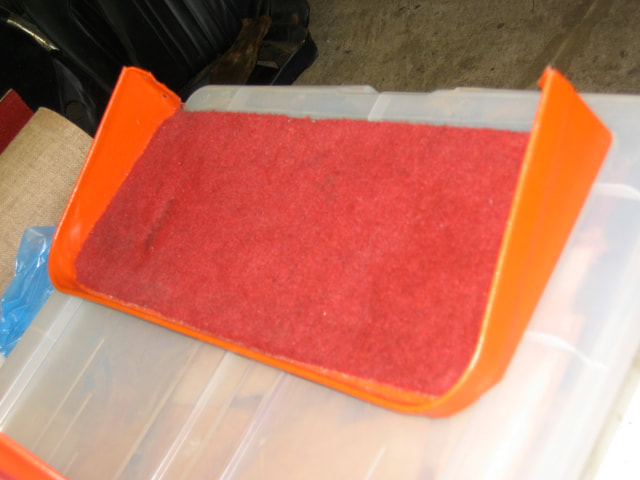
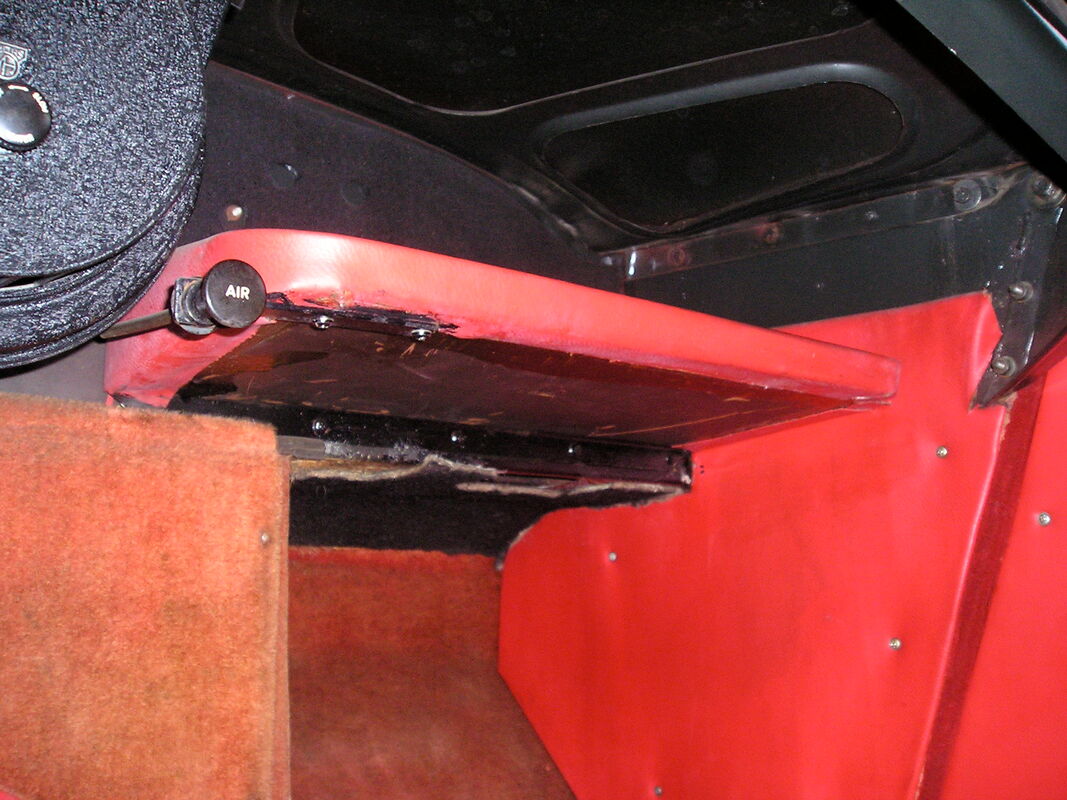
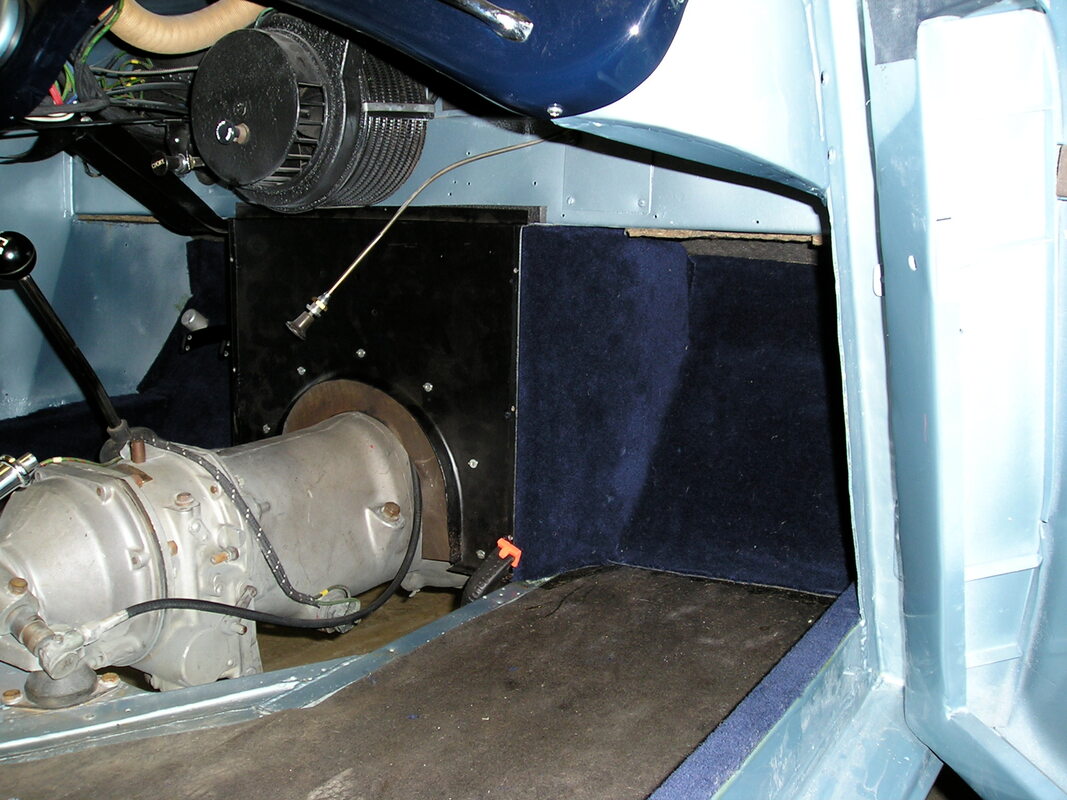
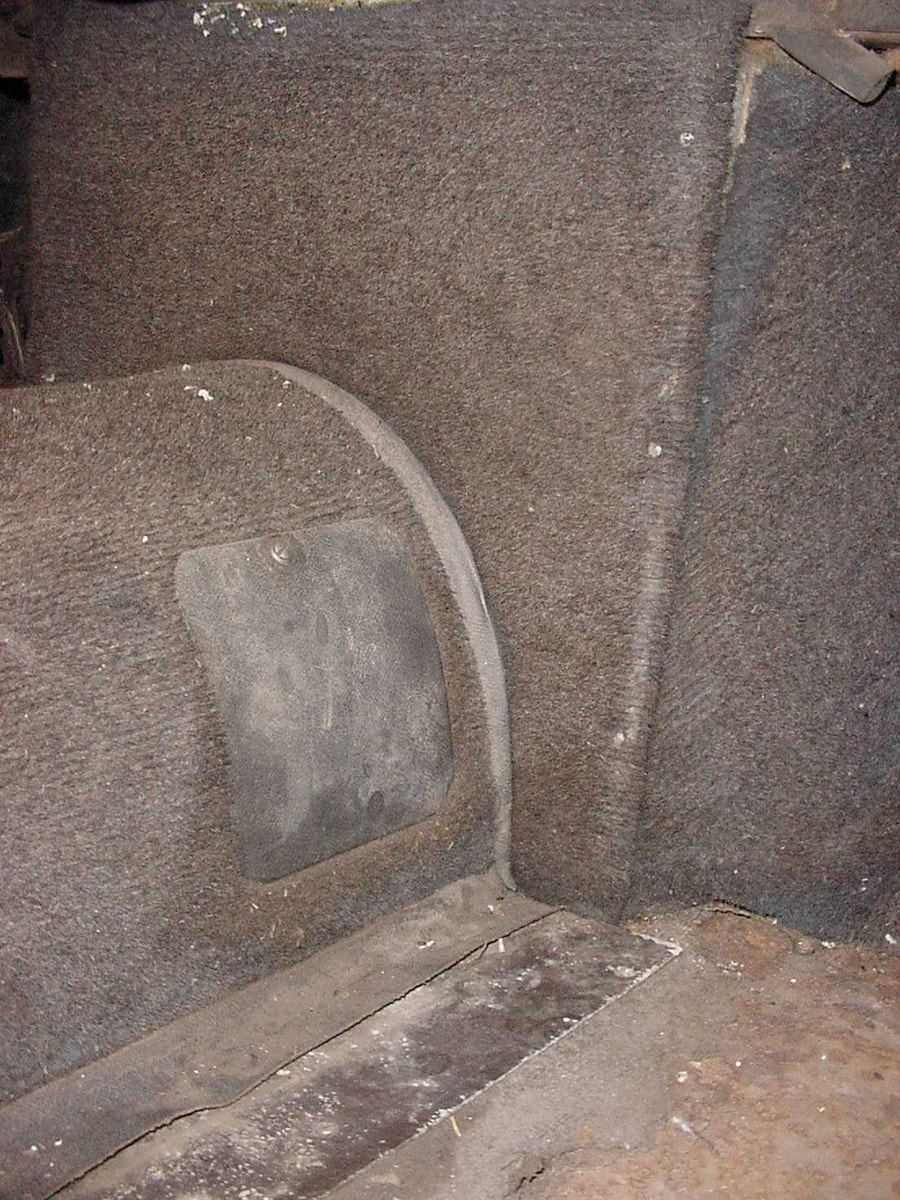
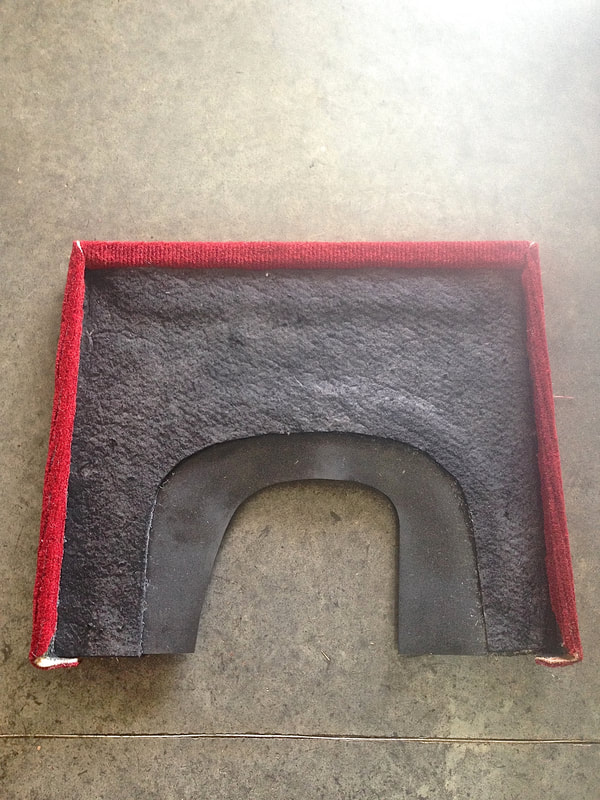
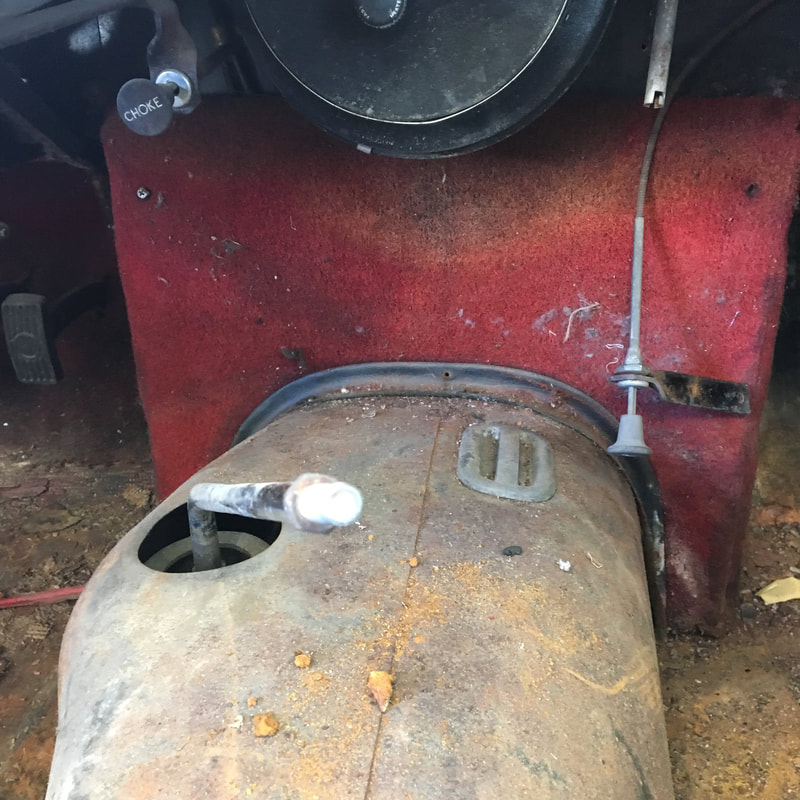
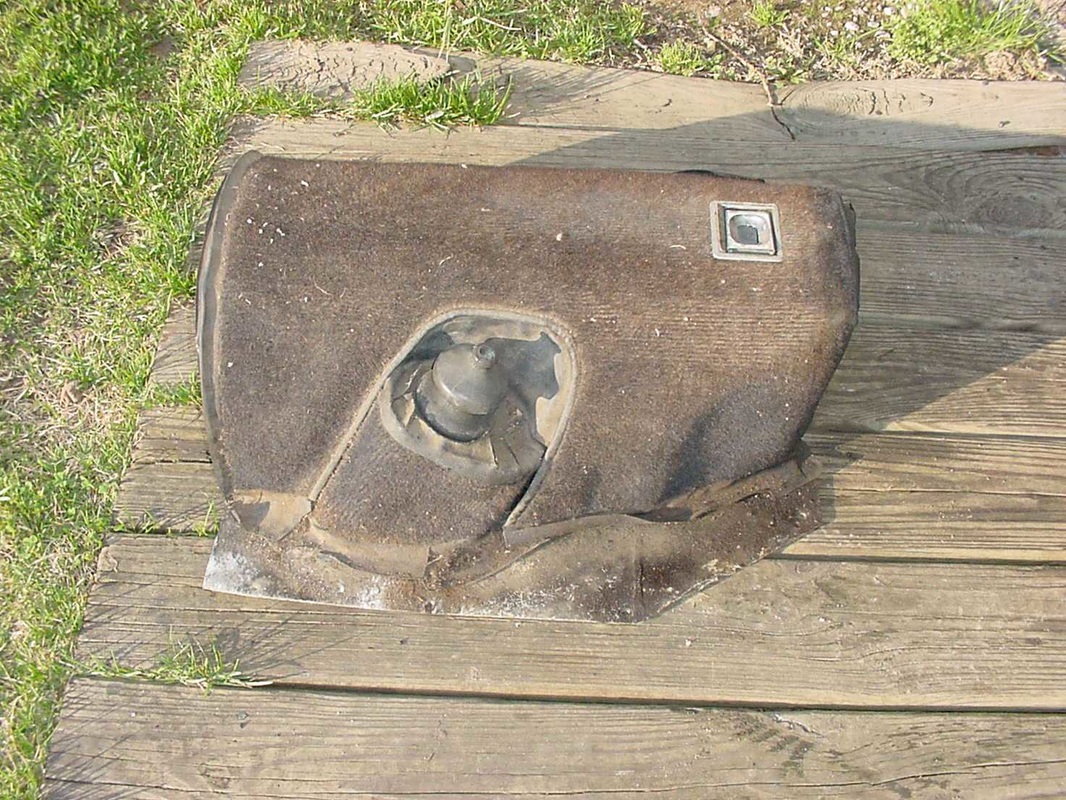
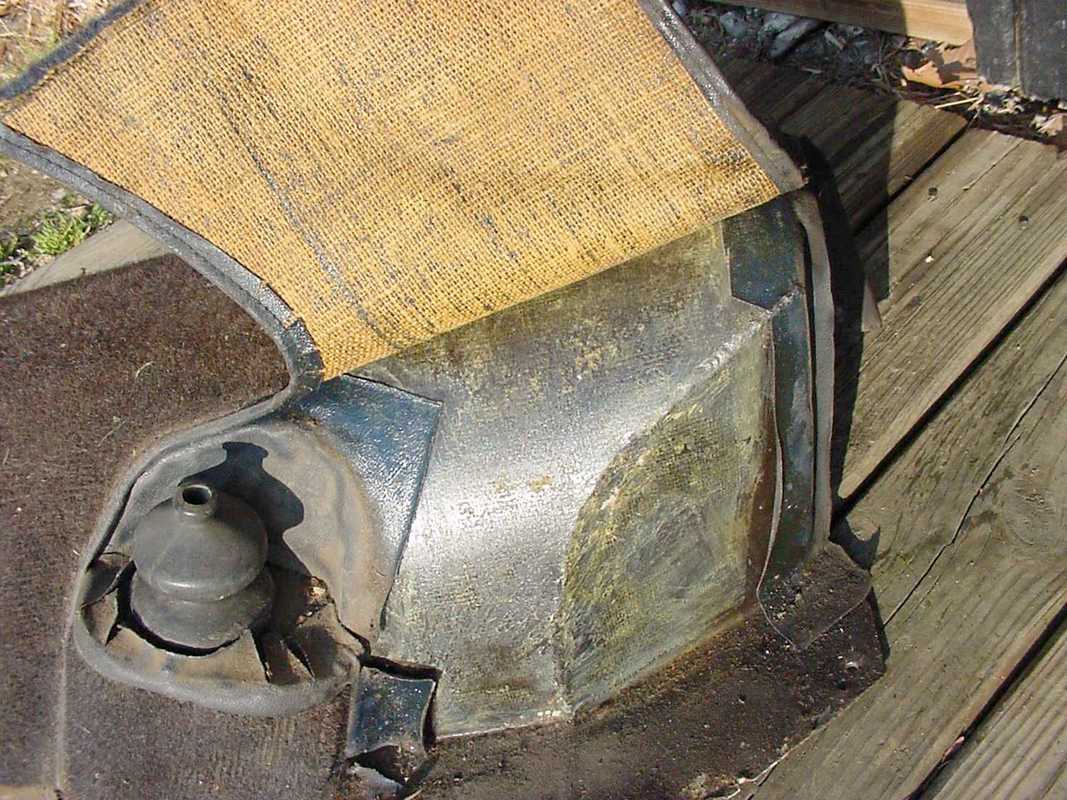
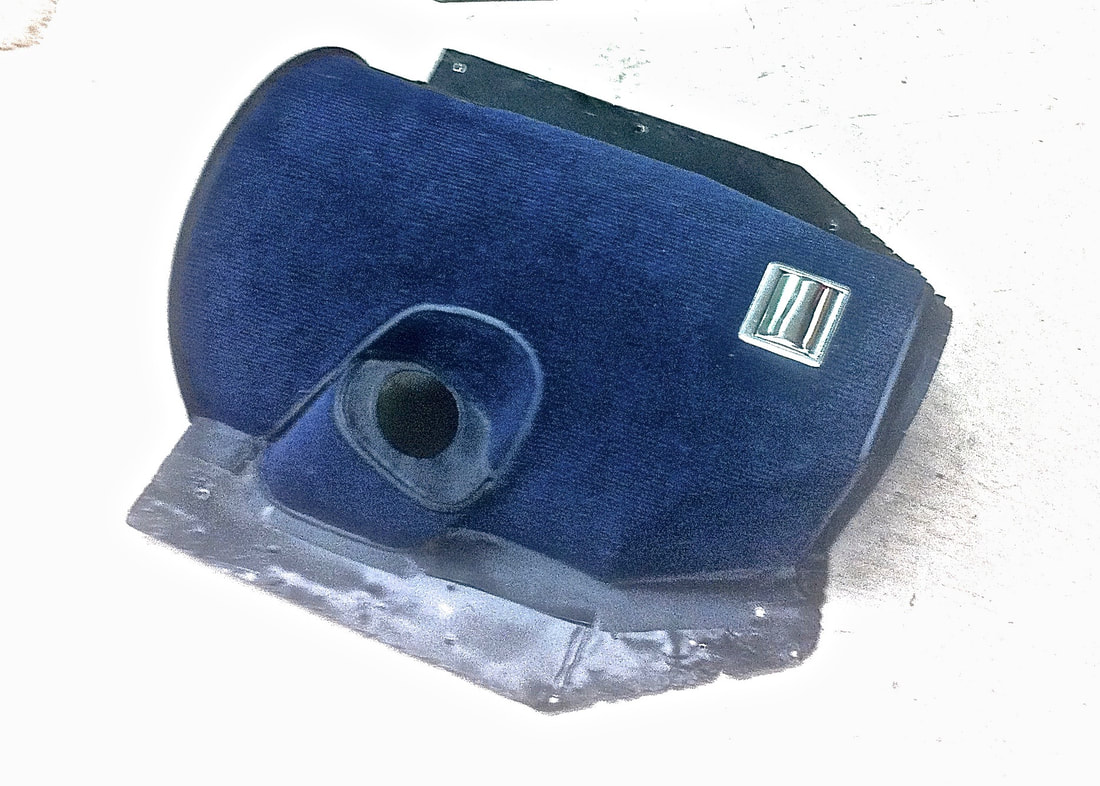
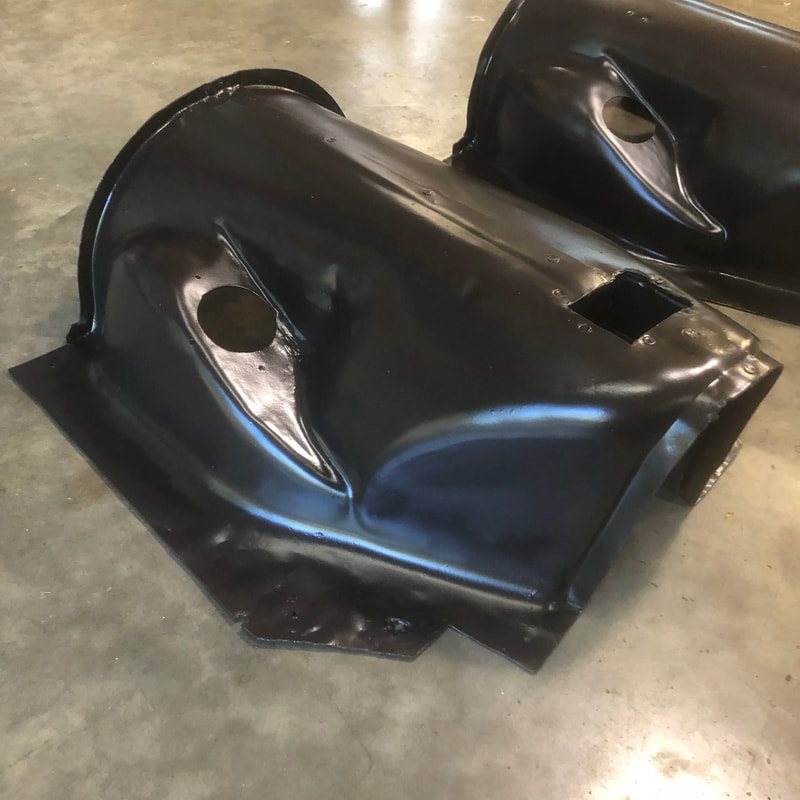
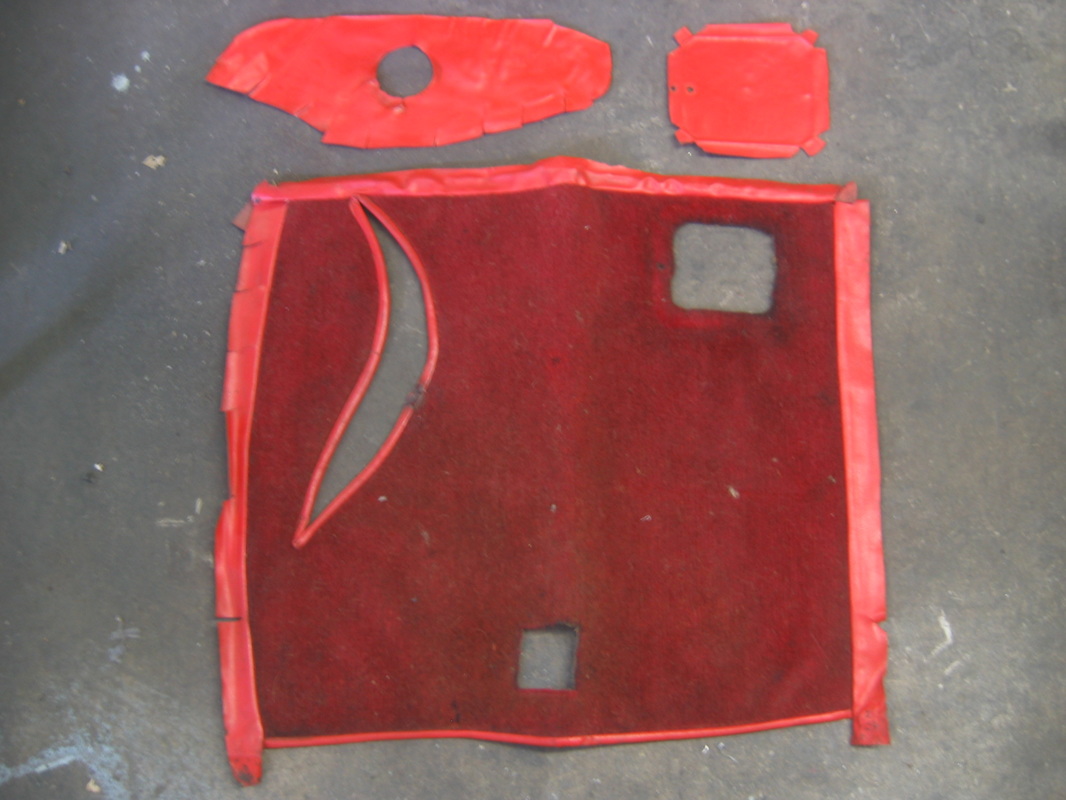
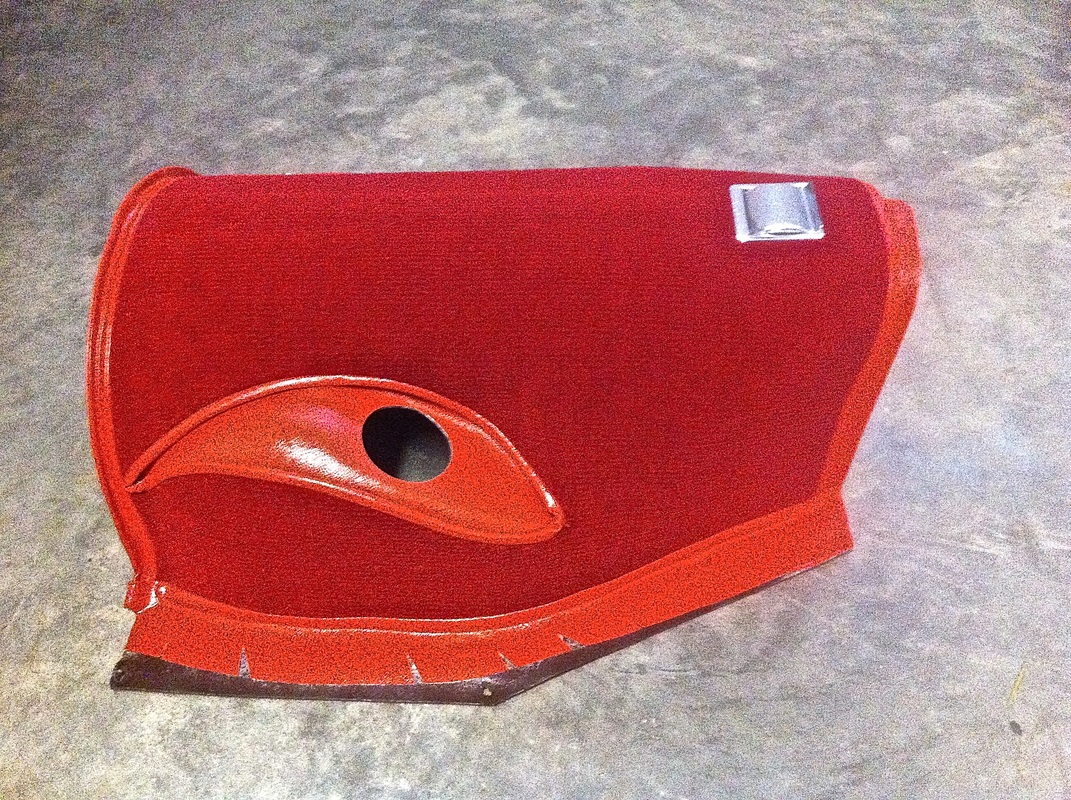
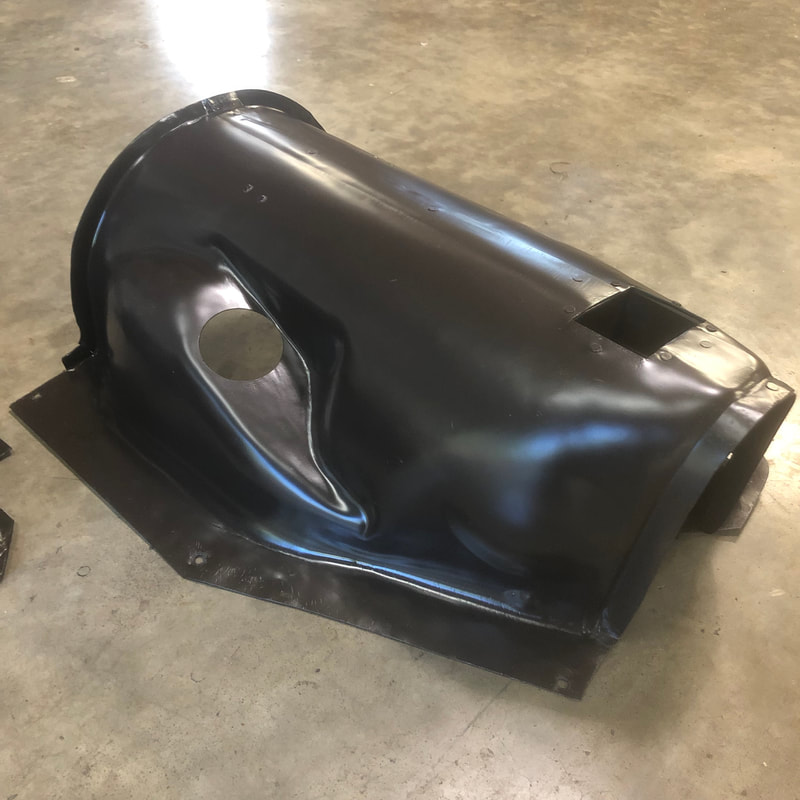
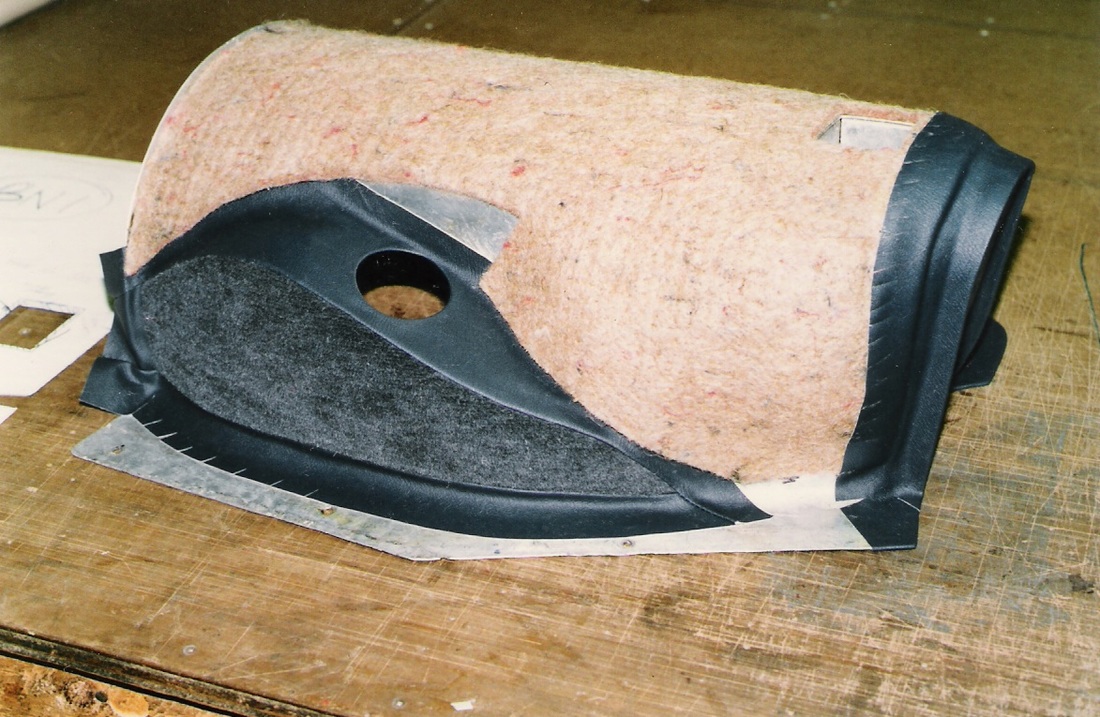
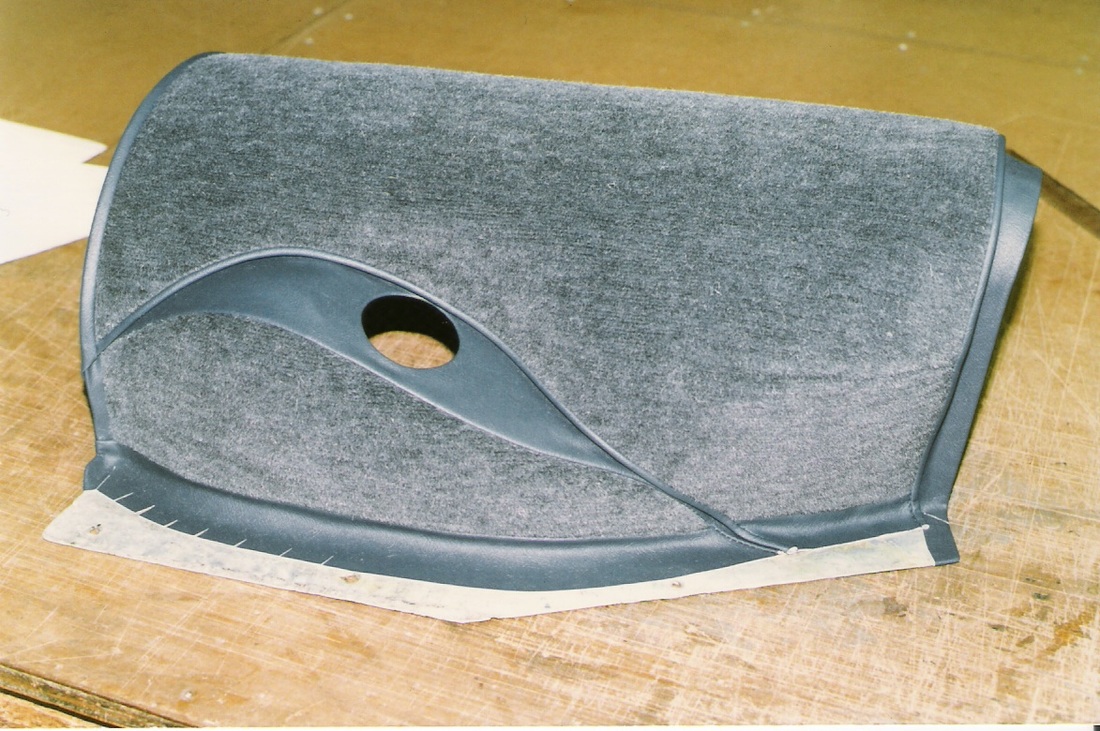
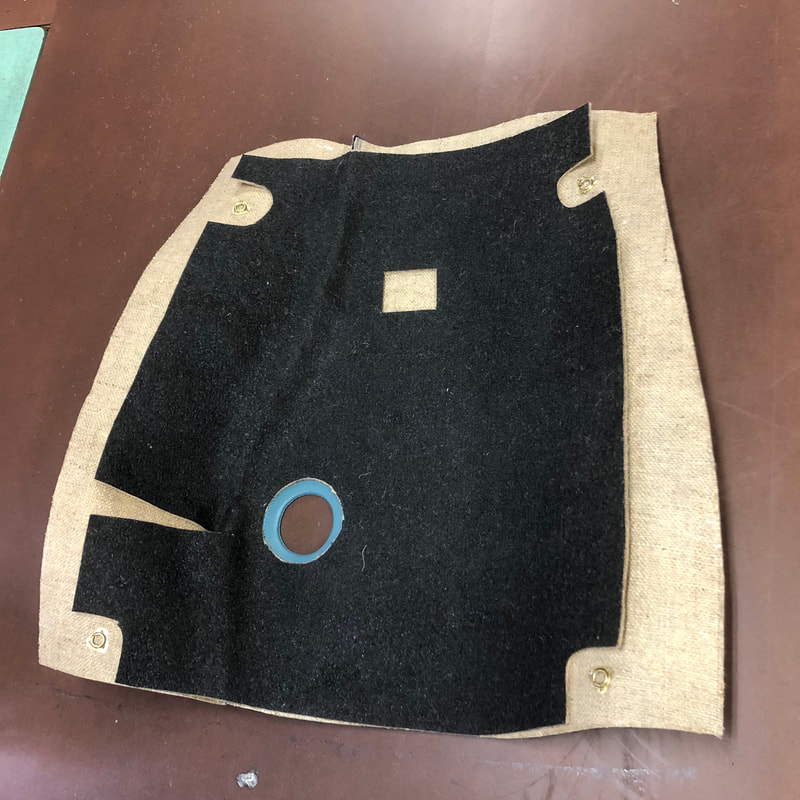
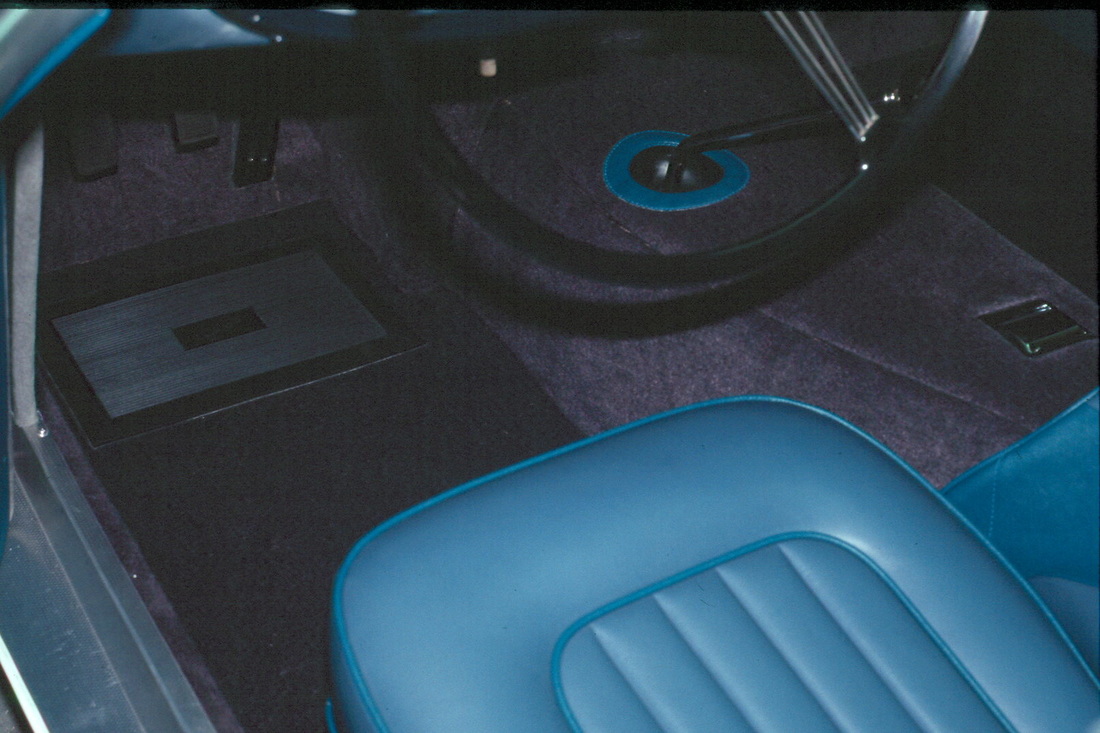
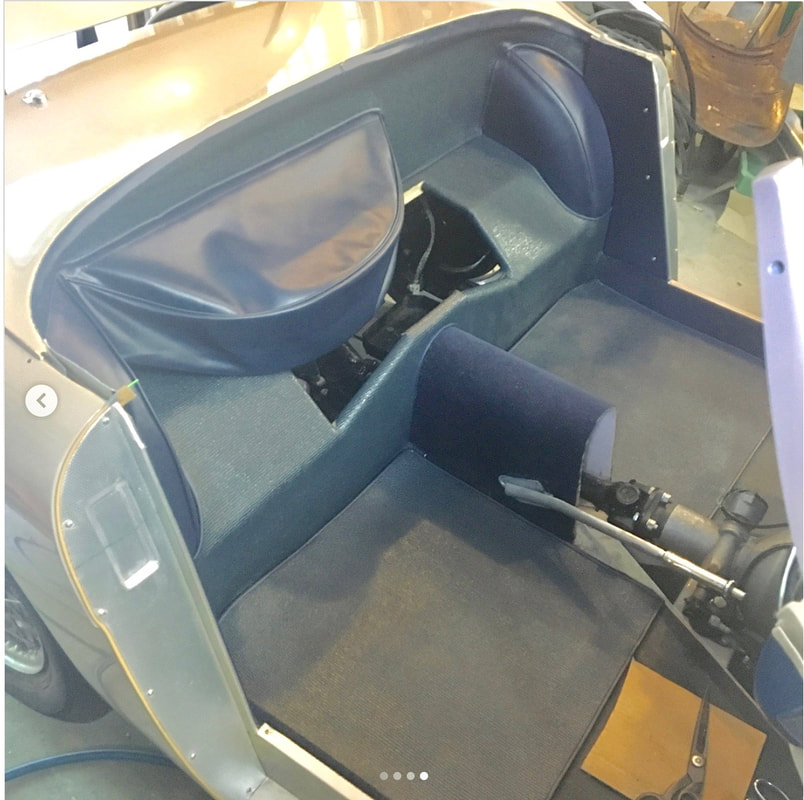
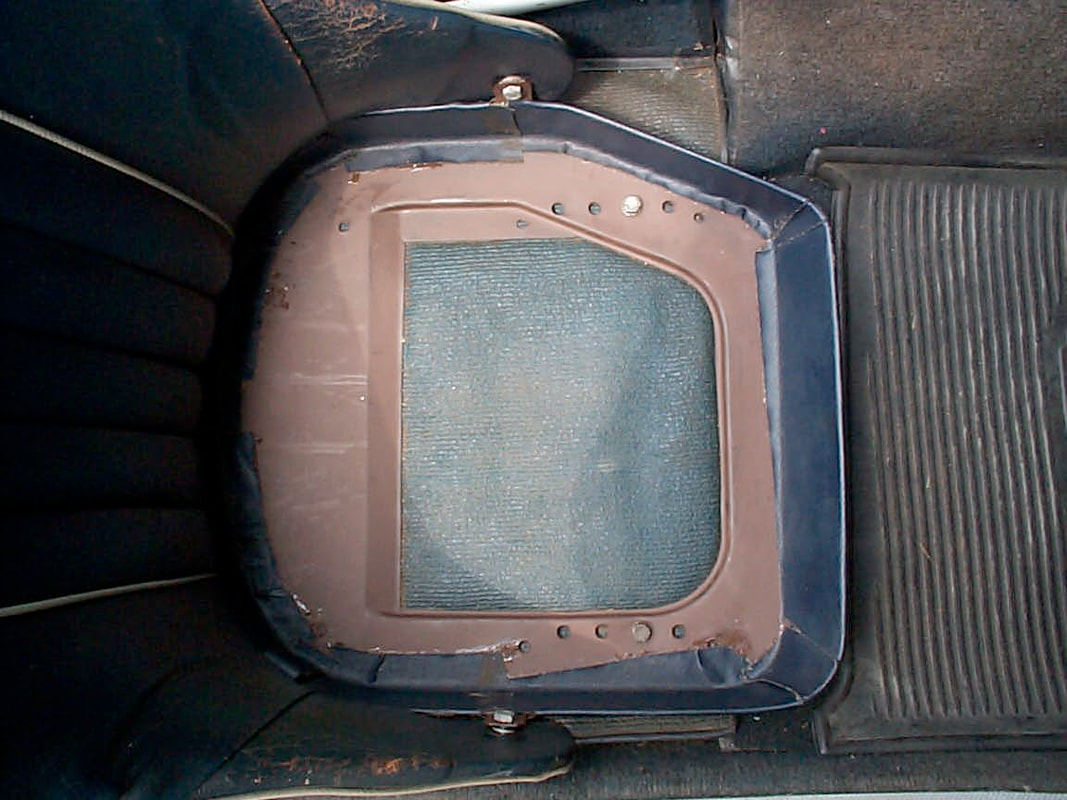
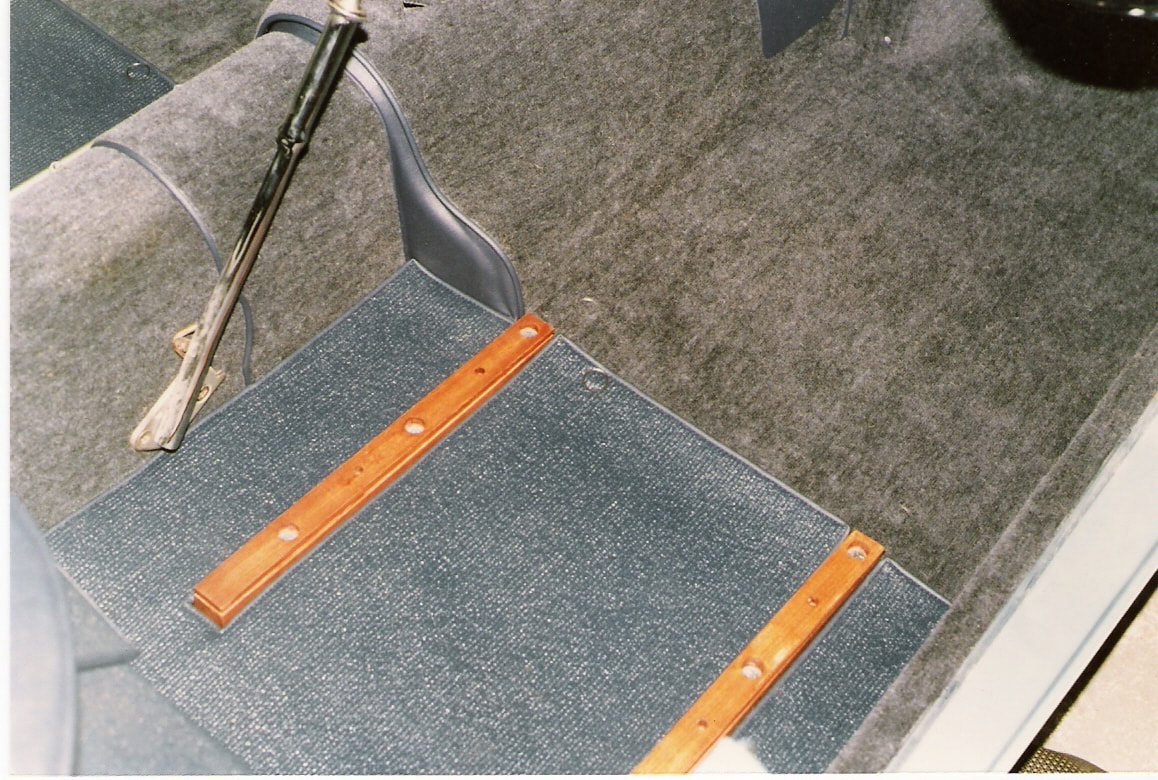
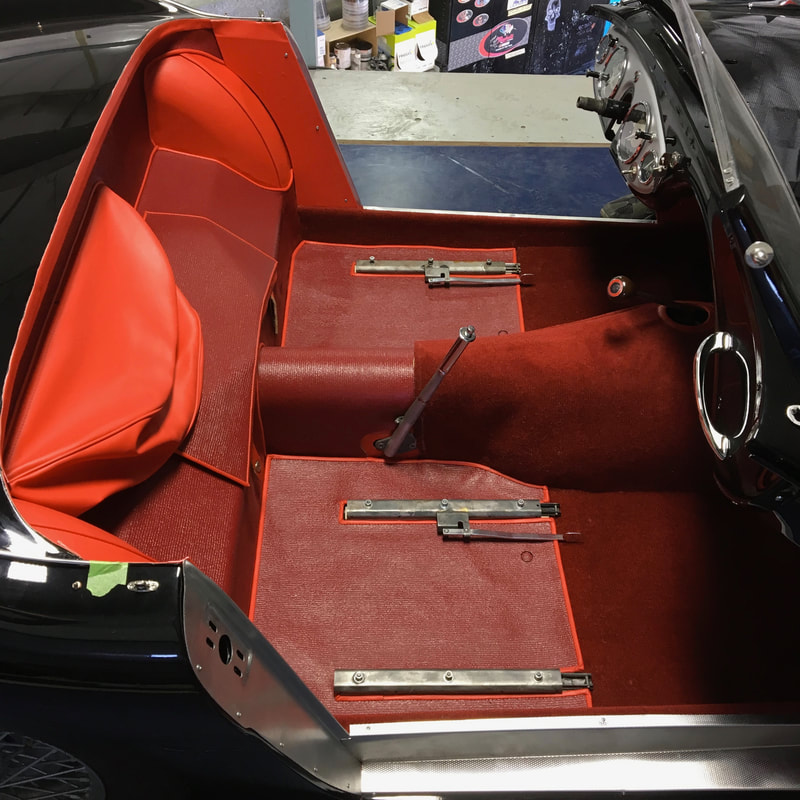
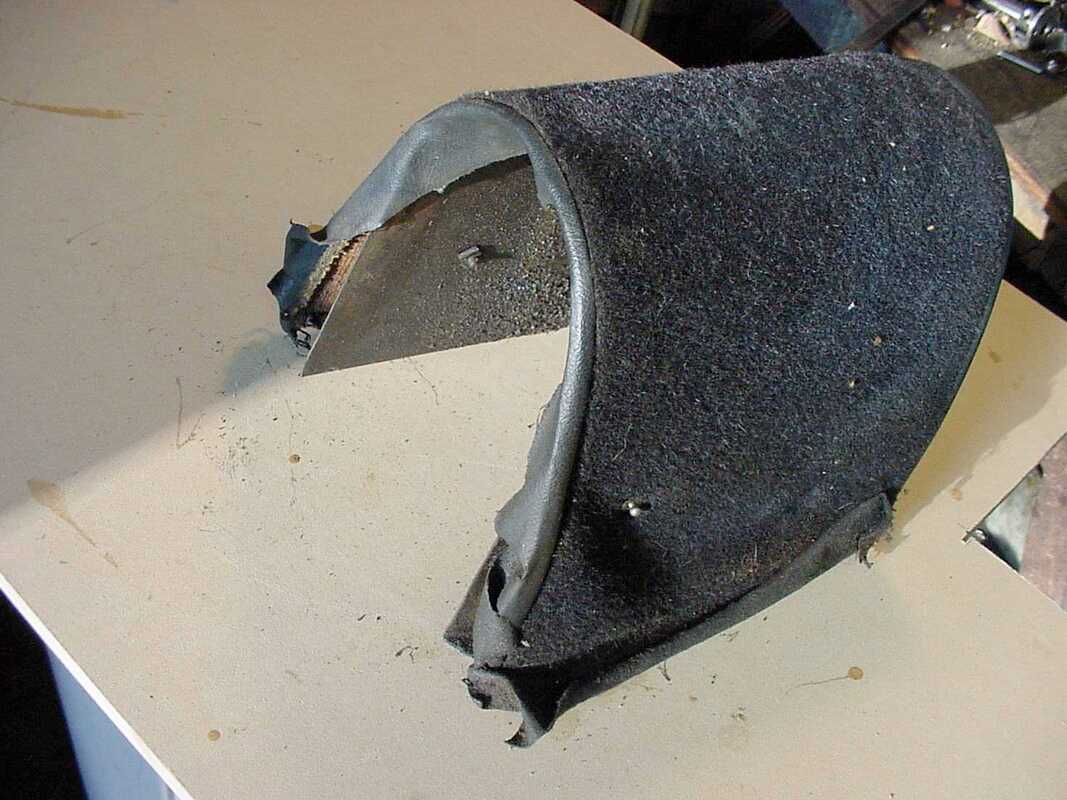
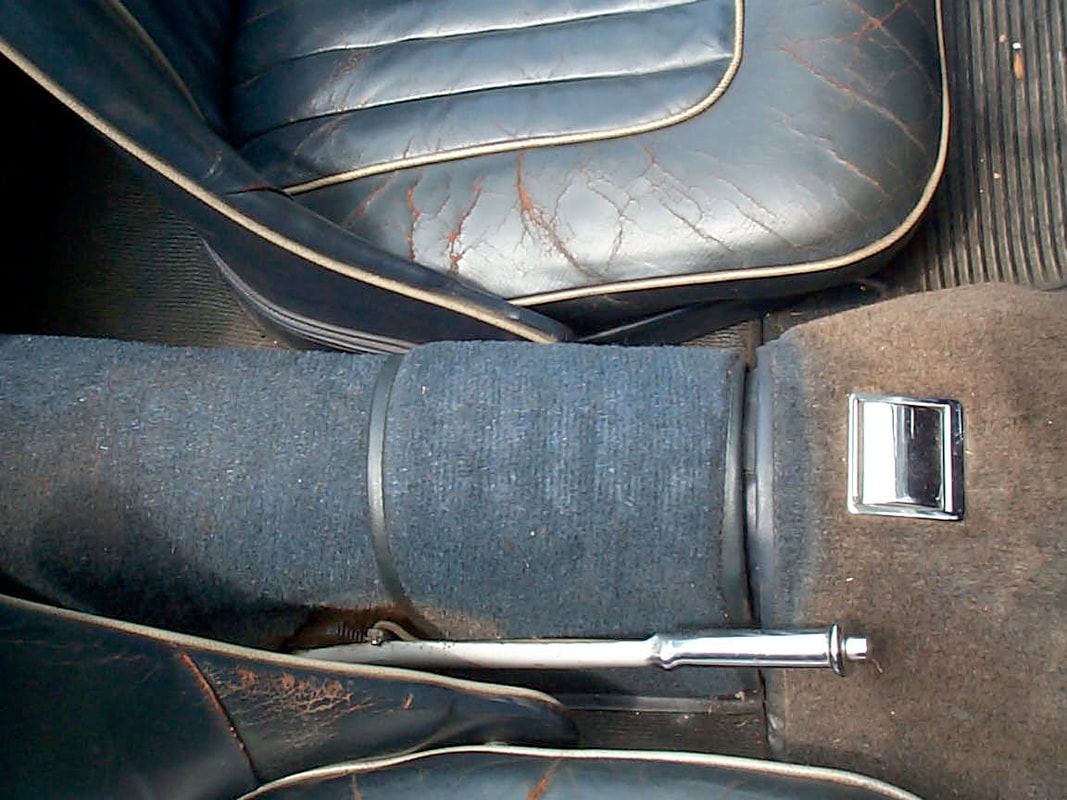
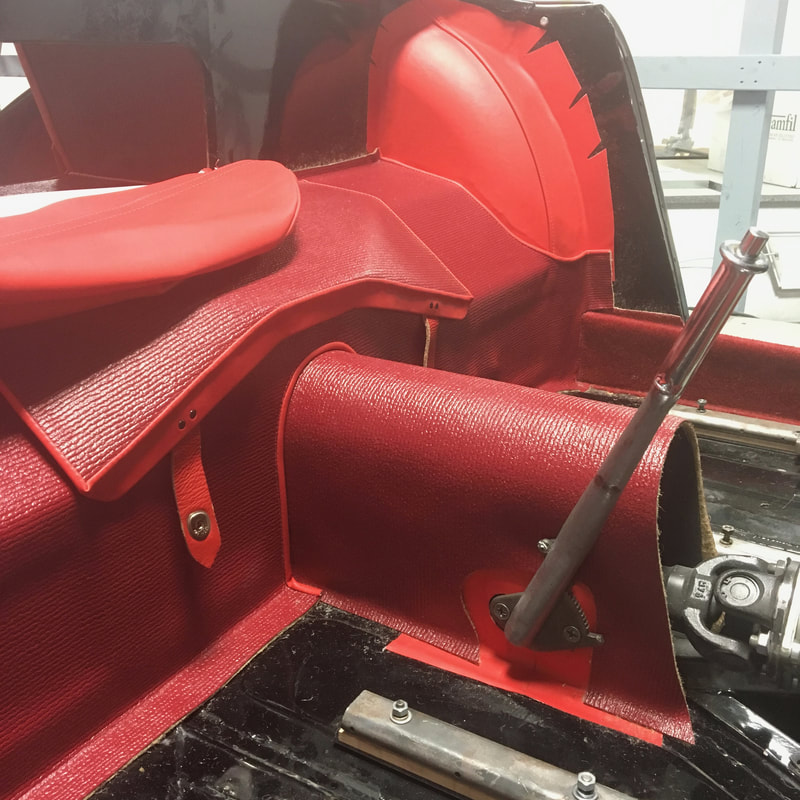
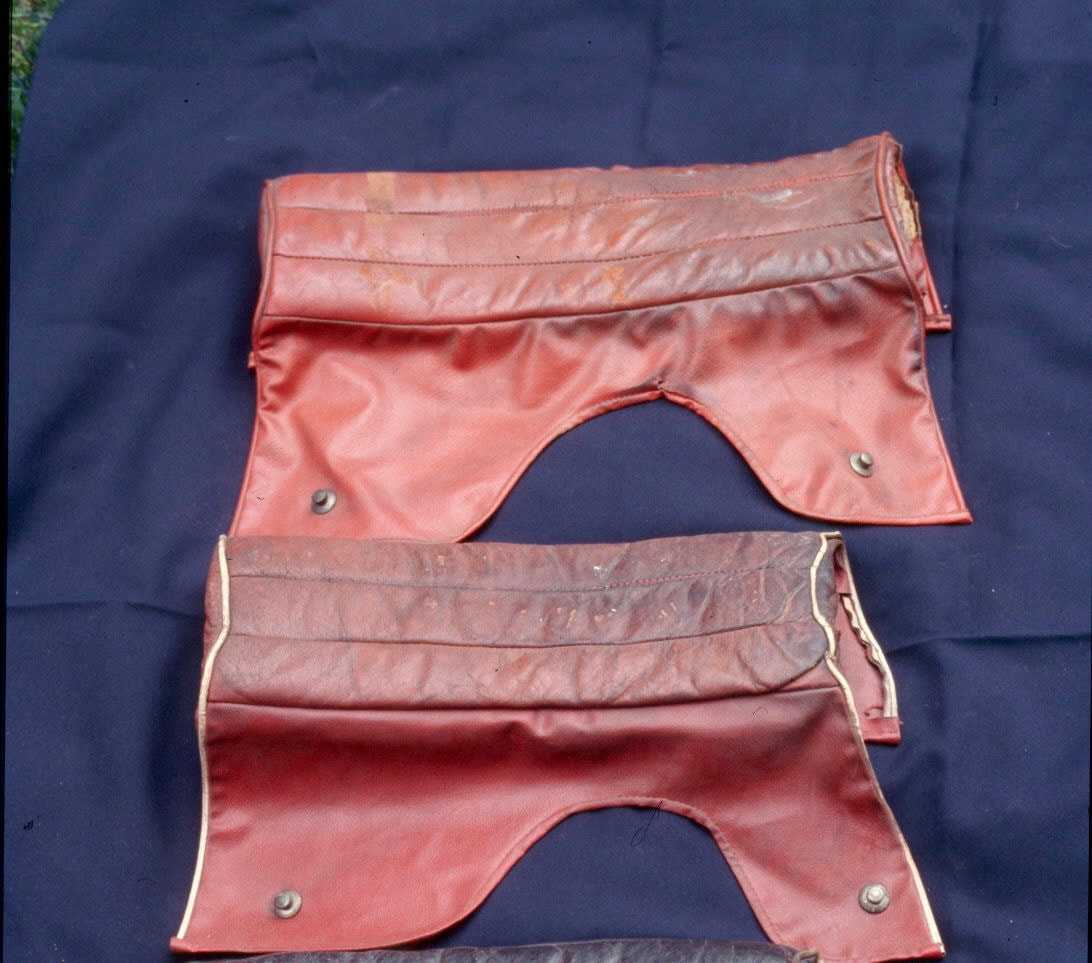
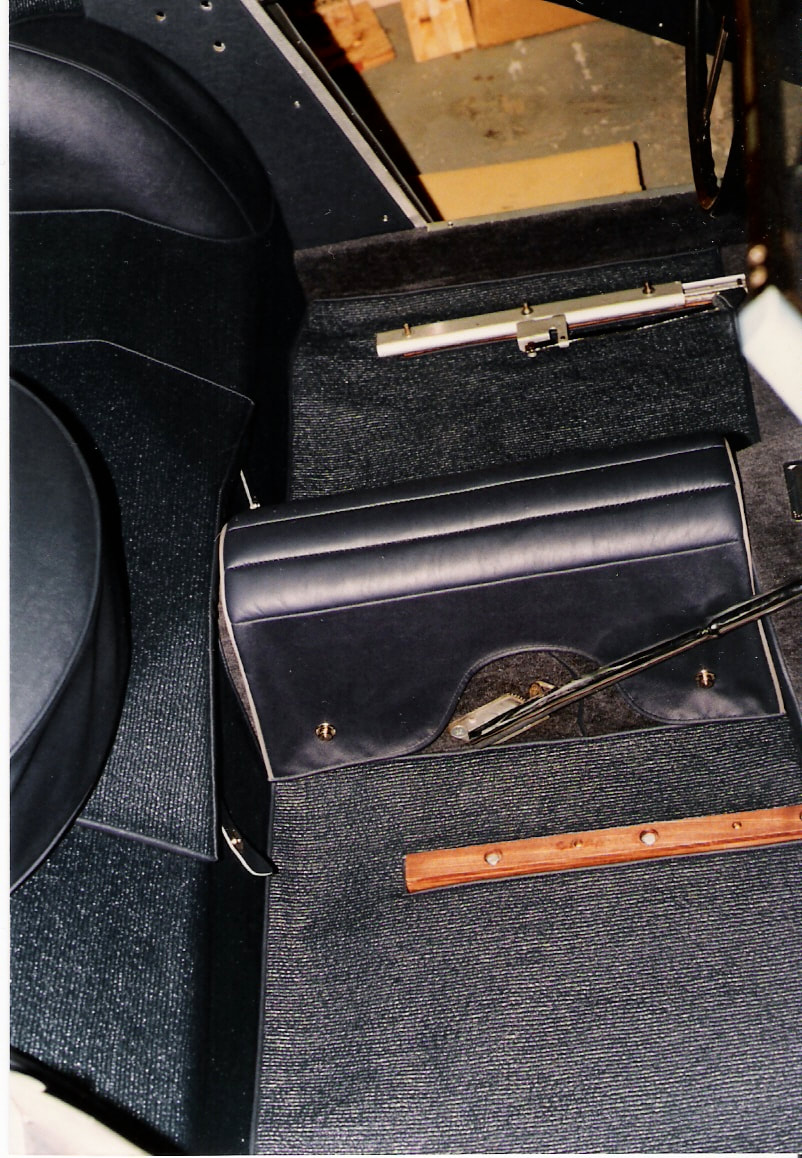
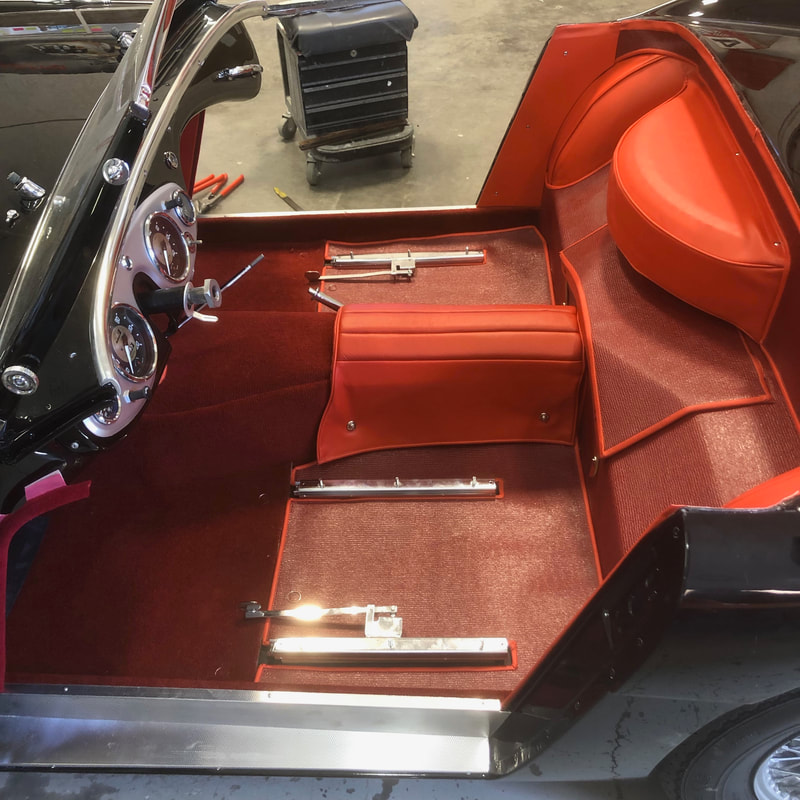
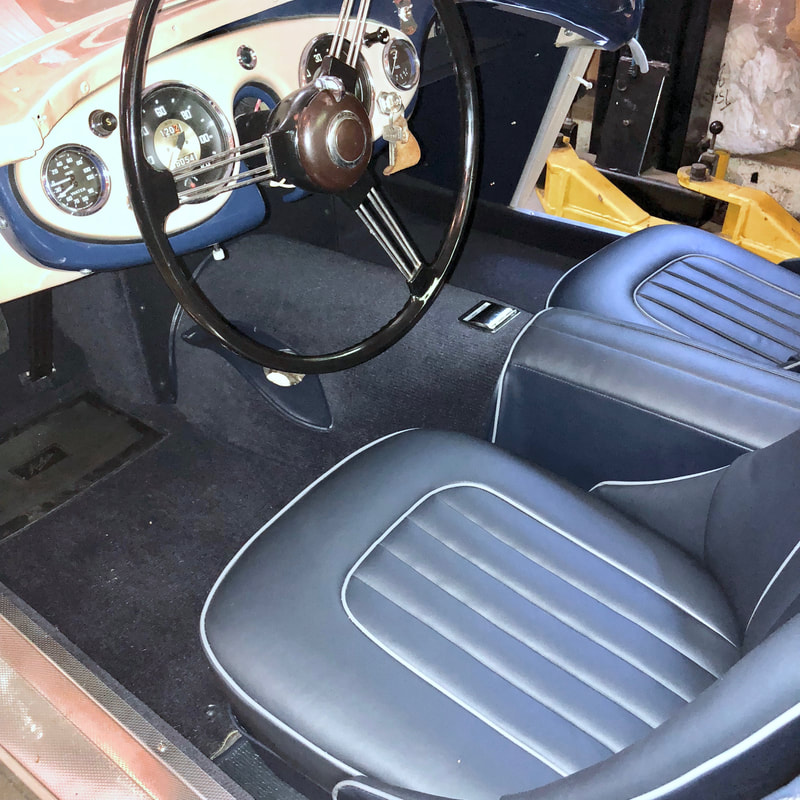
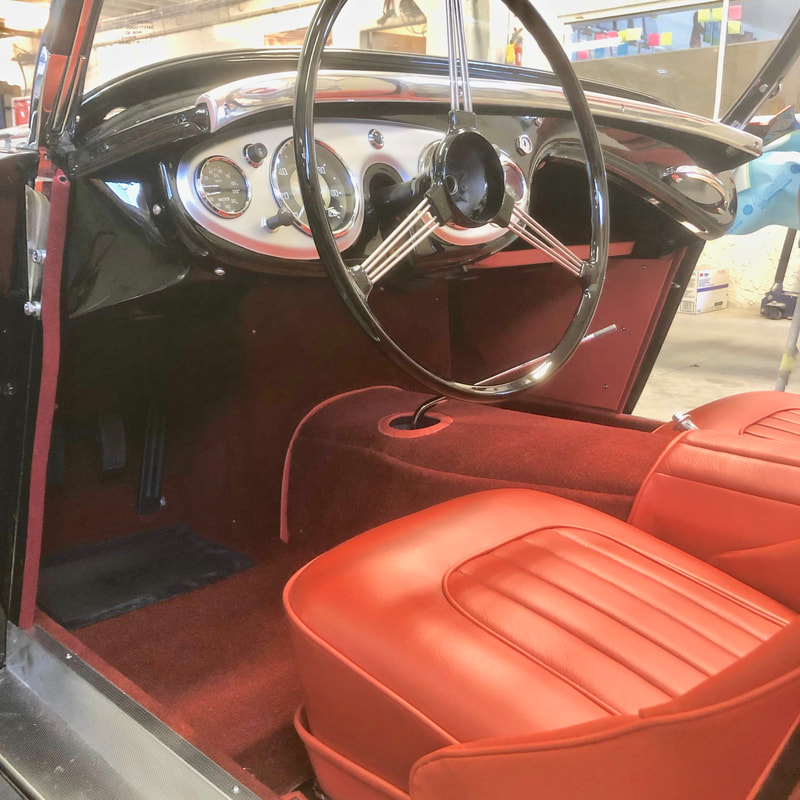
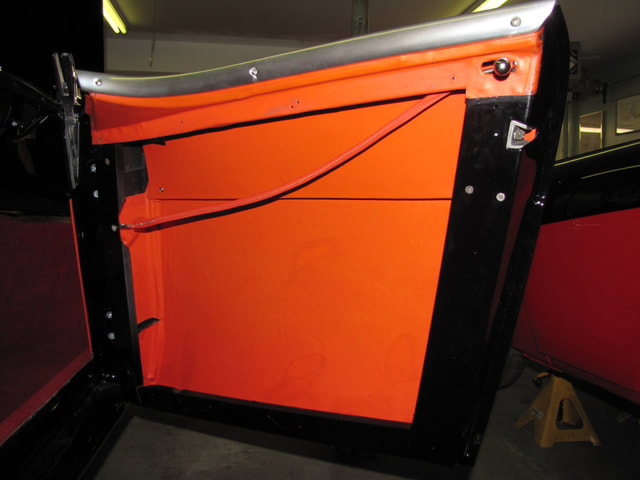
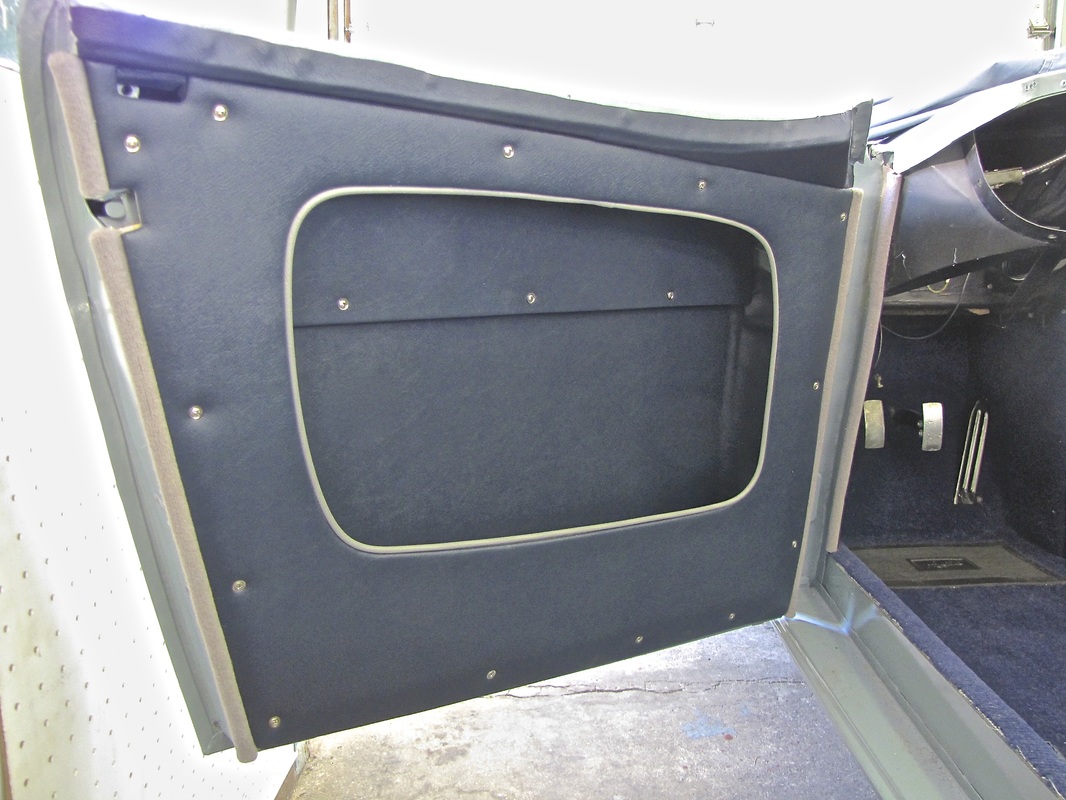
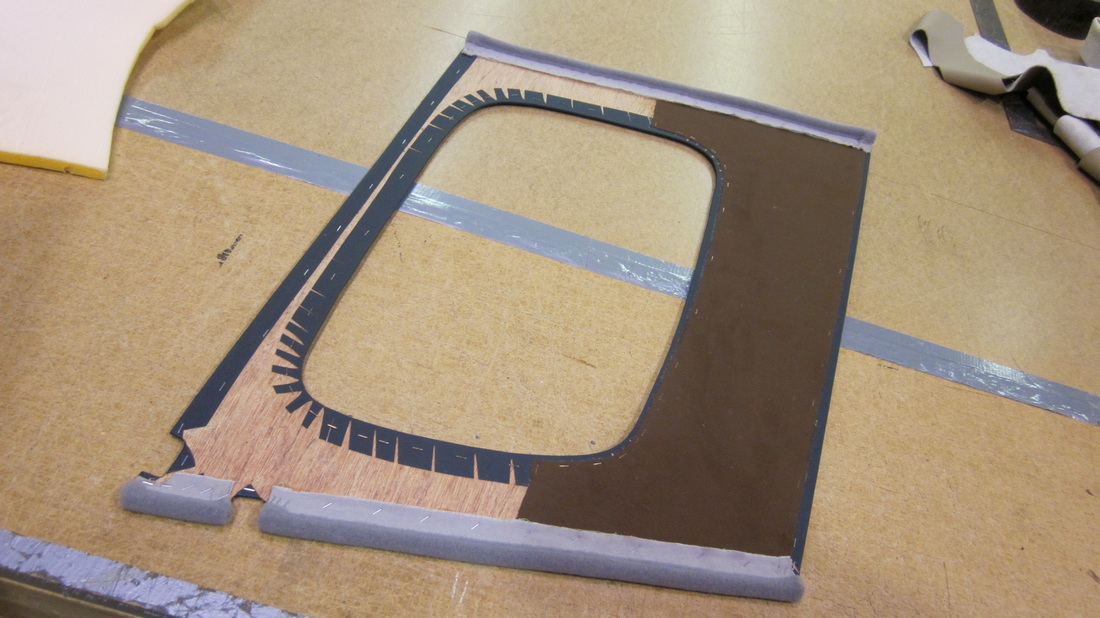
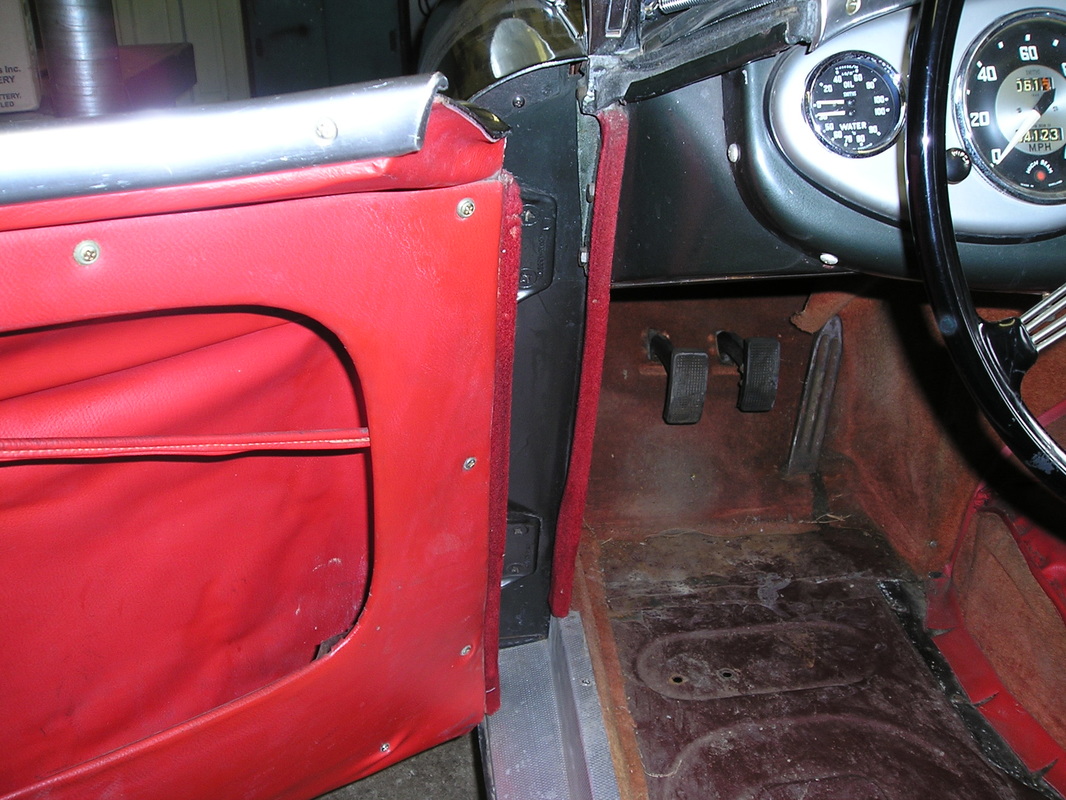
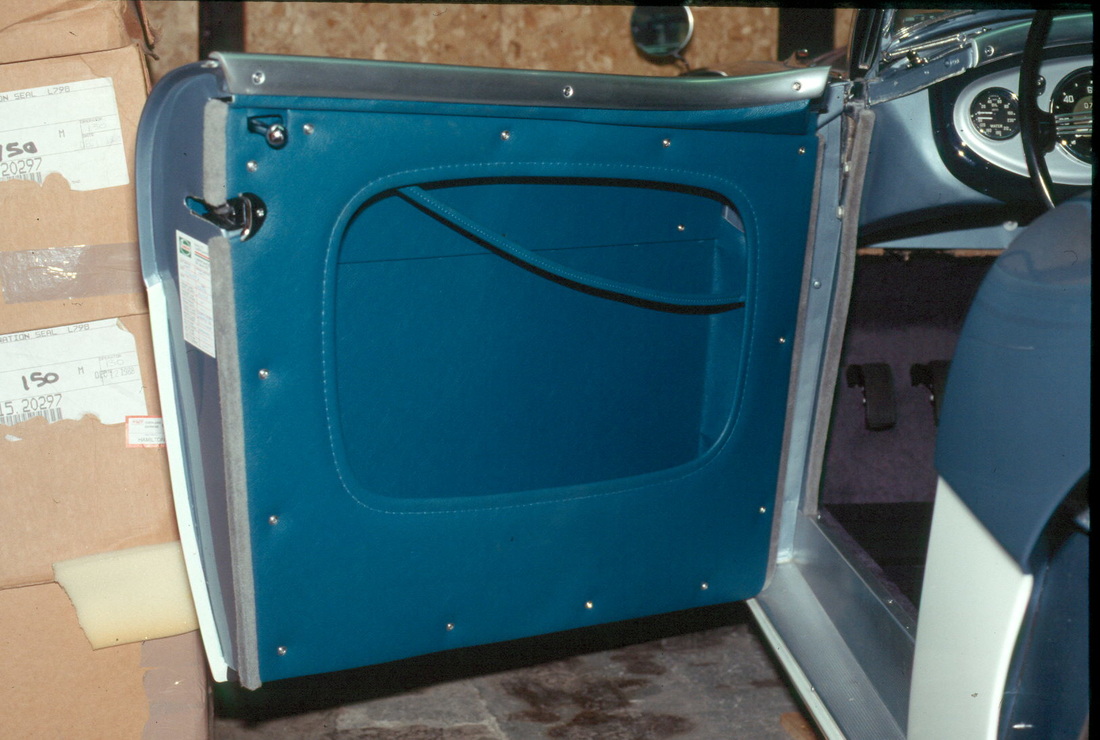
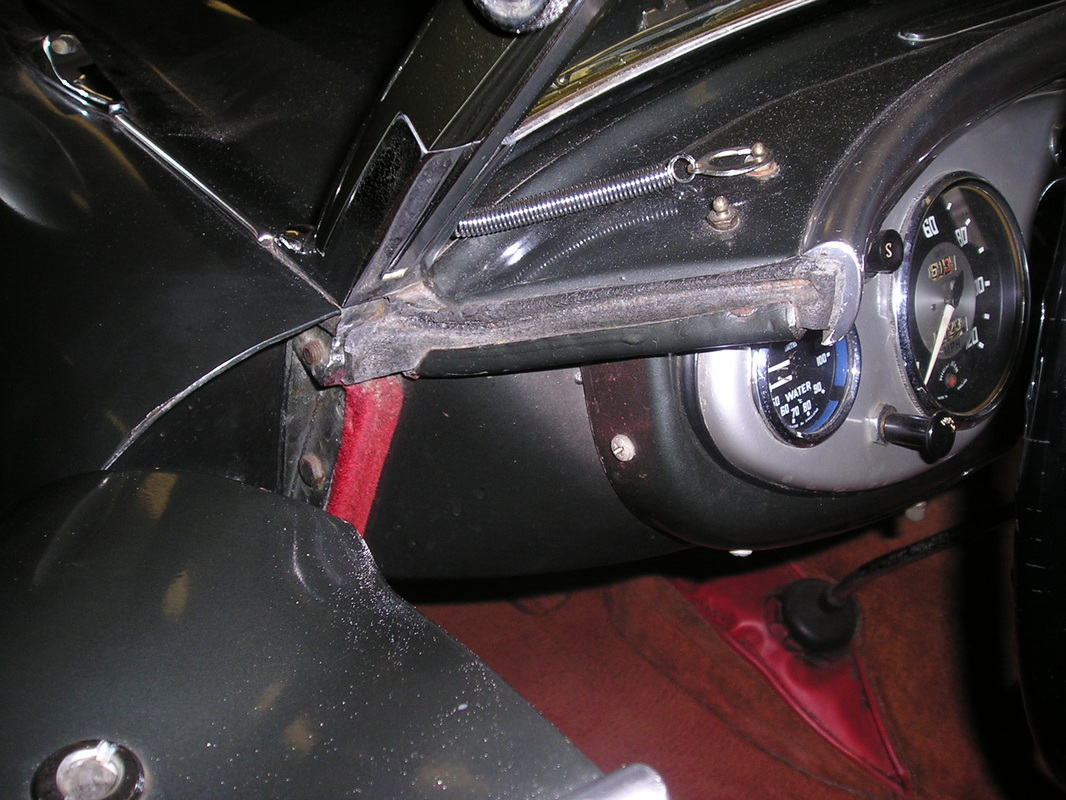
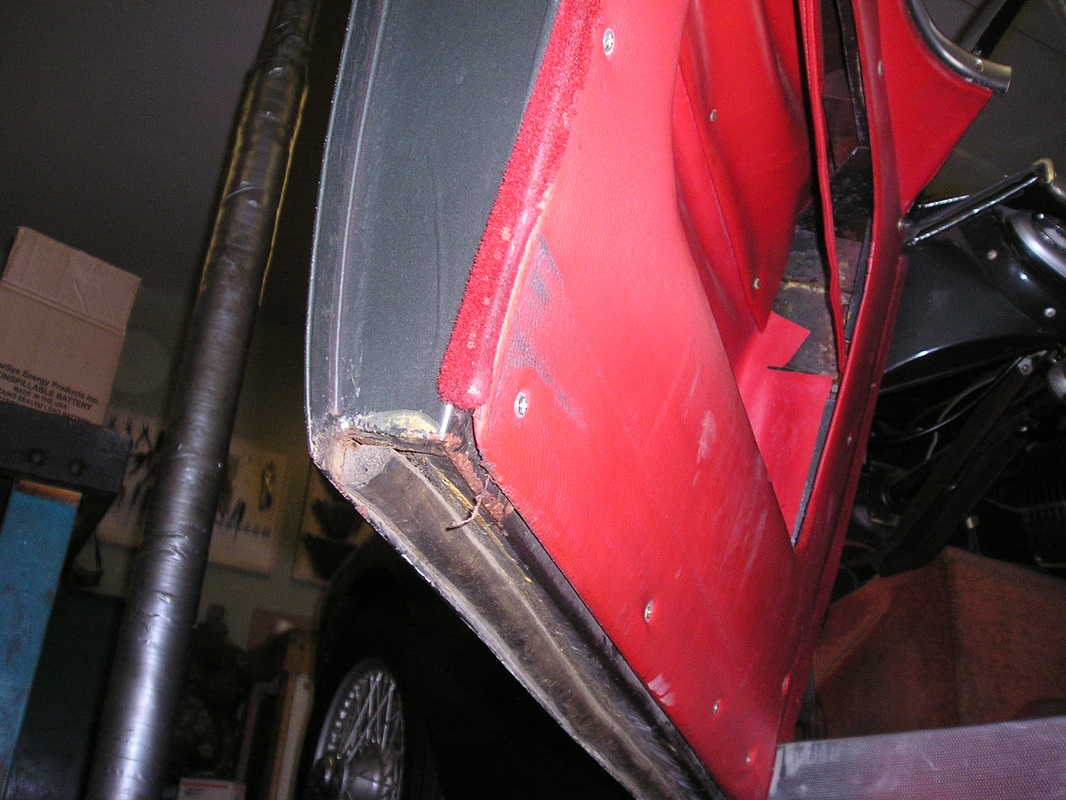
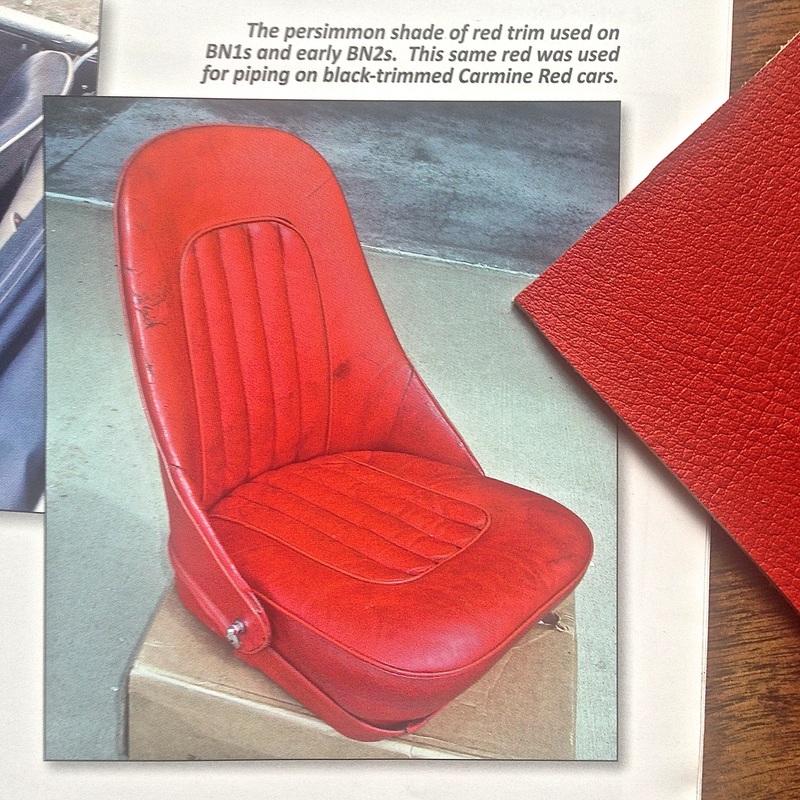
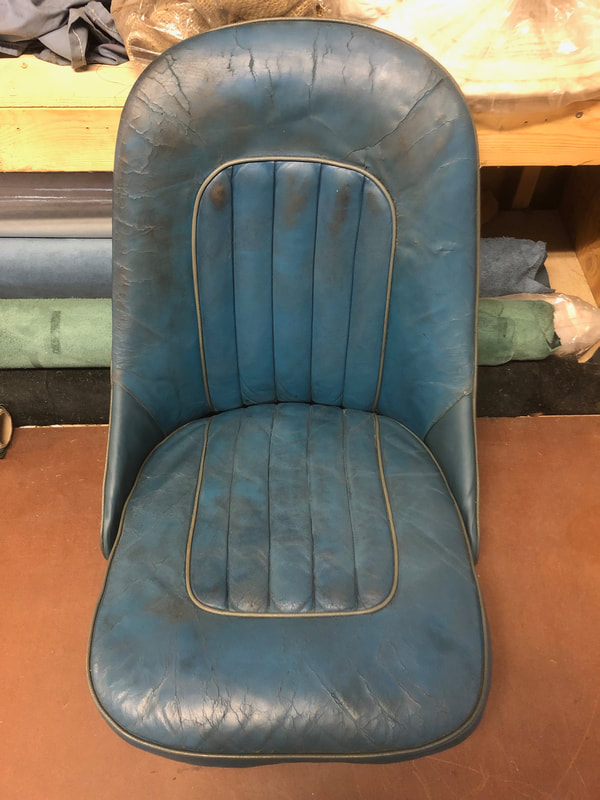
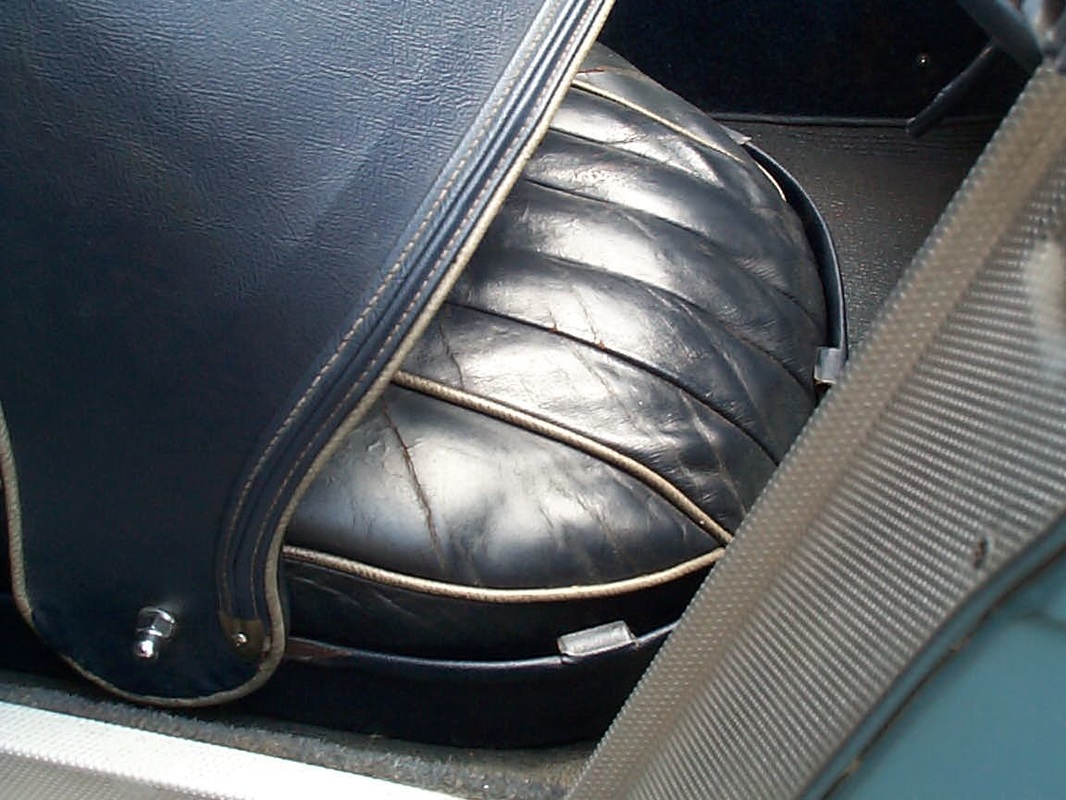
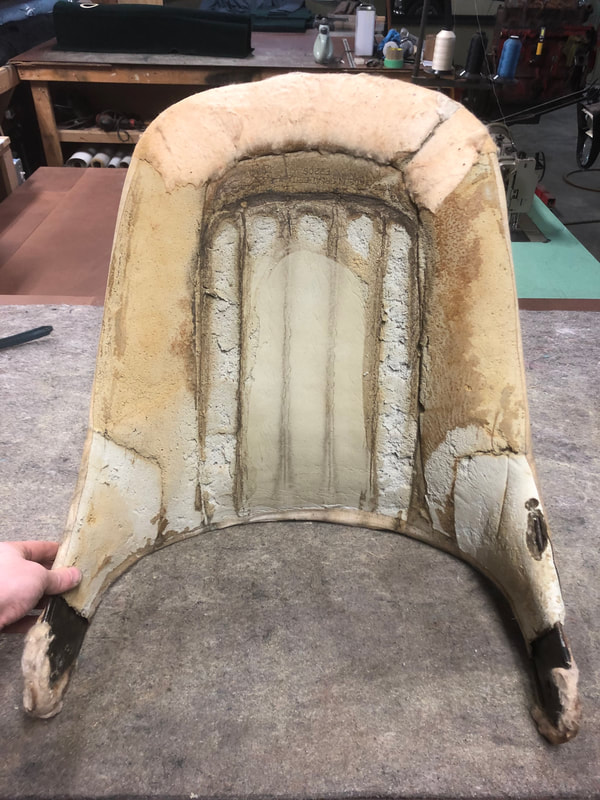
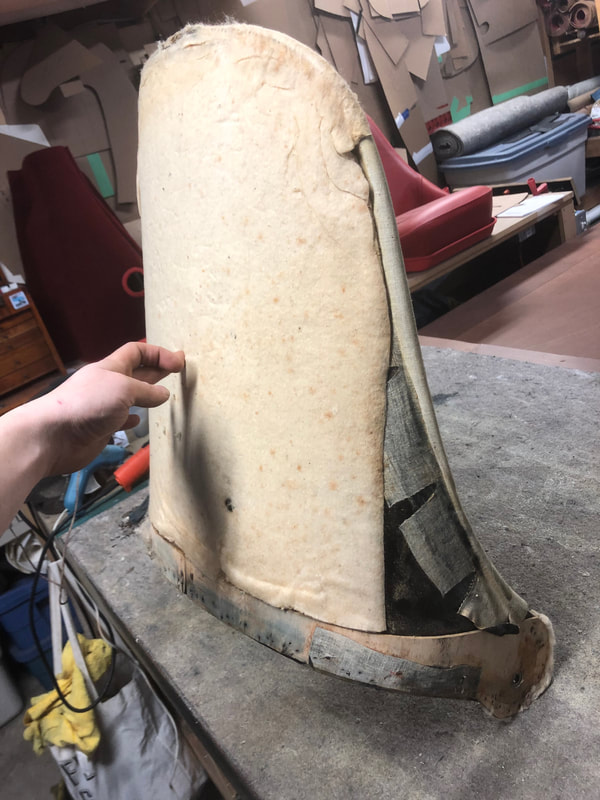
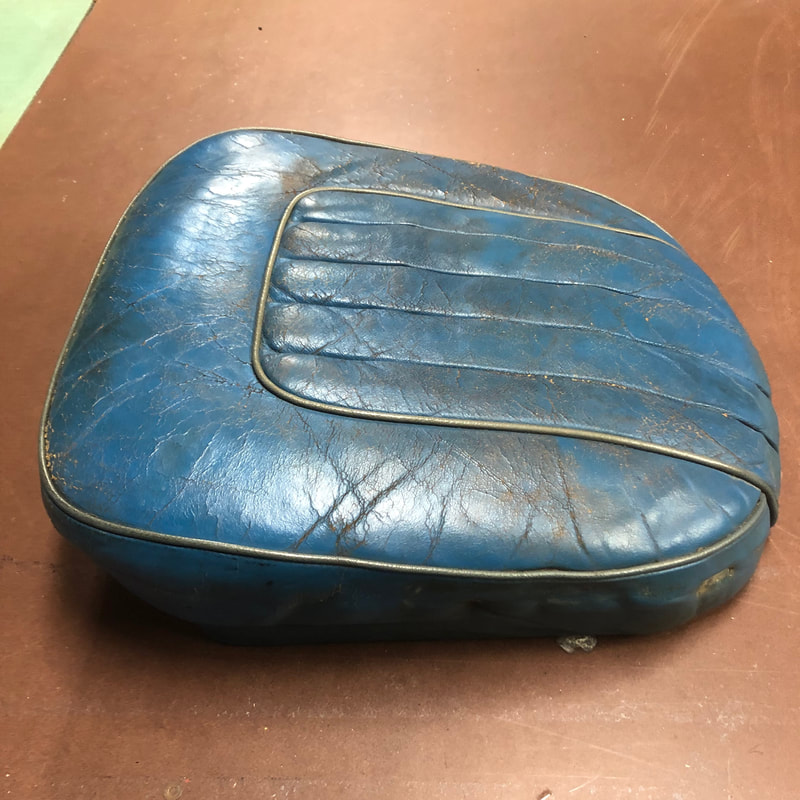
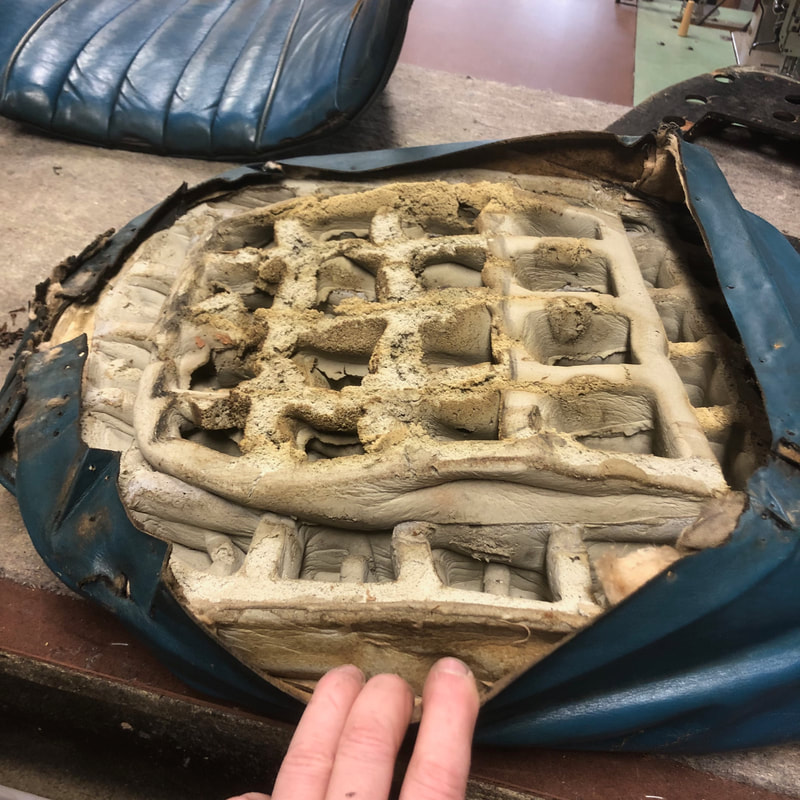
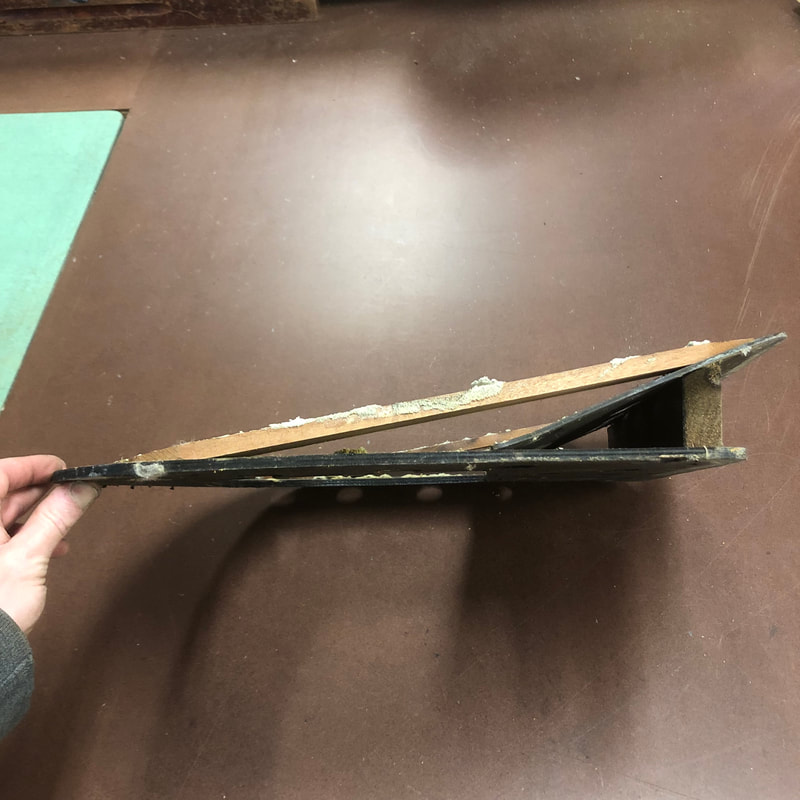
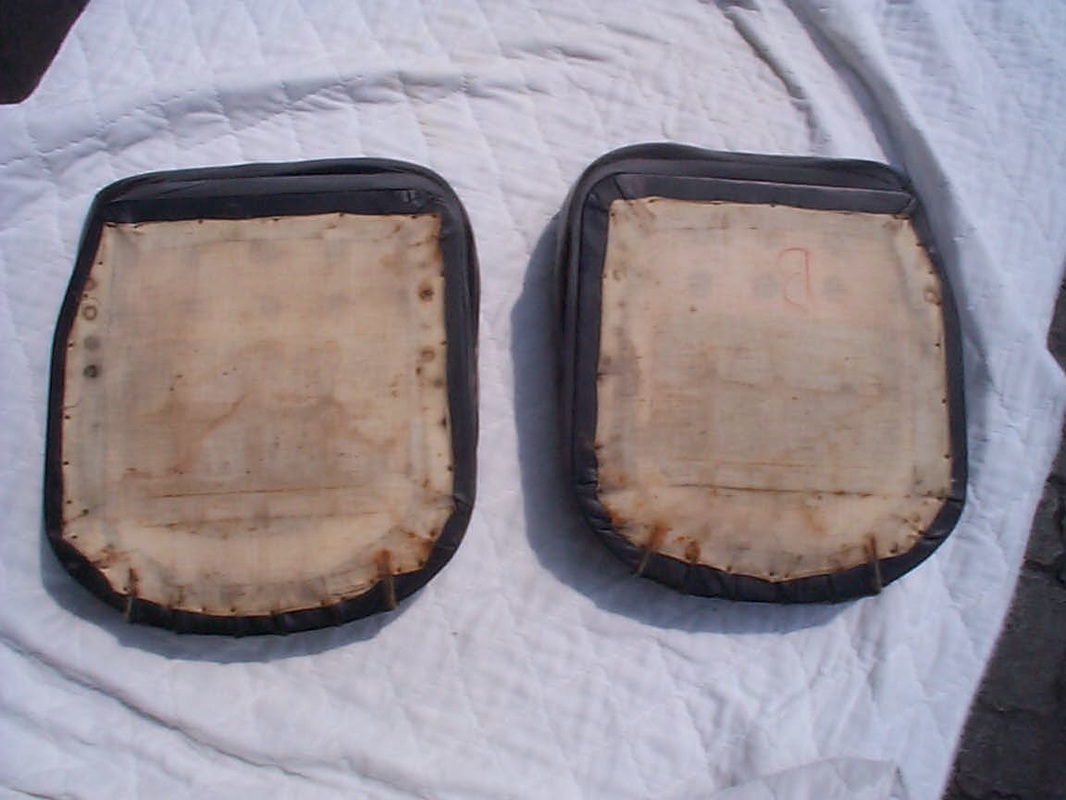
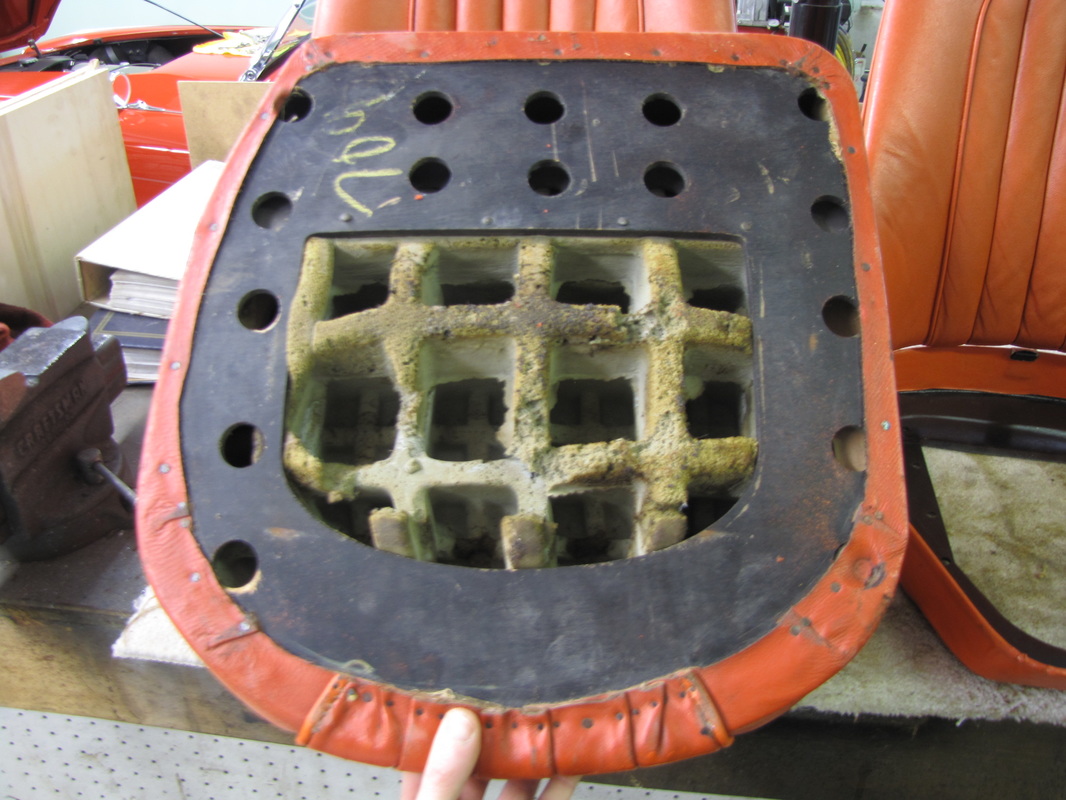
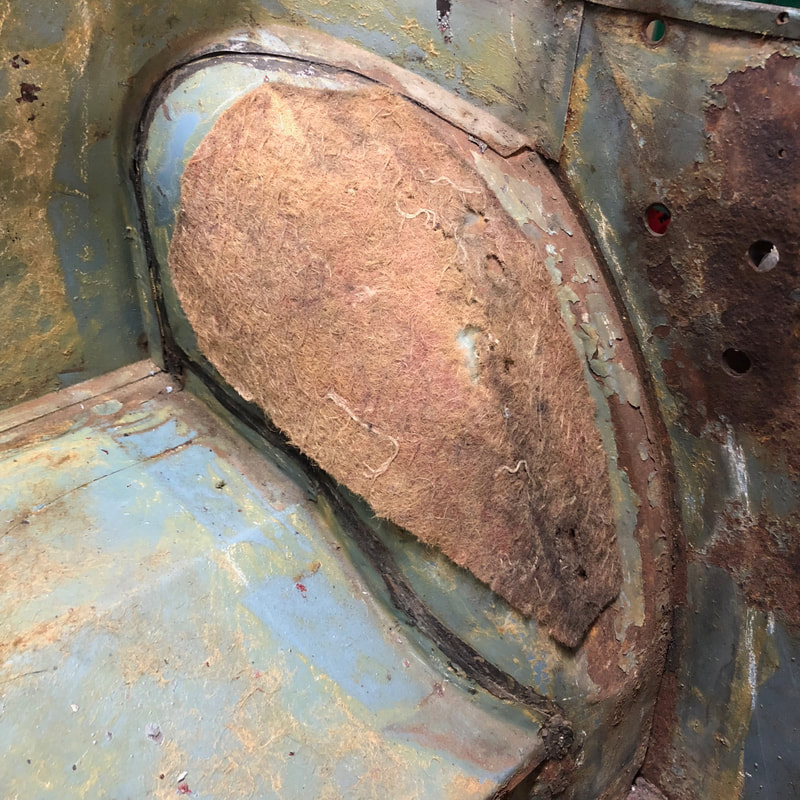
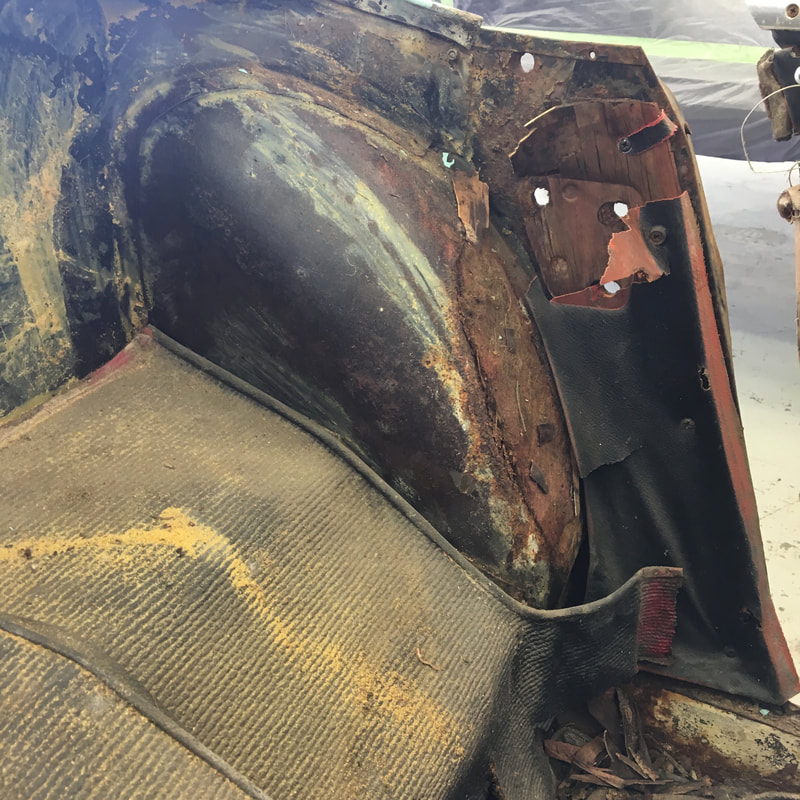
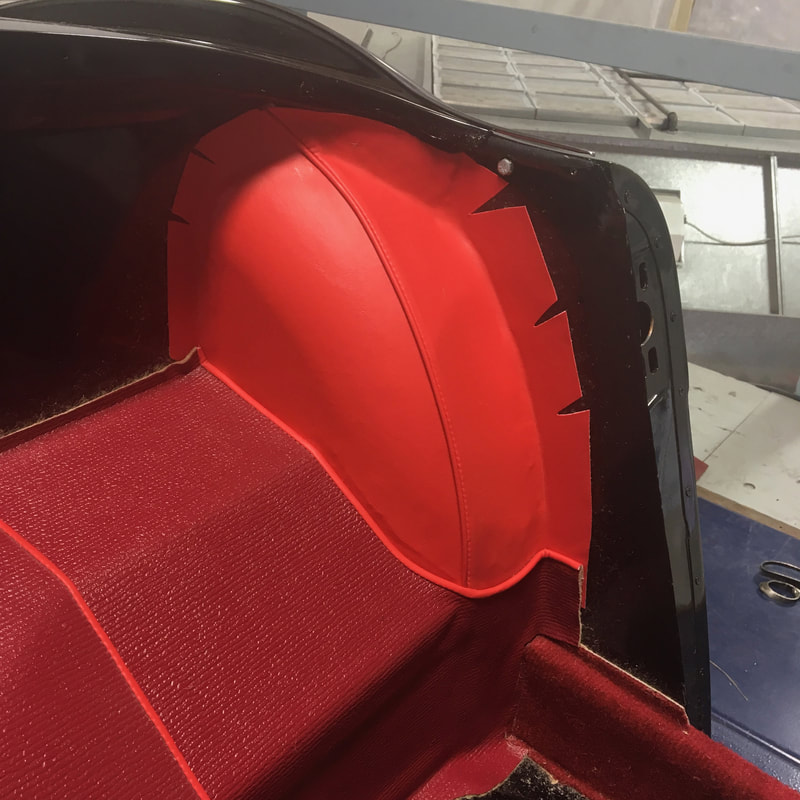
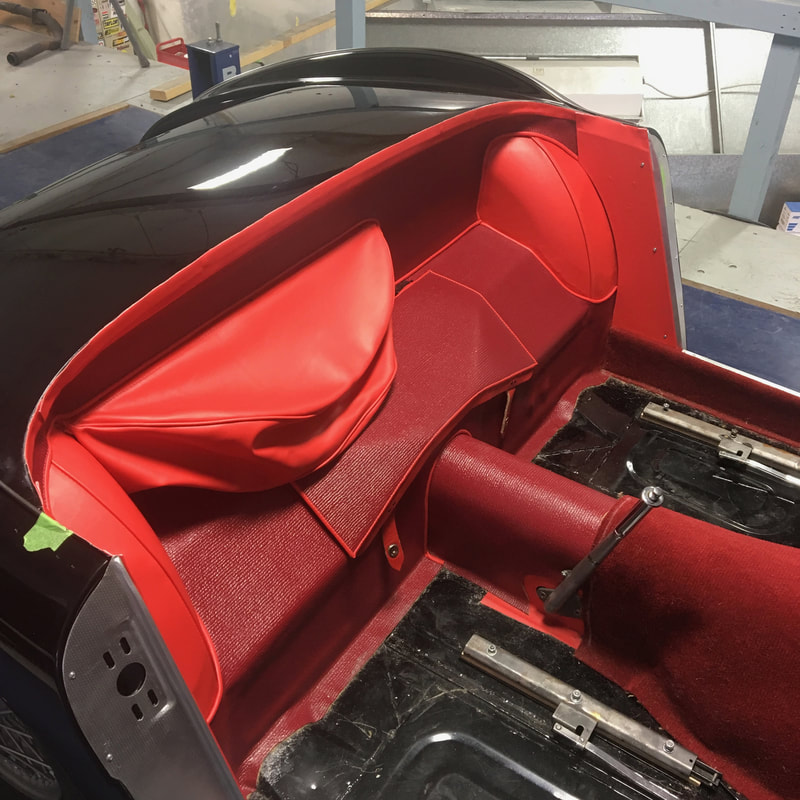
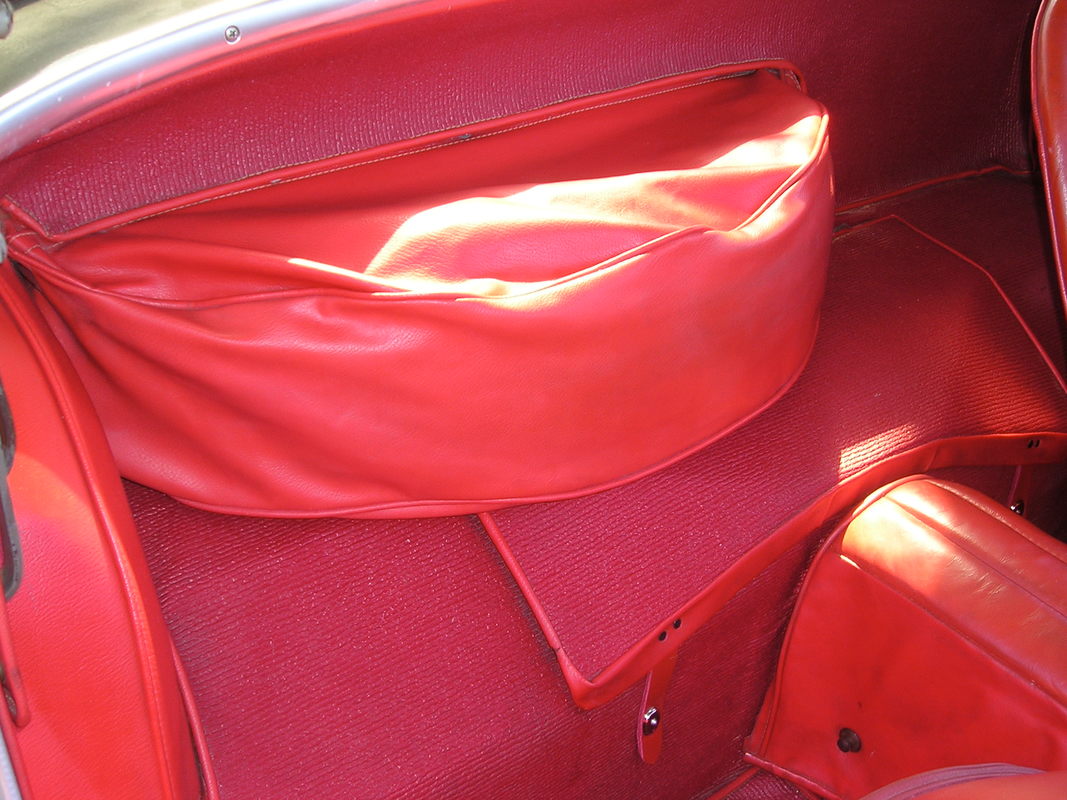
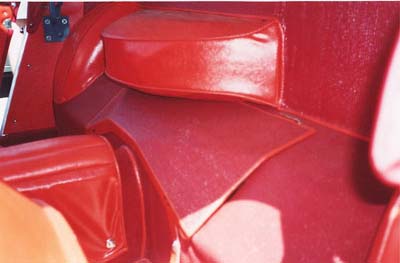
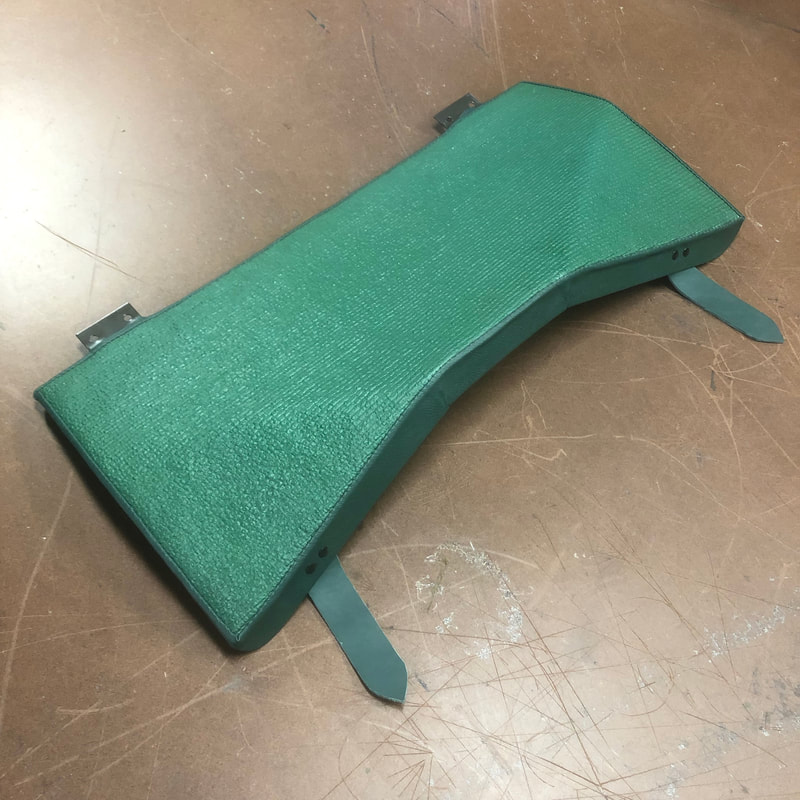
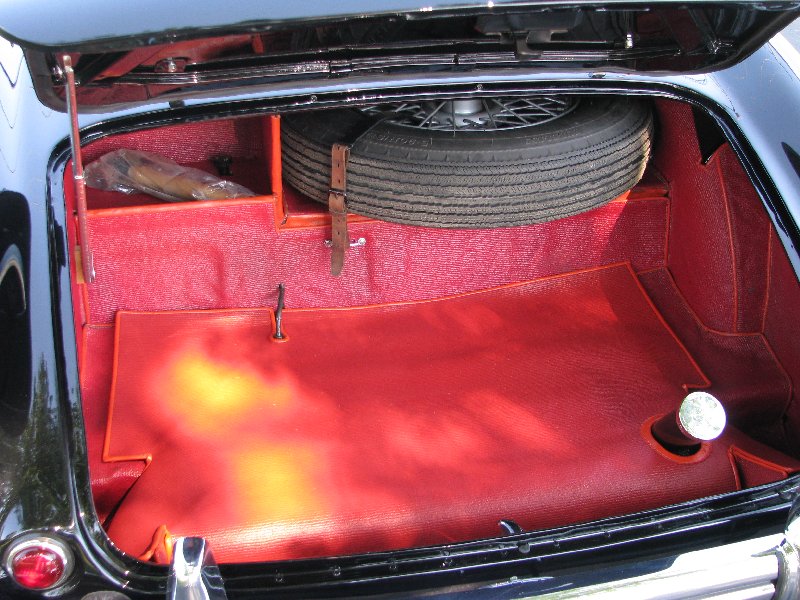
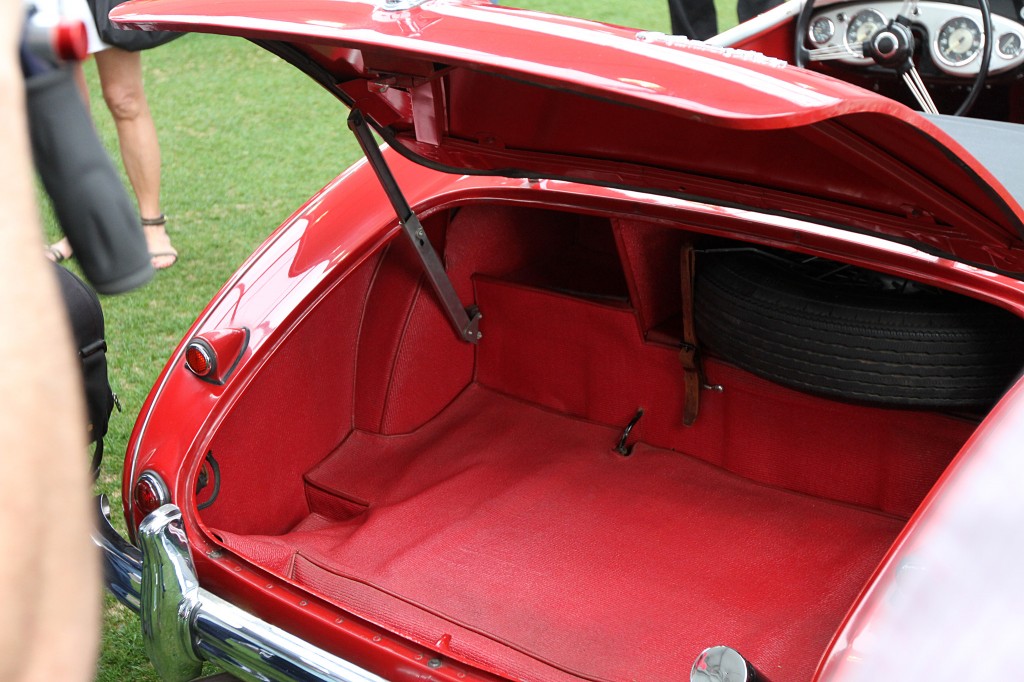
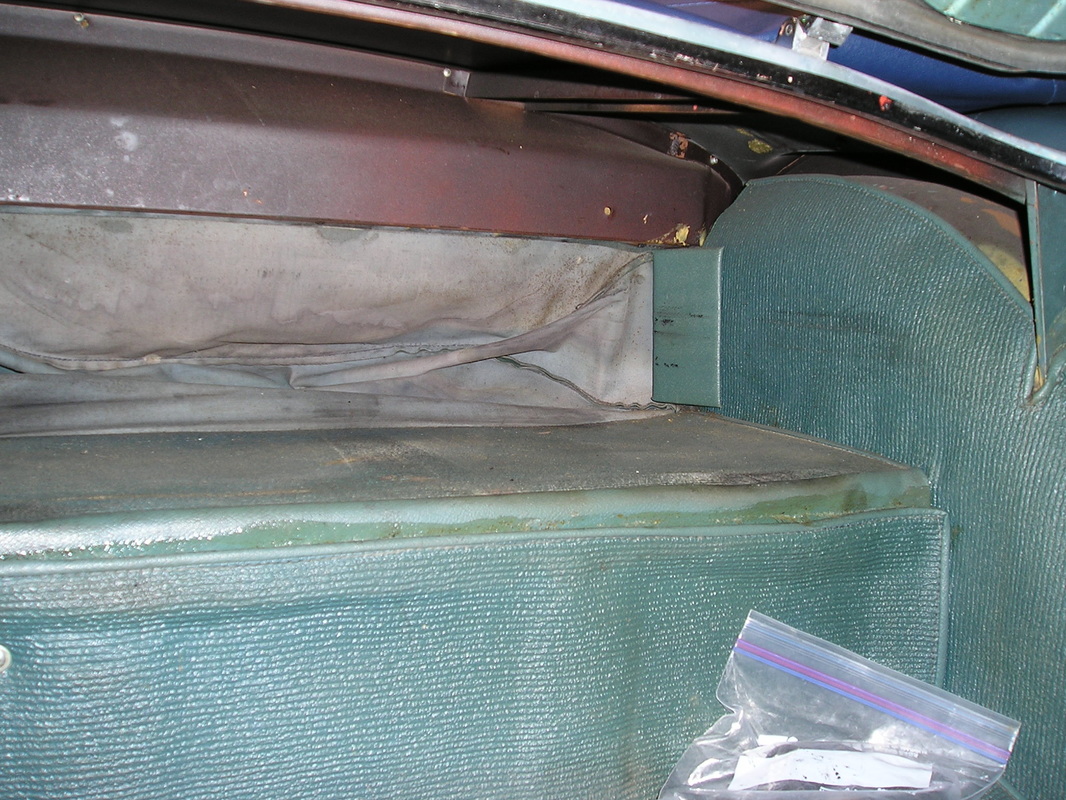
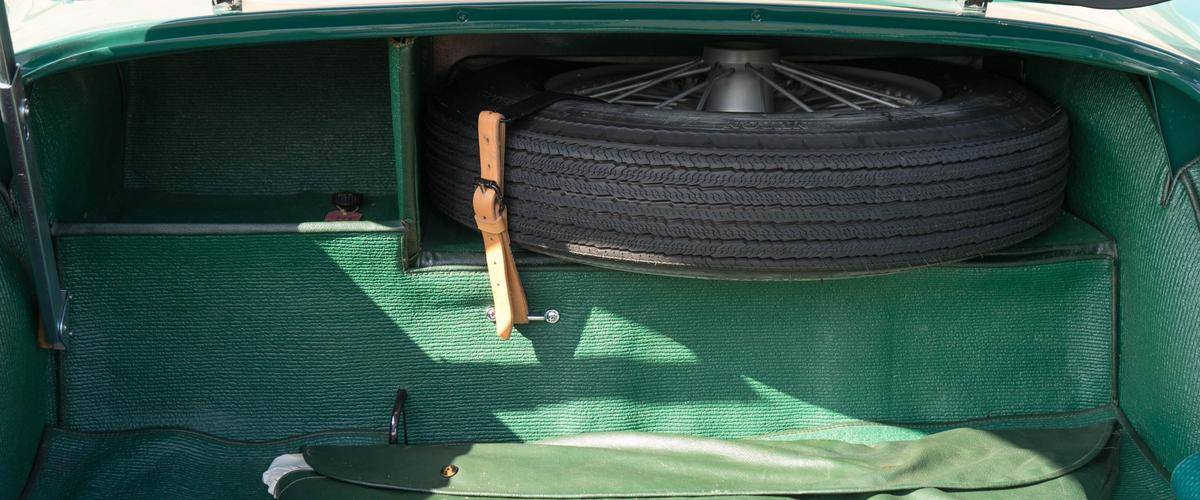
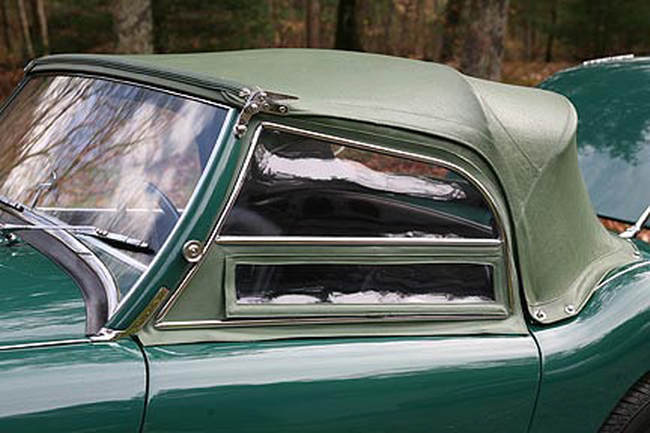
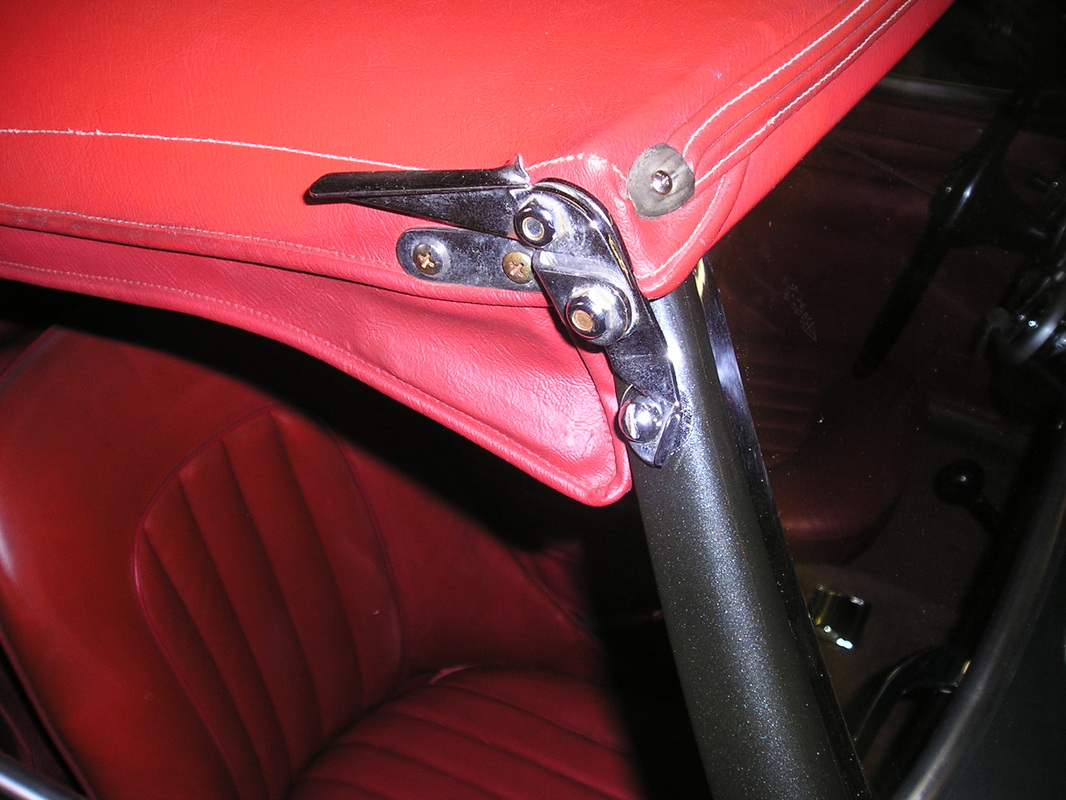
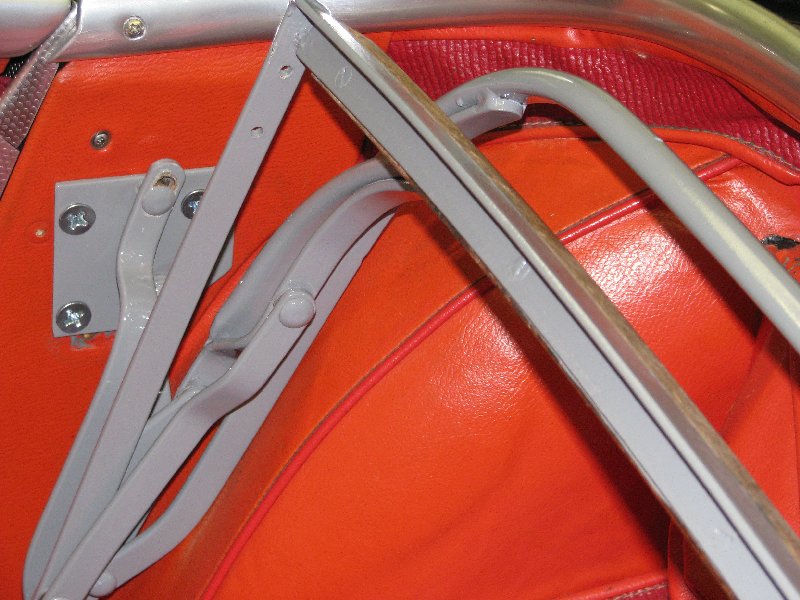
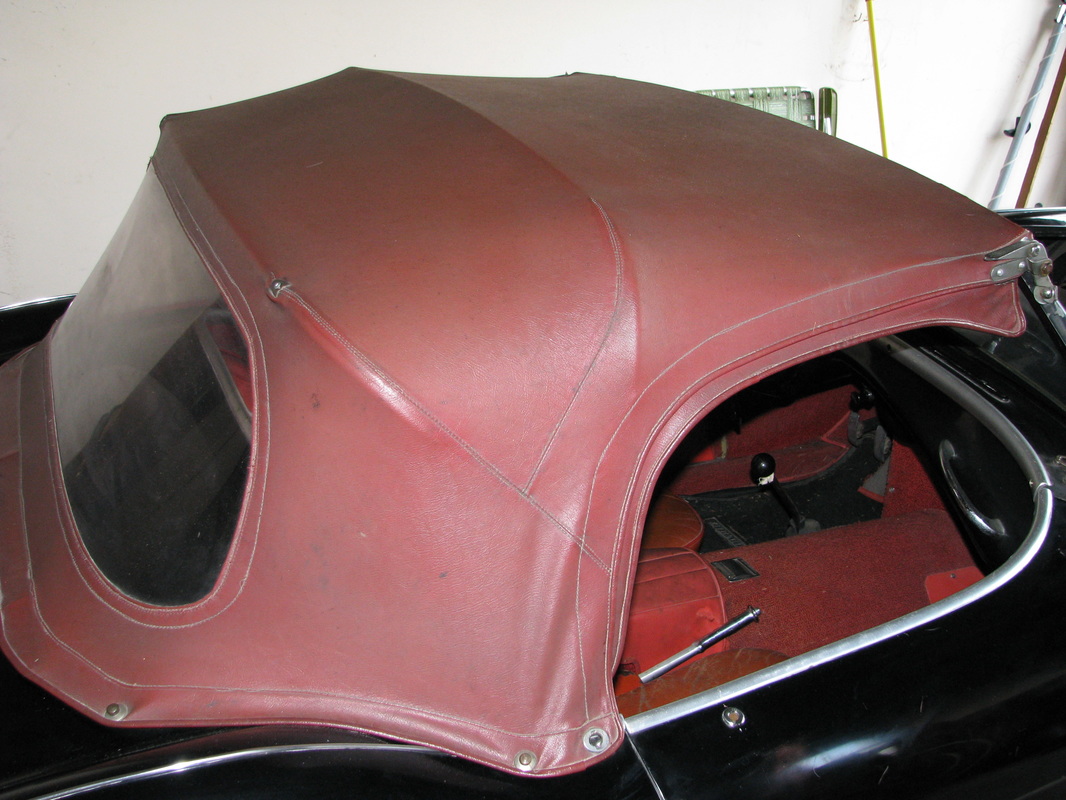
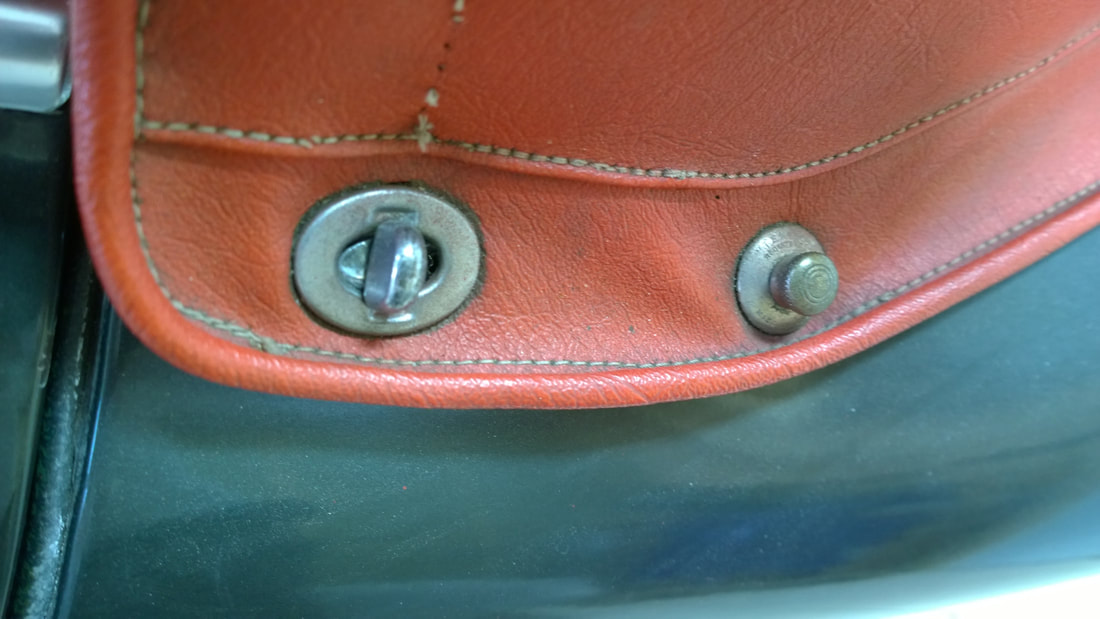
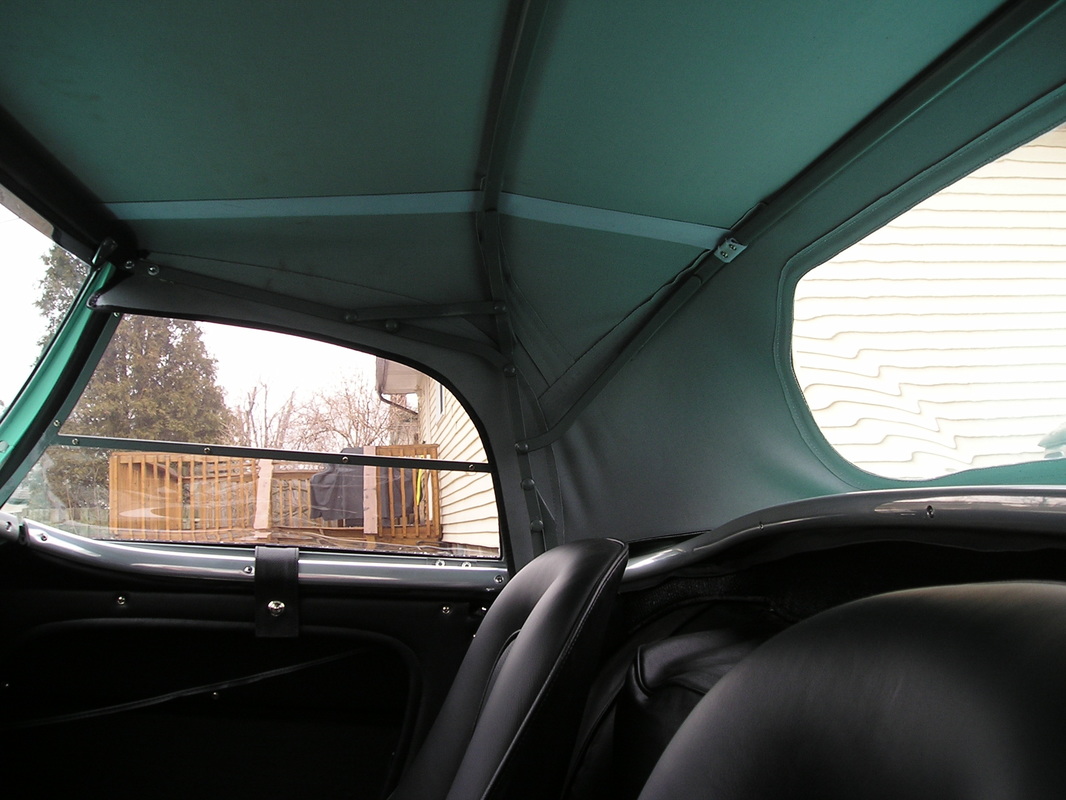
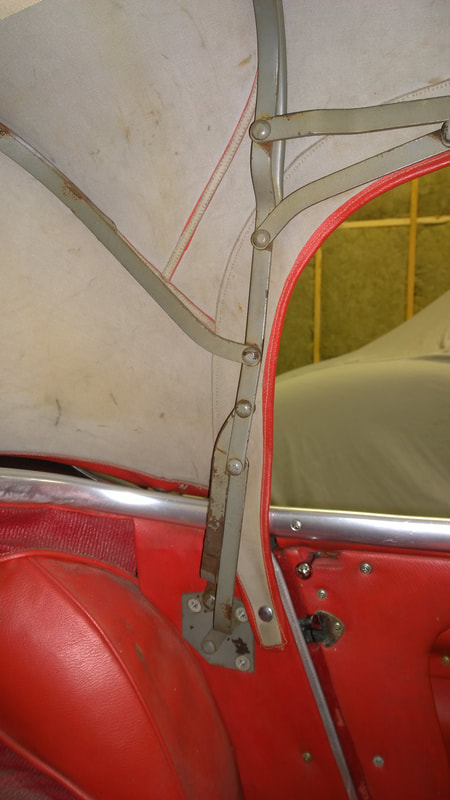
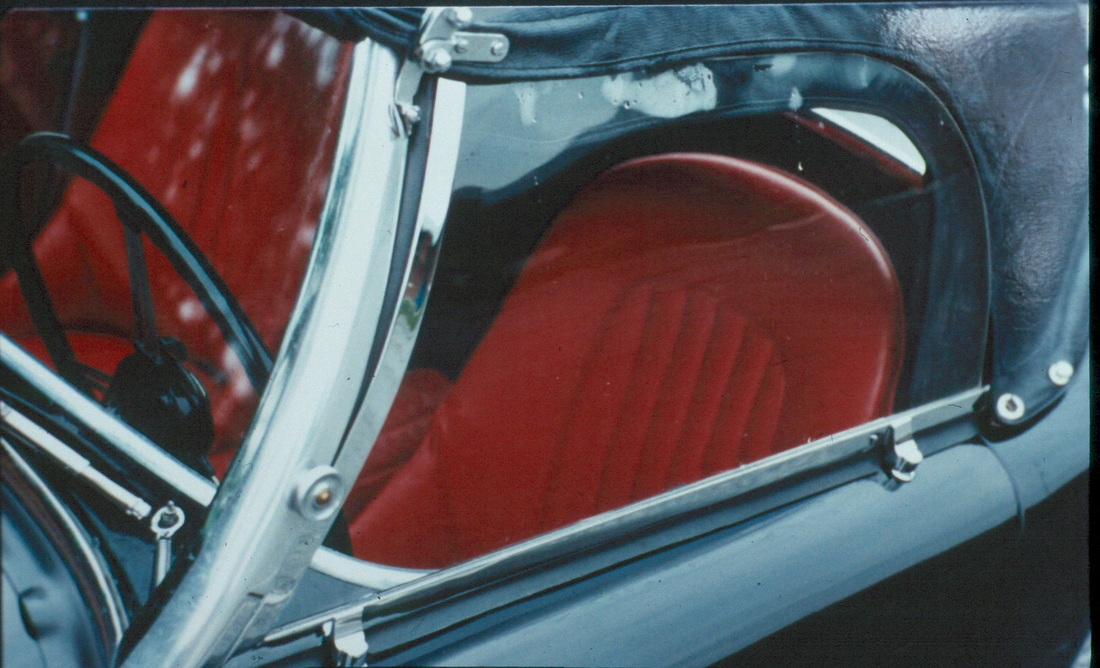
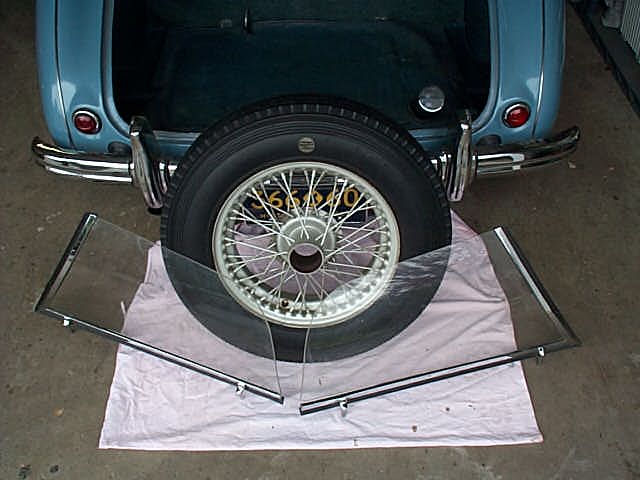
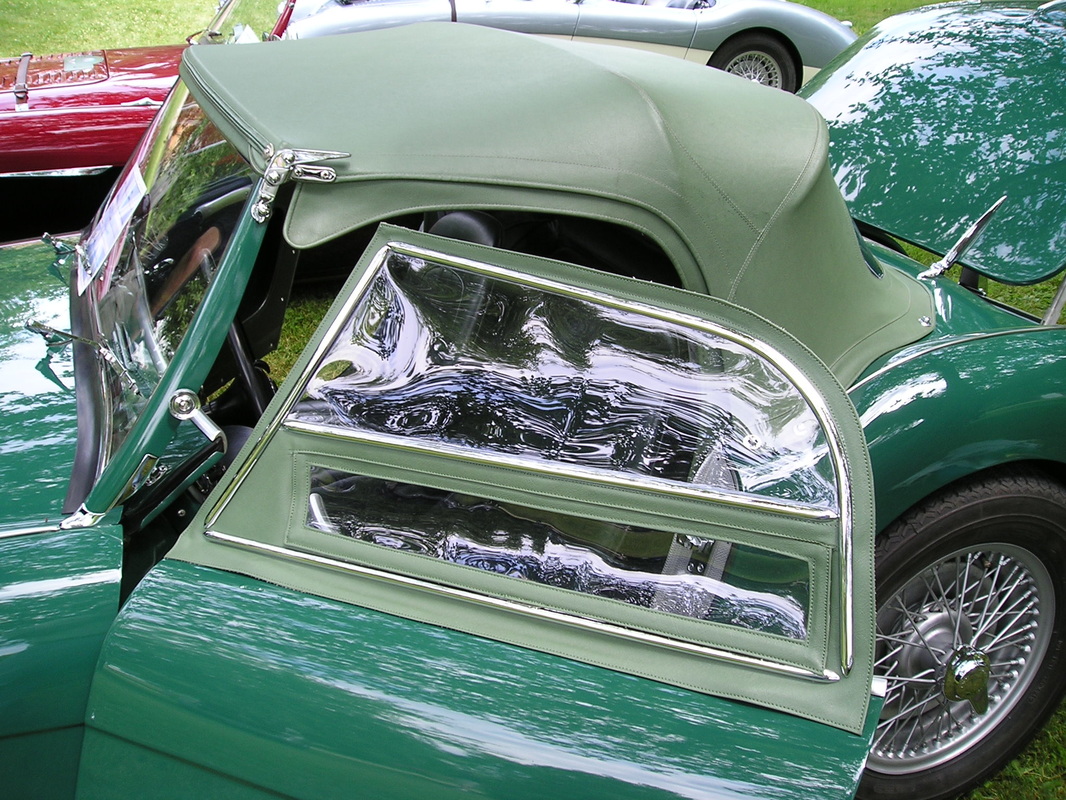
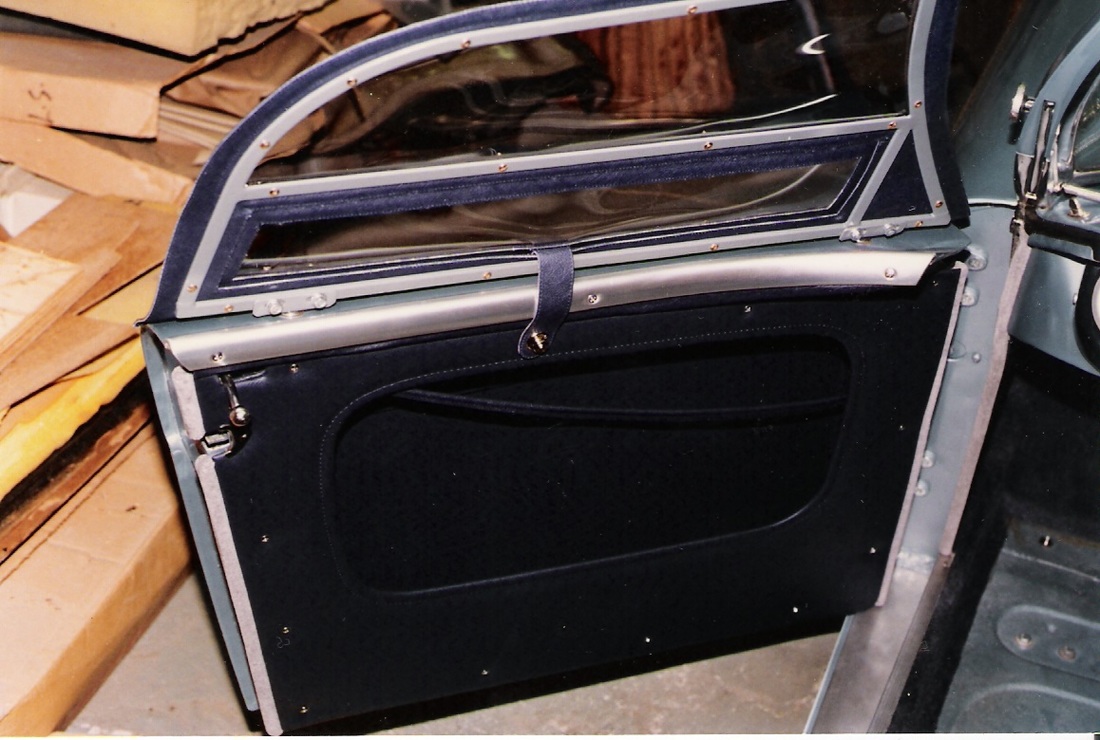
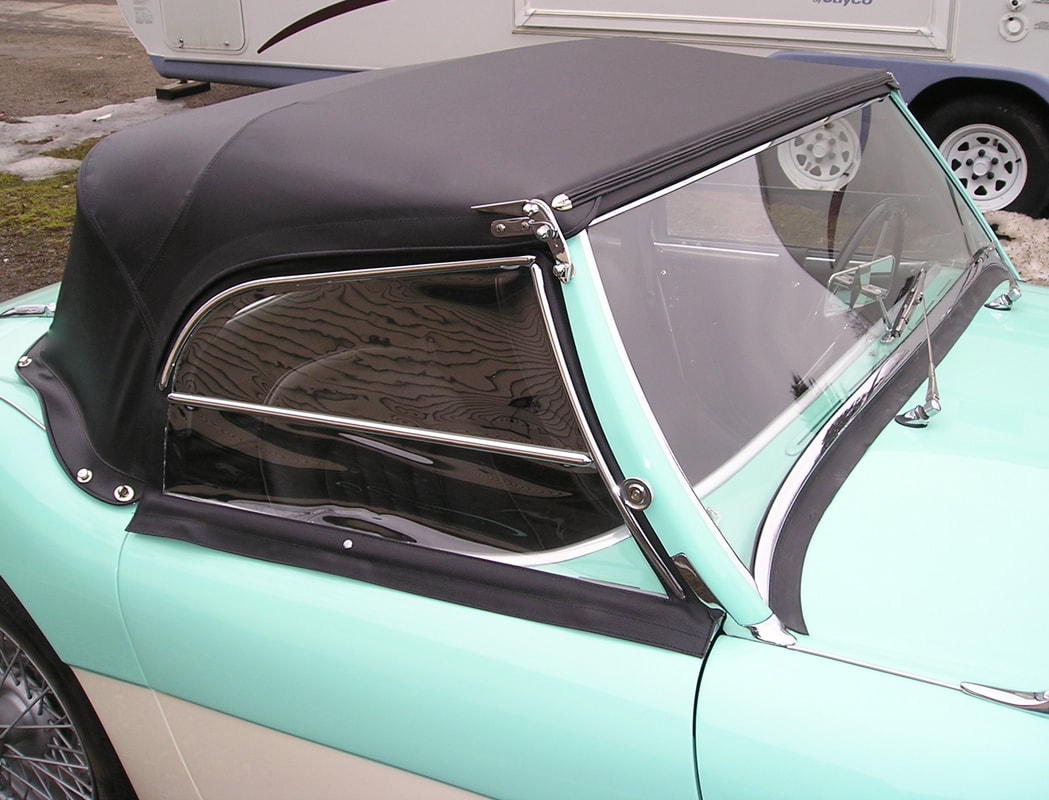
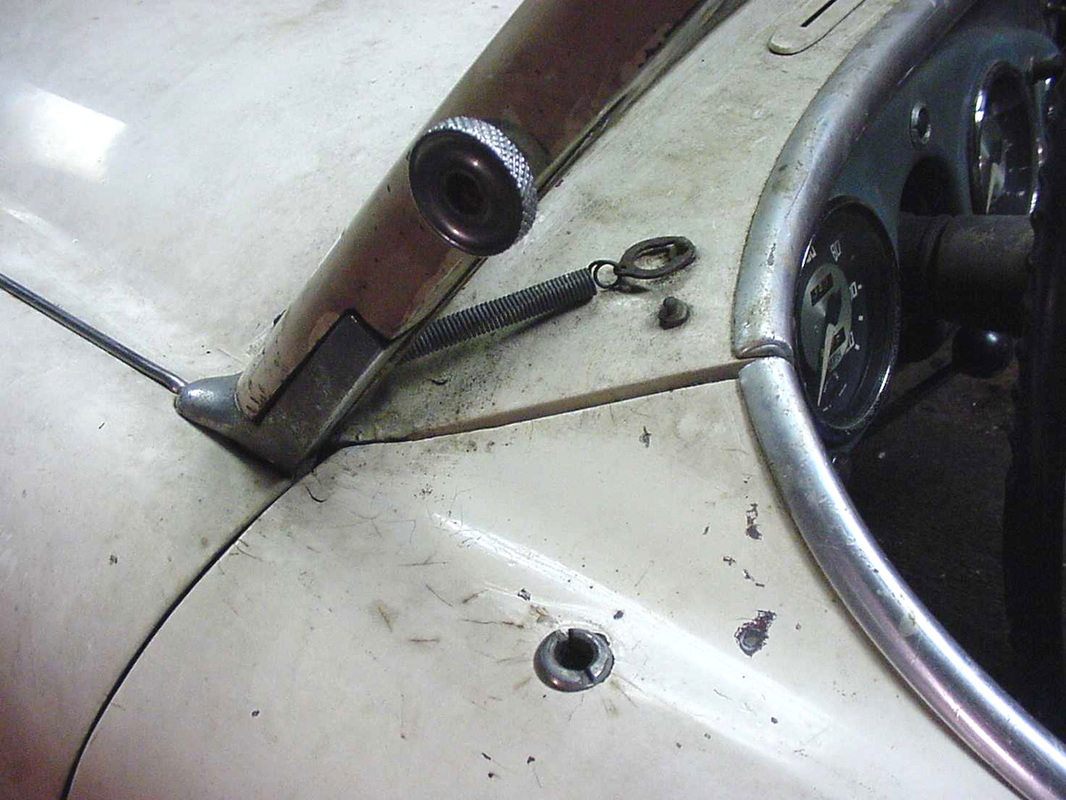
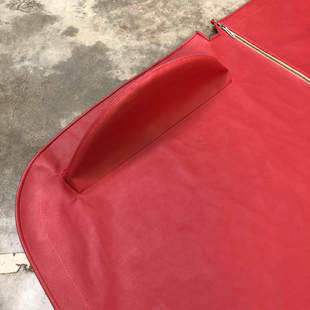
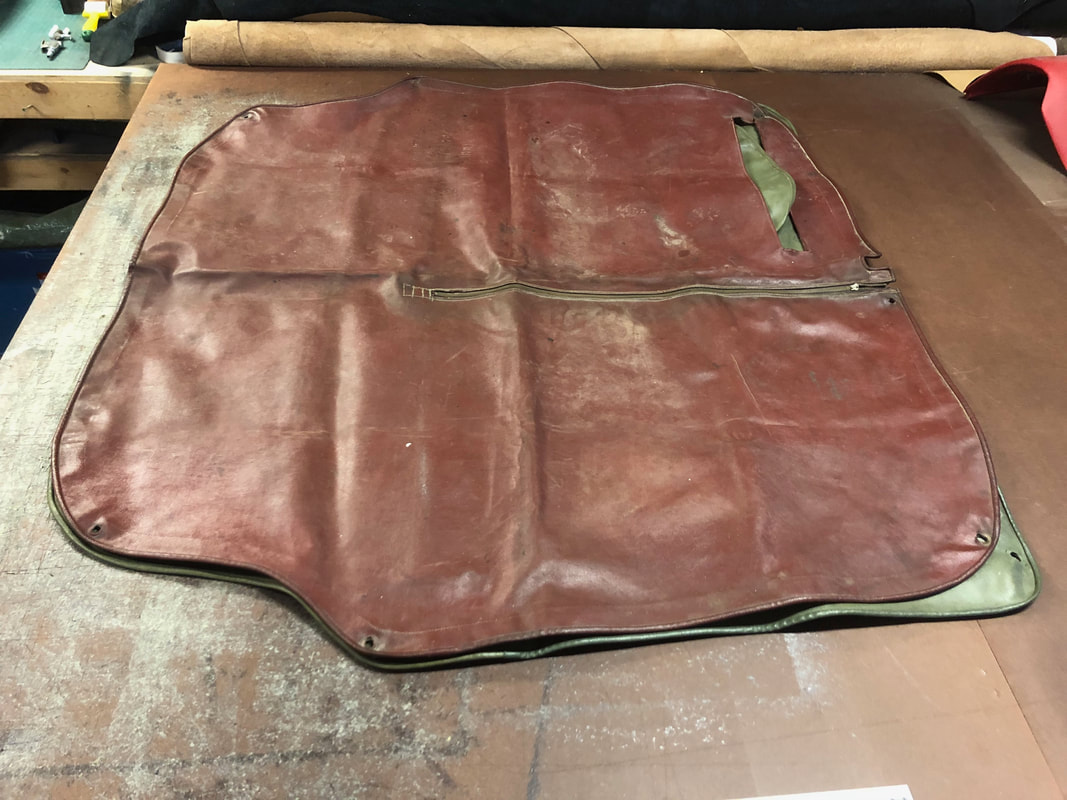
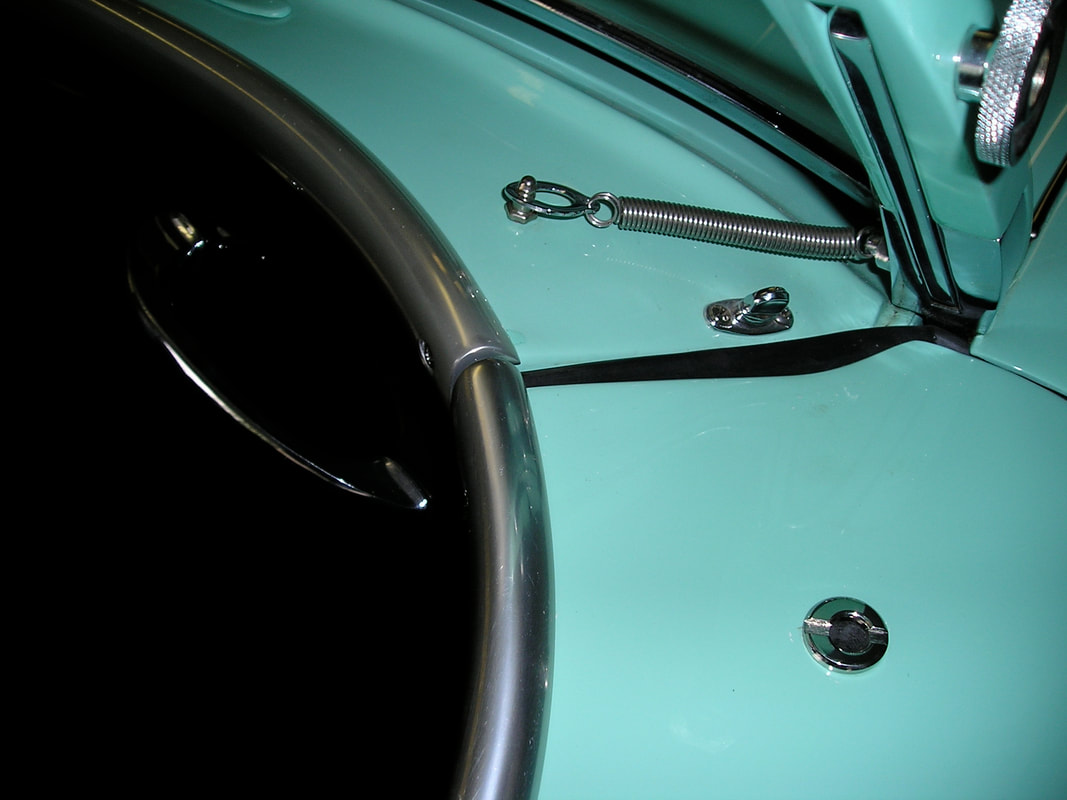
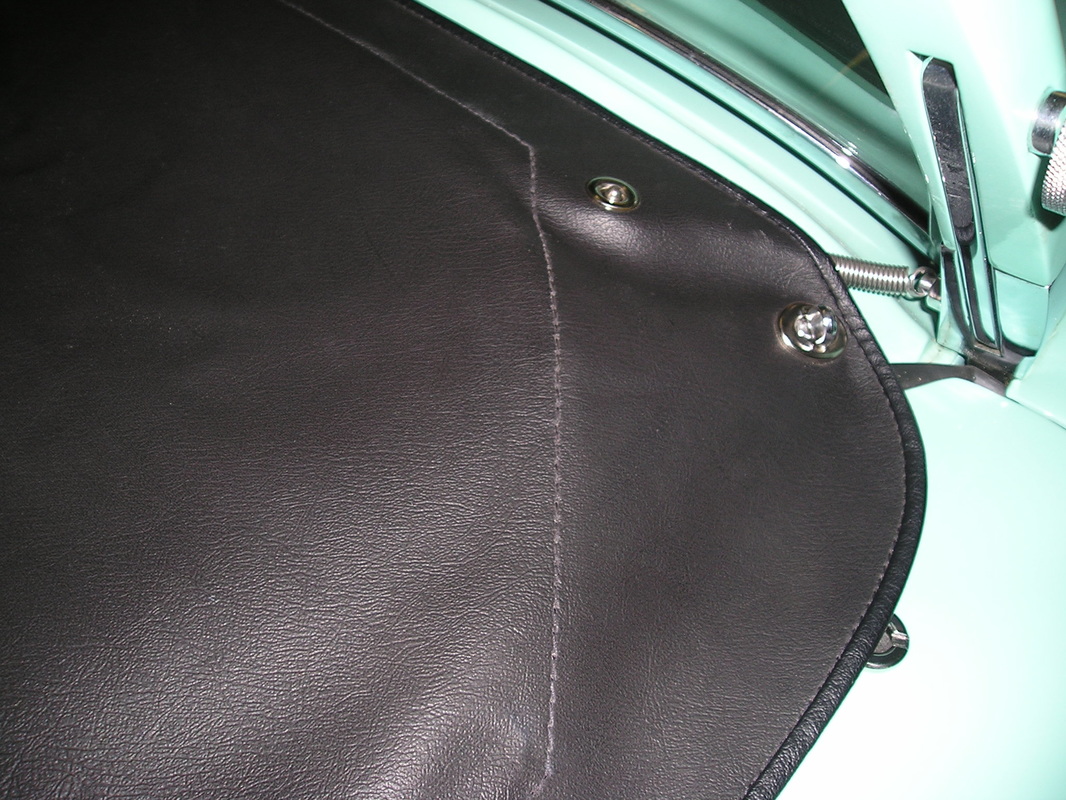
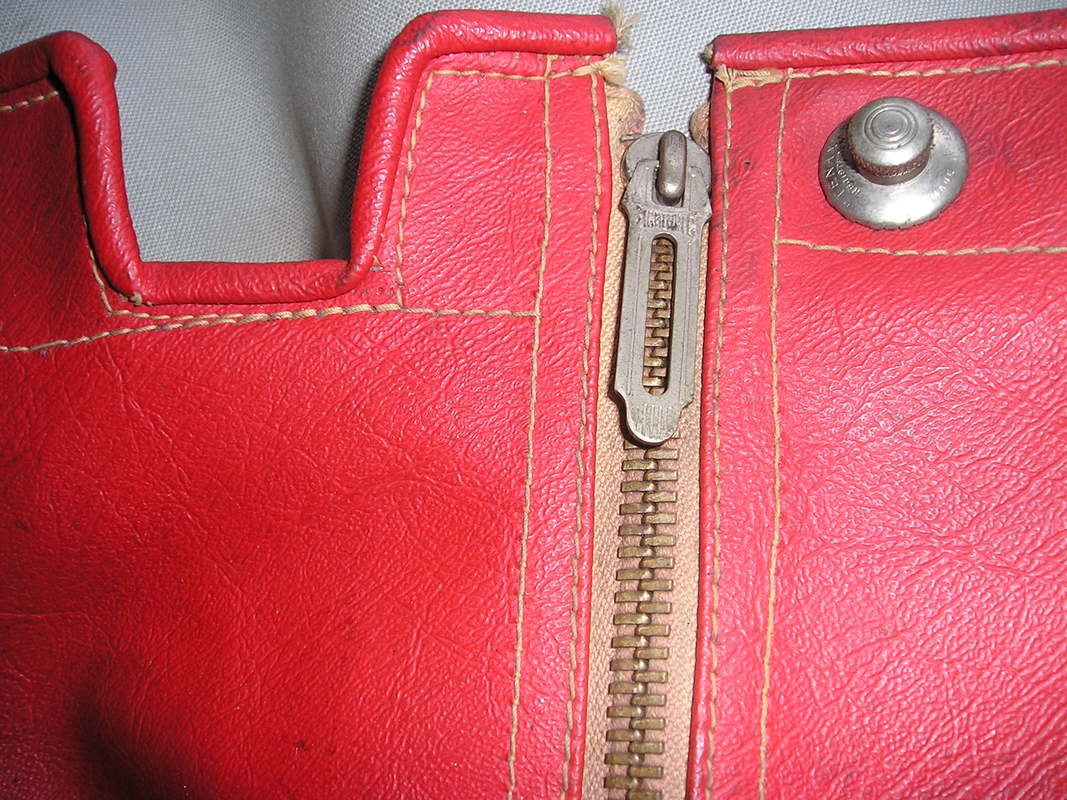
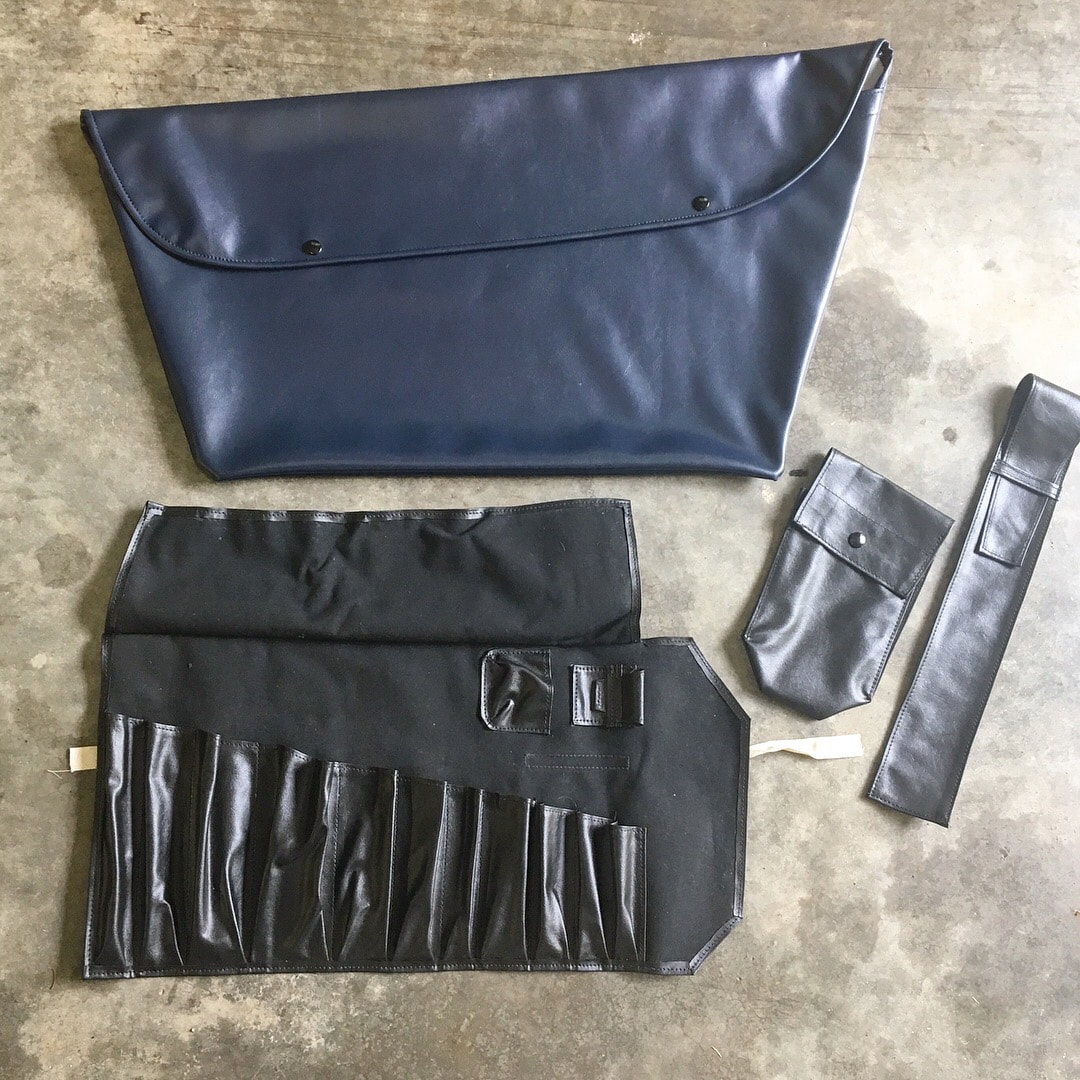
Having worked primarily on Healey interiors for several decades now, I've had many opportunities to document the evolution of Austin Healey trim and the many subtle detail changes that came along through the years as the marque evolved. The Healey 100's alone are an interesting evolution that I think many owners/restorers could benefit from understanding. So without further ado, I'll start with the Floors and Foot wells: The main floor pans were first covered in a thin layer of black tar paper. The foot wells & firewall area around the bell housing had a thin jute insulation (about 3/16" with a black patterned coating on one side) glued to the painted metal. The jute was then covered by unbound Karvel carpet glued in place over the jute. In the tops of the foot boxes, more of these jute pieces were glued in place to provide further insulation... More Karvel carpet covered the inner sills with about 1/2" overlap extending onto the floor sections. The 2 main floor mats were unbound and installed with brass carpet snaps in all 4 corners. The mats were snapped over more corresponding jute mats sandwiched underneath. The drivers mat then had a rubber "Austin" logo heel pad sewn in place over the pre-installed front snaps. On BN1's, the front kick panels were made of 1/8" birch ply with edges sanded round and covered in vinyl. There was a plastic ID tag screwed to the upper drivers side... Later BN1's (mid 54 on-) had a different style of Aluminum ID tag mounted on the LH kick panel - 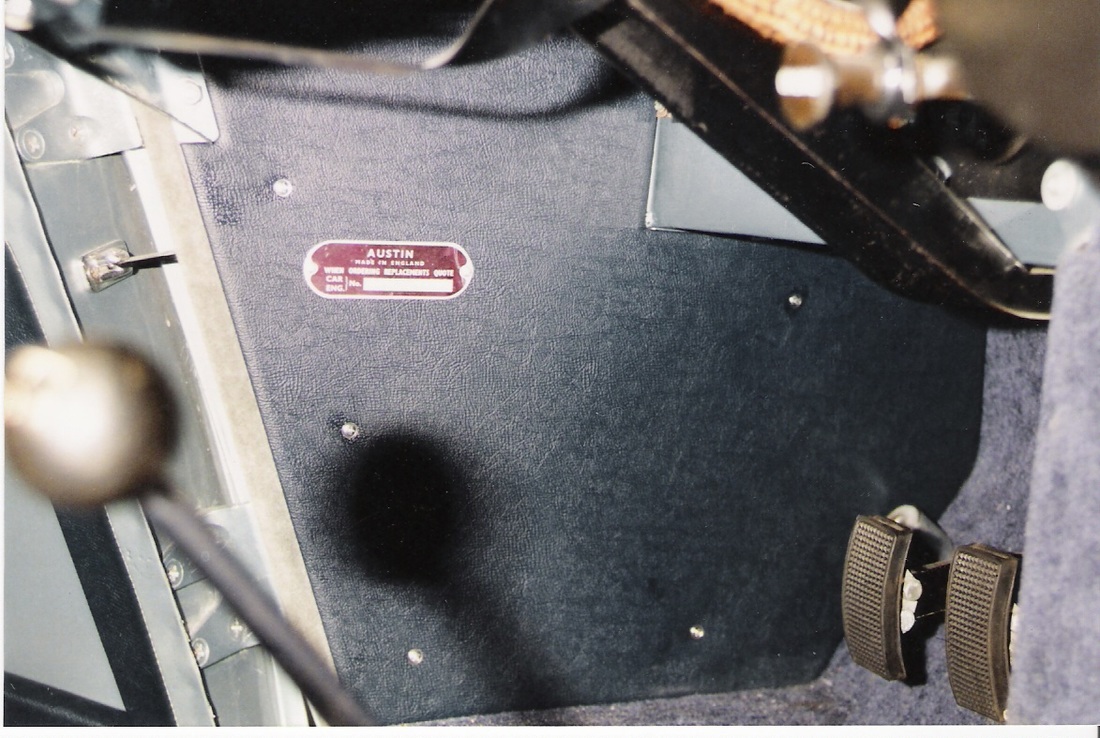 With the introduction of the BN2, these kick panels were shortened in height on both sides to accommodate the lower position of the wiper motor bracket. The panel boards themselves also started getting cut out of a cheaper hardboard and no longer had the edges sanded round. The ID tag was also relocated to the engine bay firewall on BN2's. The parcel tray was mounted to the passenger side firewall under the dash. The steel tray was painted a dark chocolate brown and trimmed with a vinyl surround and had Karvel carpet on the inner tray face... Note, the tray in the below right pic should be painted brown not black - The scuttle panel was trimmed with thin jute on both sides of the panel, the interior side was then covered with Karvel carpet that wrapped around the edges. The panels also had a rubber seal riveted to the panel that would seal around the gearbox bell-housing. Bn1 panels were a flatter design that had its carpet running left to right and screws along the outer edges on the face. The Bn2 design had bigger sides that wrapped around the toe box edges, the carpet instead ran top to bottom and it had screws on the lower sides and 2 more through the upper face: The gearbox cover sections evolved as follows: On the first hundred or so cars we've seen this rare, sharply edged style of tunnel - it was aluminum, painted dark brown and did not have any jute insulation, it was covered with sewn carpet&vinyl covers like this: Then almost immediately, as production of the BN1 moved forward we saw this new more rounded standard shape of aluminum cover, again painted brown, it was trimmed with jute insulation covered by a single piece of carpet and vinyl covers like this: Then in mid-late 54 on the BN1 we saw a 3rd tunnel and the carpet change again slightly to this 2 piece style, again glued in place with jute under the carpet The tunnel is almost the same as the 2nd but has a small hump on the rear left side to provide more clearance for the overdrive solenoid. This meant that the carpet also had a small dart sewn horizontally at the back to go around this hump: (note: the metal on second example should also be painted dark brown) Finally with the introduction of the BN2, we see an entirely different style aluminum gearbox cover that extends further back to accommodate the 4 speed gearbox. This style tunnel had its jute glued to the back of the carpet, and the carpet then snapped down in place rather than being glued down like on the BN1's: There were Armacord mats bound in vinyl and snapped in place on the floors under the seats. The shape of these under seat mats changed between BN1 and BN2 to fit around the corresponding tunnel shapes at the front. Early BN1's up until November of 1953, did not have any slotted cutouts for the seat tracks in these mats. This is because the early BN1's had adjustable steering wheels instead of the sliding seat tracks.The seats were bolted directly to the floors on those early cars with adjustable steering wheels. After Nov '53 the BN1 mats had slot cutouts for the wooden seat risers on both sides. The drivers side only had sliding tracks. Note the squared corners on the BN1 compared to the round shape the BN2 does around the tunnel. Sliding tracks on the passenger side was an available option, though not standard! On the BN1 tunnel, there was a second removable tunnel section just behind the main gearbox cover section that covered the driveshaft under the armrest. It was trimmed in carpet with vinyl edging. More Karvel carpet covered the length of tunnel behind this section right back to the rear bulkhead, it was tightly cut around the handbrake mounting so as to leave no gaps... On the BN2, the rear tunnel was covered in Armacord under the armrest, rather than the carpet used on BN1's. There was often a piece of vinyl glued in place first around the base of the handbrake under the Armacord, though on some cars we've seen this area hand painted instead to match the interior colour. Finally the center armrest was snapped down over the rear tunnel section with 4 Tenax snaps. The Armrests had 3 leather pleats on the top face, and had long vinyl sides that extended to the floor. The BN1's had a longer 19" armrest while the BN2 with it's revised tunnel arrangement had a shorter 17.5" armerest.. Moving now to the doors, The inner door skins were covered in a big piece of vinyl that was folded in the corners to cover the front, rear and bottom sections of the inner door. We've often found a strip of jute sitting in the bottoms of the doors under this vinyl flap (as a bit of padding) A separate black board panel trimmed in vinyl extended above this piece of vinyl to finish the top inner door area. Another piece of vinyl was glued to the upper inner doors just under the cockpit rails, and the door pull cord was wrapped with a sewn vinyl cover... The outer door panels were birch ply panels covered in vinyl with a very thin layer of coach wadding under the vinyl. the panel edges were sanded to a curve with an opening in the middle for a large inner pocket area. The first few hundred cars had contrasting piping tacked along the inner edge of this opening. On the inside, the lower sections of the panels had a soft brown suede like material sewn to the top edge of the outer vinyl cover and glued down to the inner panel. Furflex was also glued and tacked along the front and rear edges of the panels and along the front edge of the door frame sandwiched under the kick panels and windshield posts.. As BN1 production moved forward the door pocket piping was almost immediately discontinued as production got into full swing. The door panels remained plain without piping or stitching until towards the end of 1954, Finally in late 1954 we started seeing stitching around the door pocket openings, about 1/2" in from the edge. This practice continued on the later BN1's and through all BN2's. Note in the lower 2 pics, the original early scuttle seals, and the 1/4round seals along the bottoms of the doors themselves... The seats on Healey 100's were originally a slim and slender shape which is worth noting! - most of kits available today make for a seat backrest that is much bigger and puffier looking than they actually were. The center pleated section of the backrests were stuffed with coach wadding and the piping smoothly curved around the top, I've noticed this area is often too squared off on modern kits too, it's a detail often missed because later 6 cyl cars did have a more squared off design at the top of the pleats. Here is what they should look like on a 100/4: The backrest piping continued down around the pivot arms under the lower Hidem strips and joined to itself along the bottom edge of the backrest. The backrest was bolted to a lower cushion pan that was mounted to the floor or seat tracks. The removable cushion would firmly sit in the pan. The pan was painted dark brown and trimmed in vinyl aound the inner & outer perimeter... The inner frames of the backrests had wooden tack strips riveted to bottoms with brass split rivets. The foam was a soft molded Dunlopillow foam glued in place with thin wadding used to pad the back and add some definition above the center pleated area: The cushions were a big molded shape of Dunlopillow with square cutouts molded into the bottoms to allow them to squish down when sat in. The top perimeter was packed with wadding to give definition and the back of the pleats was often stuffed to fill any gaps where they met the backrest. They were mounted in a sturdy wood frame glued and screwed together that gave an upward rake towards the front of the cushion... We've seen on several early BN1's the use of white cloth being tacked to the bottoms of the cushions to finish them off neatly, however by early '54 this practice seems to have been discontinued and the bottoms of the Dunlopillow cushions were left exposed... Moving to the rear bulkhead... The wheel arches had a small jute pad where the top frame would rest, covered by a sewn vinyl cover with piping. The shape of this jute pad has been seen in a few variations, early BN1's had this larger style of jute pad - the vinyl cover only being glued around the corner edges so the cover would float over the pad and not define the shape of the pad underneath. Later BN1's and BN2's had a smaller jute pad that only covered the flat D pressing in the wheel arch. This allowed the wheel arch cover piping to be glued more securely along the wheel arch and still look clean and smooth The rear bulkhead was covered mostly in Armacord with vinyl trimmed birch ply panels for the B pillars. The early BN1's until about mid 1954 had a much larger vinyl spare wheel bag than later BN1's and BN2's. Here you can see the difference between the big and baggy early spare wheel bag and the later more slender shaped bag that fit the narrow shape of the standard "Dunlop Road-speed" tires a lot better. - In hindsight, the narrower bag won't actually fit most of today's tires! The battery box lid was trimmed in Armacord edged with vinyl and had leather straps riveted in place with snaps to secure it shut. The boot of all 100/4's was trimmed in Armacord with vinyl edging. The patterns remained basically the same throughout the 100/4's, except that early BN1's (up to around Aug '54) had a narrower main mat for covering the gas tank. Here you can see the earlier narrow boot mat design that required longer separate Armacord side pieces to fill in around the side wheel arches. The later style BN1 and BN2 boot mat was made full width and sewn differently around the rear bumper brackets. This last shot of a teal blue BN2 interior shows the spare wheel shelf and wheel wedge block as was standard on all 100's... Here is an example of the original green Armacord with darker vinyl edging... The soft tops were basically the same pattern between BN1 and BN2 with 3 minor changes occurring between the top frames and latch mechanisms. They had grey webbing between the bows and the front wooden header rail. The header rail was trimmed in matching Vinyl or Everflex as the hood. Some early BN1 tops have been found in vinyl, while later ones were all done in Everflex. The early style tops had a trim screw through the top into the rear bow that also trapped the webbing straps. Note: the below pic shows the original "sage" green Everflex used with green interiors - this Sage green colour material is no longer available. There were 3 different styles of side screens on the 100/4's - Early BN1 side screens were plexiglass with a chrome metal frame. They came in a colored vinyl stowage bag that matched the interior. The Plexiglass BN1 screens were replaced in late '53 by this 2nd style of sewn vinyl side screens that had a flip up signalling flap which could be snapped shut from the inside... Then in late '54 and on the BN2 we saw a 3rd style again in sewn vinyl with clear plastic windows. The lower flap had been eliminated and instead the lower rear corner of the entire screen could be lifted just enough to work the inner door handle. These all came with a matching color vinyl stowage bag for the screens. The Tonneau cover: The early BN1 Tonneau cover was a slightly shorter and more curved design than later Tonneau covers. It followed the shape of the front cockpit rails and had Tenax snaps in the front corners. Later BN1's and BN2's had a slightly different pattern of tonneau with the front corners being bigger and more squared off. These later tonneaus also used a turn button snap instead of the previous Tenax in the front corners. Here you can see an early BN1 tonneau in red over a later BN1/2 style tonneau in green... This black tonneau is on a later BN2 and shows the later design with taller front corners and turn-snaps instead of the earlier Tenax. Note also the small grommet over the spring studs... The Tonneaus were made of Everflex and originally came with a Lightning brand zipper and nickle plated Tenax snaps with a knurled head: Last but not least, the Healey 100's also came with some separate stowage bags for storing your accessories. There was a bag for storing your side screens, a tool roll, Jack and Jack handles bags. The tool, jack & handles bags were all made of a very thin black vinyl. The side screen bag was made in the same coloured vinyl as used in the rest of the interior. So there you have it - some interesting detail references to note on the interior trim of Healey 100/4's
In closing, I am very pleased to announce that after years of careful research, Rightway Heritage Trimming is now producing all of these various styles of 100 interior trim components! All made by hand to exacting detail standards using the correct materials and colour combinations. Contact me anytime for samples and pricing info through: www.rightwayheritagetrim.com Until next time -
10 Comments
Kent Bommarito
2/18/2017 03:33:45 am
I'm happy to hear your continuing your dad's work in upholstery on little British cars, we are ageing out of the sport and we need new blood to carry on. Many of us had cars in are youth and are returning in retirement to them . I am restoring a Dec. 53 Austin healey 100 that was disassembled in 1962 , put in boxes for more than a half century and went from owner to owner with wishful thinking they someday put it back together, after many hours of work and investigation of the way it goes back together I've found your site and are in the process of finishing the interior thanks to your help. I have made fiberglass moulds from all body parts and inner panels and have built a glass 100 ah body one day you may be interested in a full scale model of 100 ah . Thanks again for your interior pictures a info on a correct installation.
Reply
1/18/2018 07:53:55 pm
Invaluable! Also own a 1953 manufactured, still a rolling chasias, but no rust except the fender corners, waiting for me or someone to finish it right.
Reply
1/19/2018 07:52:33 am
Do you have a CD/DVD available for purchase or download?
Reply
Edward Skevington
1/21/2018 12:38:26 am
This is a brilliant article & very well written, all info matches correctly to all original factory aspects of the 100 my mother bought brand new 64 yrs ago. It has been well used 2-300000 miles but never stripped down. Also block has never been out. Its still running on factory fitted pistons rings big ends & crank.
Reply
Peter Waldburger
2/12/2018 07:25:44 am
Also have an October '53 100. Was my daily runner in the seventies, now in pieces awaiting a rebuild. Superb article, many thanks, will definitely make it my reference point when I get there. Noticed the early two piece dashboard in some of the pics.Have over the years been able to acquire many new (old) parts including M pistons and carbs. Excluding the block, the entire engine is new with period parts. These, together with gearbox parts and grilles etc., were located in Rhodesia (now Zimbabwe) during the war years. We were armed to the teeth, travelled in an armed military convoy and camped out. All very exciting, but the trip was without
Reply
Ken Collup
7/7/2018 03:04:53 pm
I have a December 54 mfg date BN1. Loved all the details. Mine was subjected to either hill climb or rally work as evidenced by extra underbody protection and assorted bruises. It is currently down to the subframe awaiting new replacement panels. Again I loved your article
Reply
Roy Crane
11/8/2018 03:42:35 am
Great article! My son and I have just begun a total frame off resto. of our 1955, BN1, right hand drive. Are you offering upholstery kits? I have been looking at the Heritage site, but have no commitments to a supplier as yet. This is the first source I have seen for what colors were available. I was thinking of a biscuit trim package, but seeing that was not a choice, with the Carmine red exterior, I will have to consider going with the original red trim package.
Reply
Sh Vd haring
12/9/2018 05:48:14 am
Heel wat van geleerd,ben zelf een bn1aan het restoreren naa 4jaar bijna klaar spruce green bn1-l 222504
Reply
KC Mooney
8/22/2021 11:36:05 pm
I am just beginning the restoration of BN1 227228 which I have owned since 1966 and stumbled across your article on the internet. You are obviously an expert on the 100 4 and I would like to ask you a question about the dashboard. I had an original parts catalogue which sadly was destroyed in a house fire but I read it thoroughly and I remember that there was an option listed for a wood dashboard. It was decades ago and I have never seen one so I am questioning my memory. Can you comment on the existence of that option?
Reply
Your comment will be posted after it is approved.
Leave a Reply. |
Archives
December 2023
|

 RSS Feed