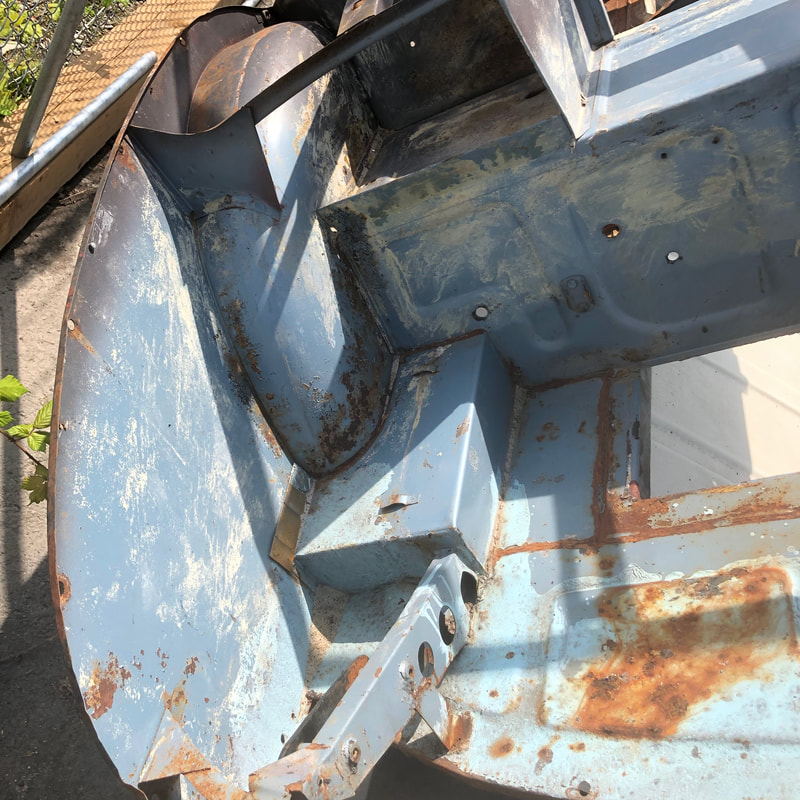
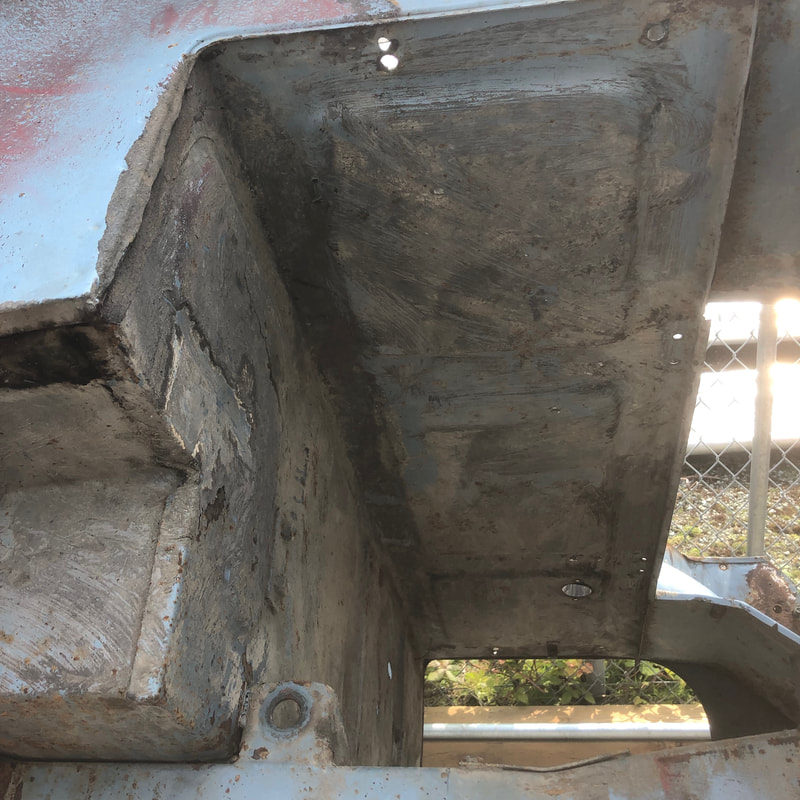
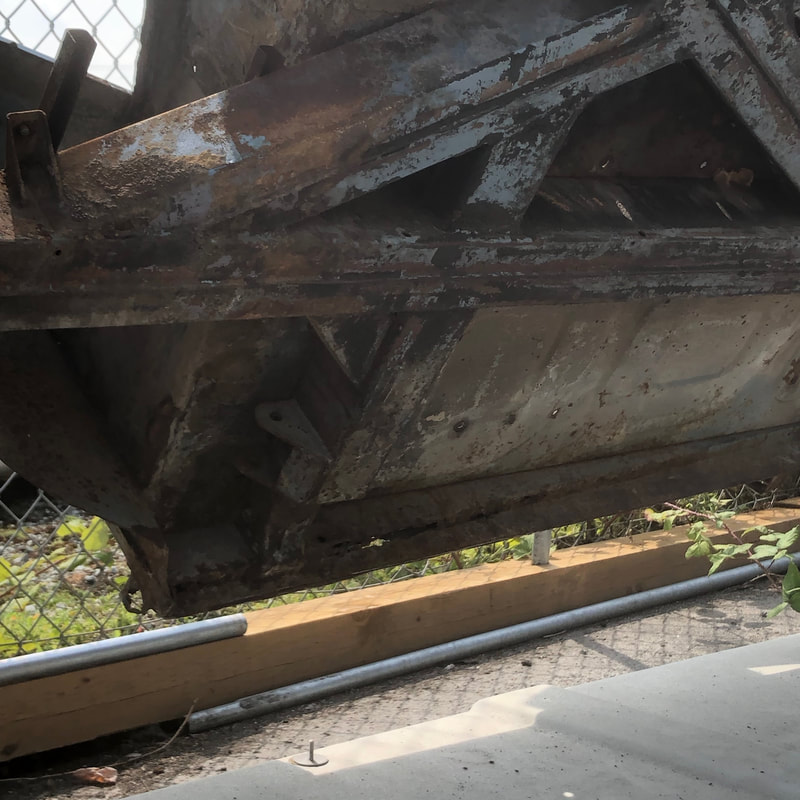
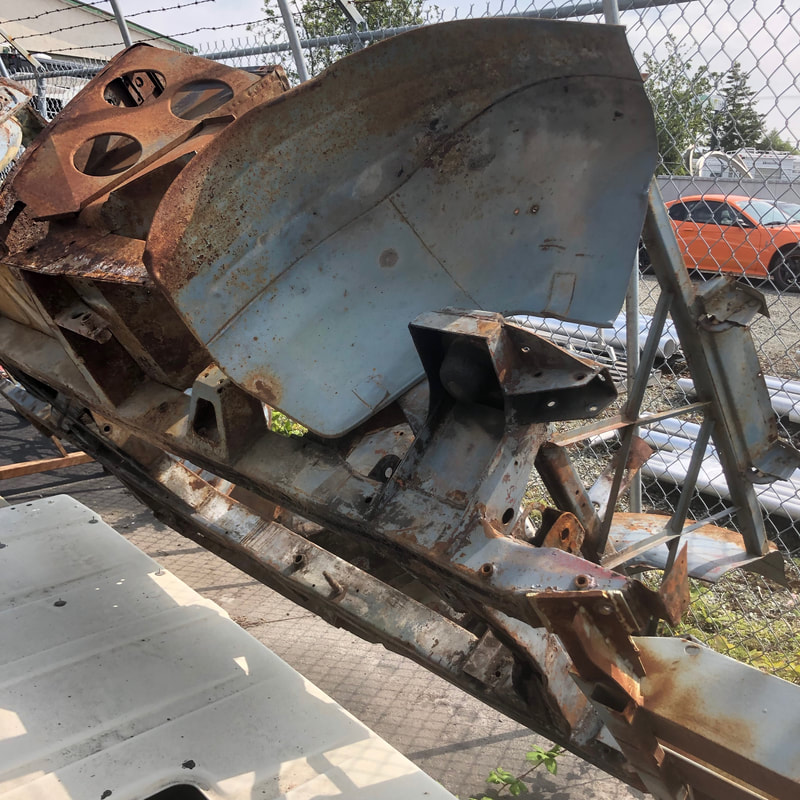
 It's been about a month since my last post, with summer in full swing i just haven't had the time to write between all the camping and outdoor adventures. However as always I have been keeping busy with lots of car stuff! I did write and present a slide show presentation a few weeks ago for the Old English Car Club at their monthly meeting, I've also just been published for the second time this year in another magazine - this time, Healey Marque magazine - which I was featured on the front cover! Over the past weeks the guys at Jetstream have begun sandblasting my BN1 chassis. But just before they did I got some good pics of the original Healey blue paint they uncovered after giving the chassis a pressure wash to remove all the years of dirt and grime: 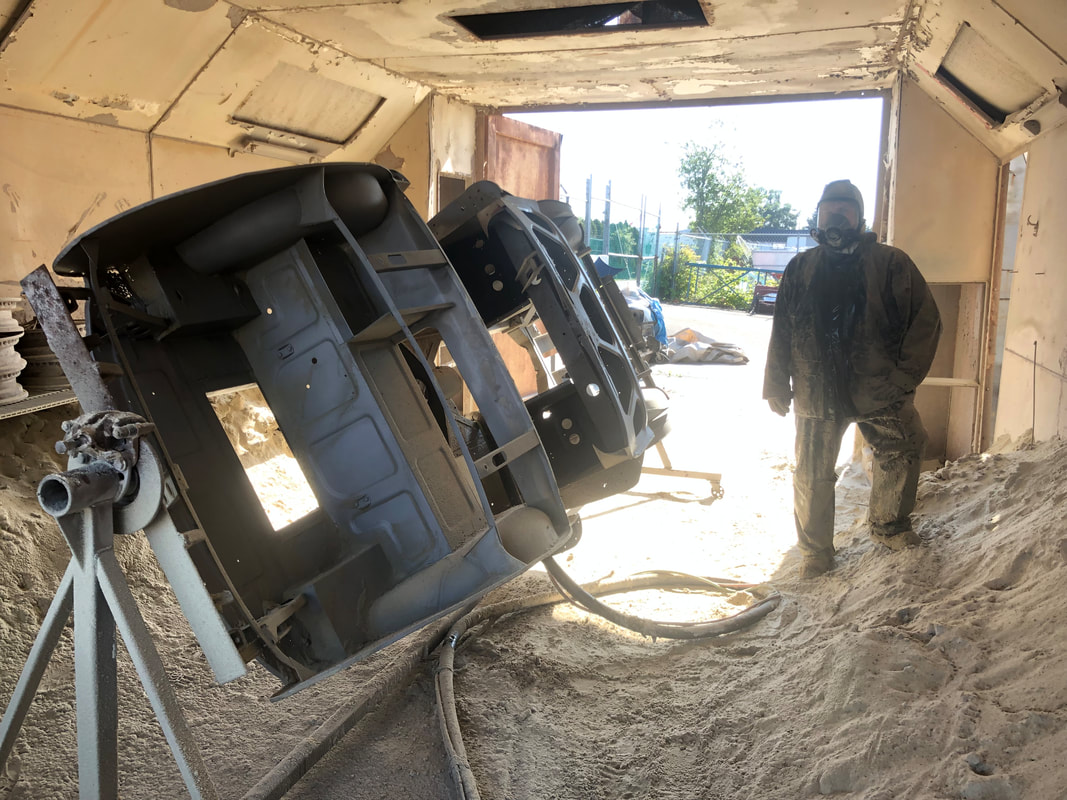 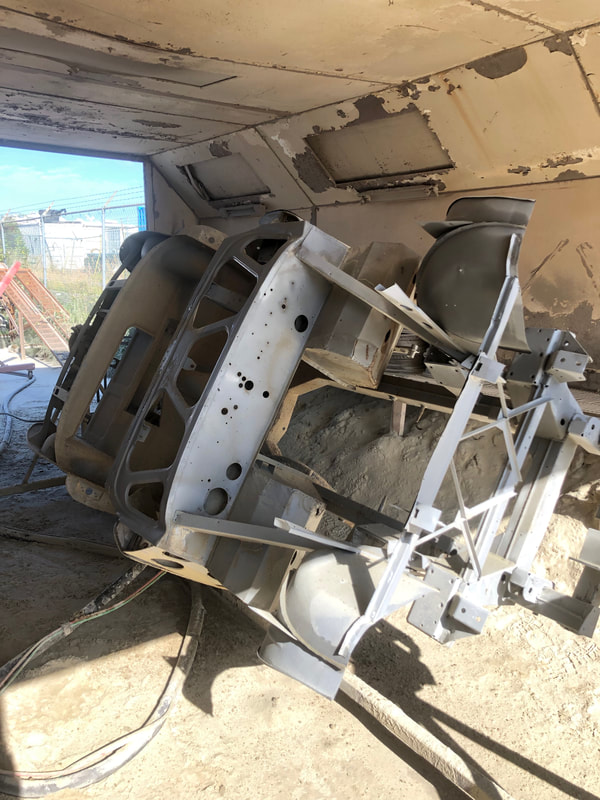 Check out this Healey blue paint - yes it did have a very faint metallic in it! though it's pretty faded in these pics. Also note the black primer underneath and the areas that the blue paint didn't reach as the body & chassis were clearly sprayed AFTER it was assembled...
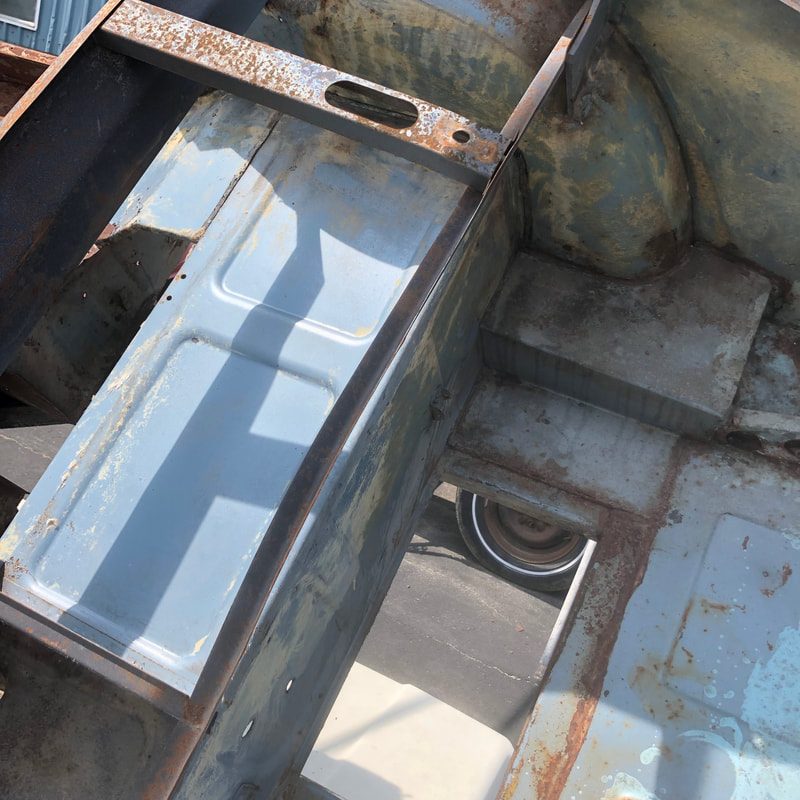 Here are some of the underside areas, and note the factory undercoating applied just over and behind the rear axle area...
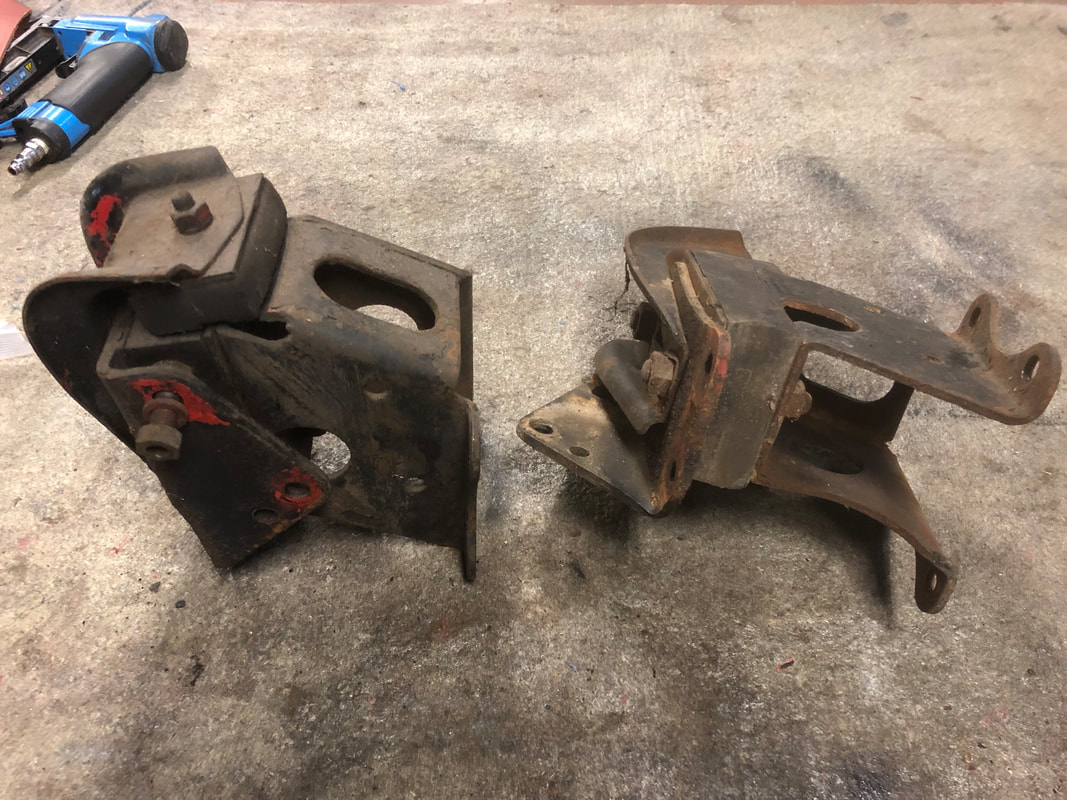
In the meantime I've begun the process of refinishing all of the bags of original hardware for the car. I had the guys at 'Blast-it' carefully sandblast everything - bag by bag to bare metal. Now I have to go through and re-plate everything in either zinc or black phosphate as original. For the zinc parts I have a home electro-plating system I purchased from the Eastwood Company: A battery is hooked up to a bar of pure zinc submerged in an electrolyte solution. The other battery lead hooks to a small metal colander/spoon that I put the hardware in. When I submerge the hardware into the electrolyte solution, it bubbles and foams for 5-10min and then voila! the parts are now plated in zinc! I then rinse them in water, dry them thoroughly and spray them with a clear coat to seal them and add an extra layer of protection. 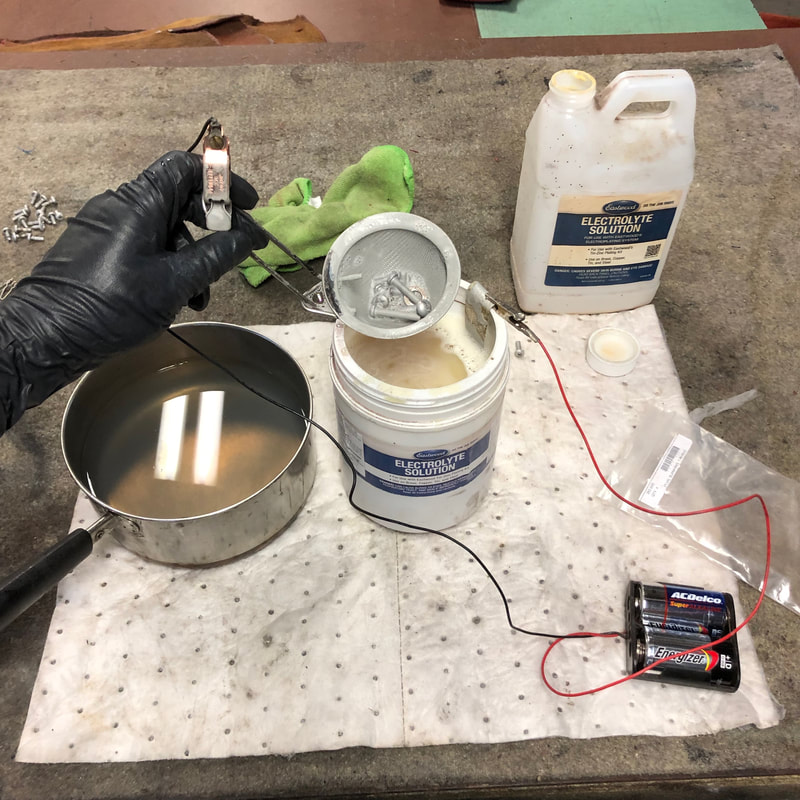 - I'll be saving the black phosphate plating process for a future article, I still have to learn and experiment to get that process right, but I have a great article with good instructions in it written by my friend Curt Arndt. - so stay tuned - Here's some freshly plated and painted parts for the bonnet latch mechanism, complete with the red stripe painted on the black latch spring as original. The longer bracket and the latch pin are listed as being bare steel in the concours guidelines, so I sealed them with clear coat and gave them a wipe with some Fluid Film to prevent corrosion: 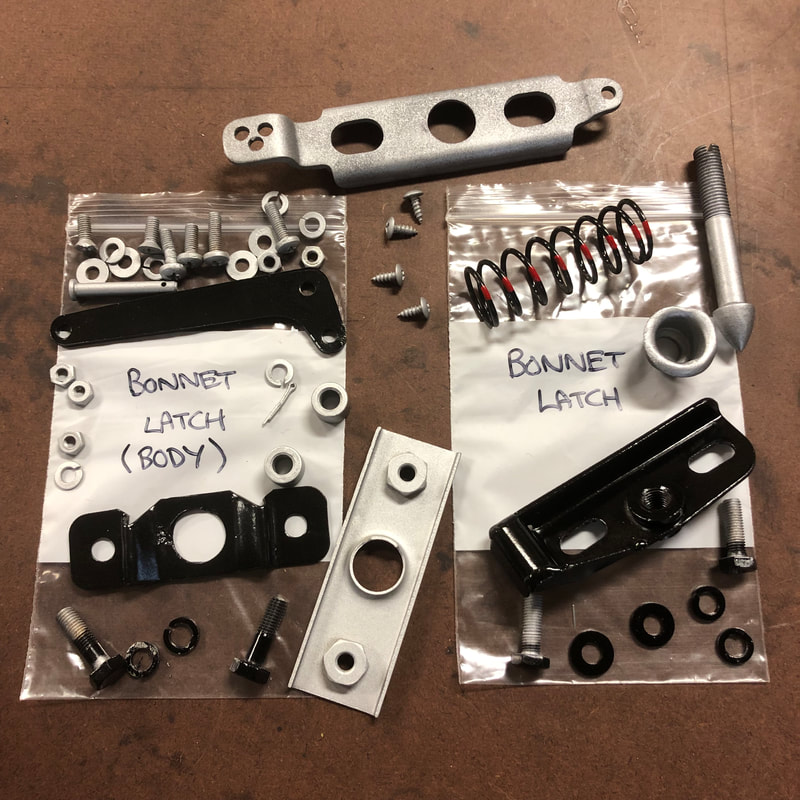 I sandblasted, rebuilt and painted my engine mounts with new rubber blocks from AH Spares. As with most re-pro parts the new rubber blocks needed some coaxing to fit properly!
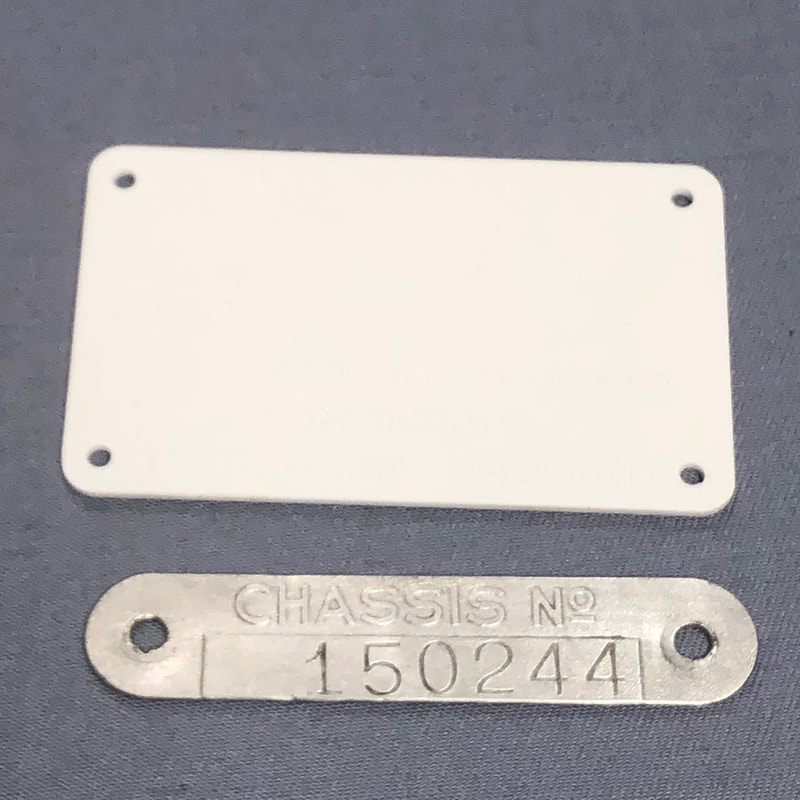
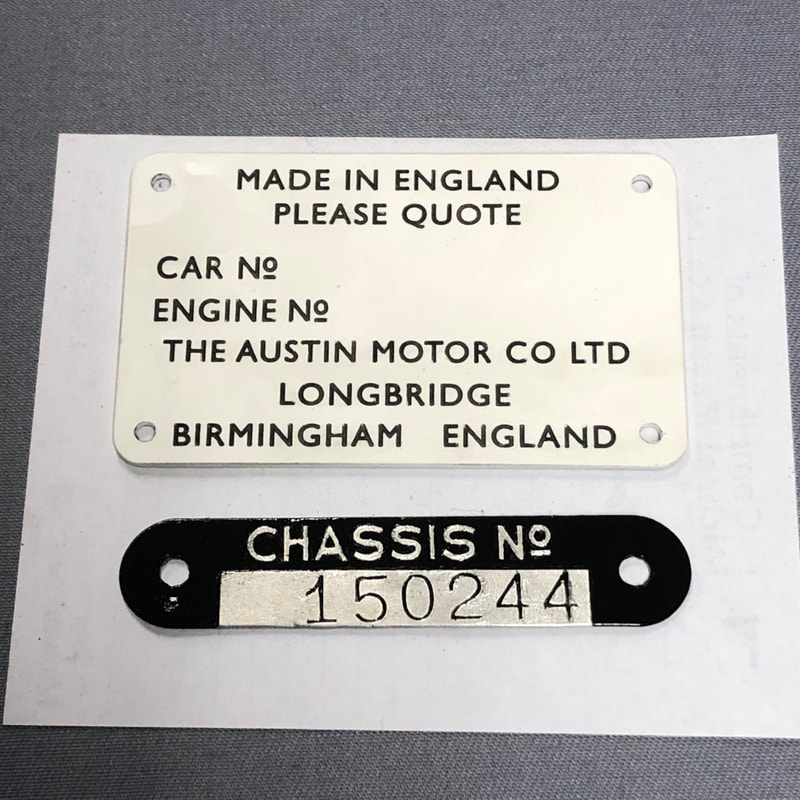
I carefully hand painted in the black lettering on these chassis ID plates, the new white plastic plate which mounts to the R/H interior kick panel will still need to have the chassis and engine numbers stamped into it...
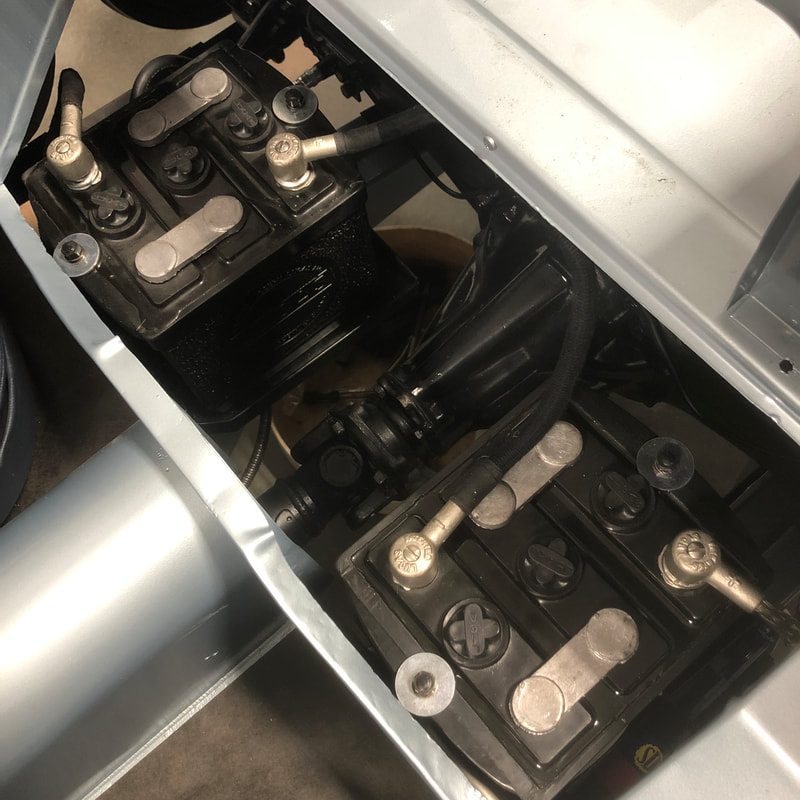
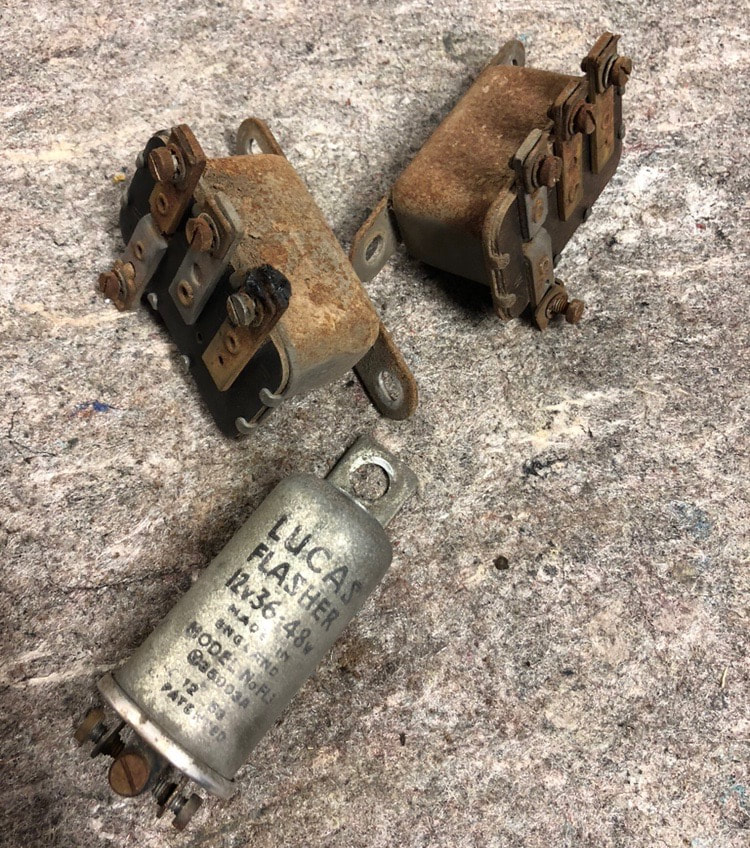
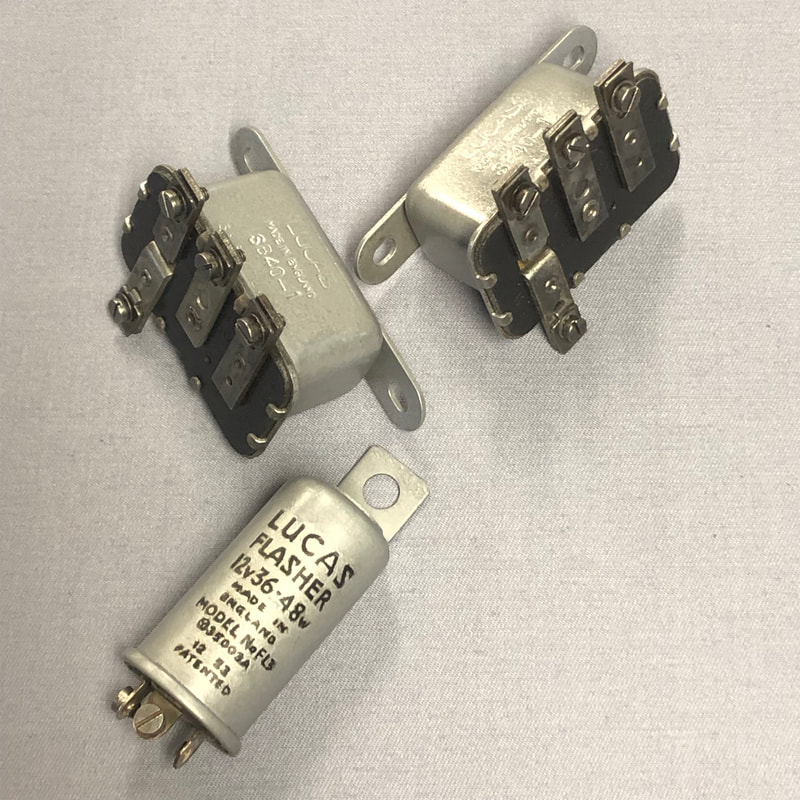
I also cleaned and refinished the flasher and overdrive relays for the firewall. These pieces are all original and date coded for 12/53. I wanted to figure out how to clean and refinish the flasher body without losing the already fading black lettering on it. So I ended up using a .000 size model paint brush with some thinned aluminum colour paint, I carefully painted aluminum around the actual letters and then retouched the lettering in with a .000 size black artists pen - of course this took a LOT of patients! A final spray of satin dull coat to blend it all together and you'd never know it was painted!
The wall of parts staging is looking shiner all the time!  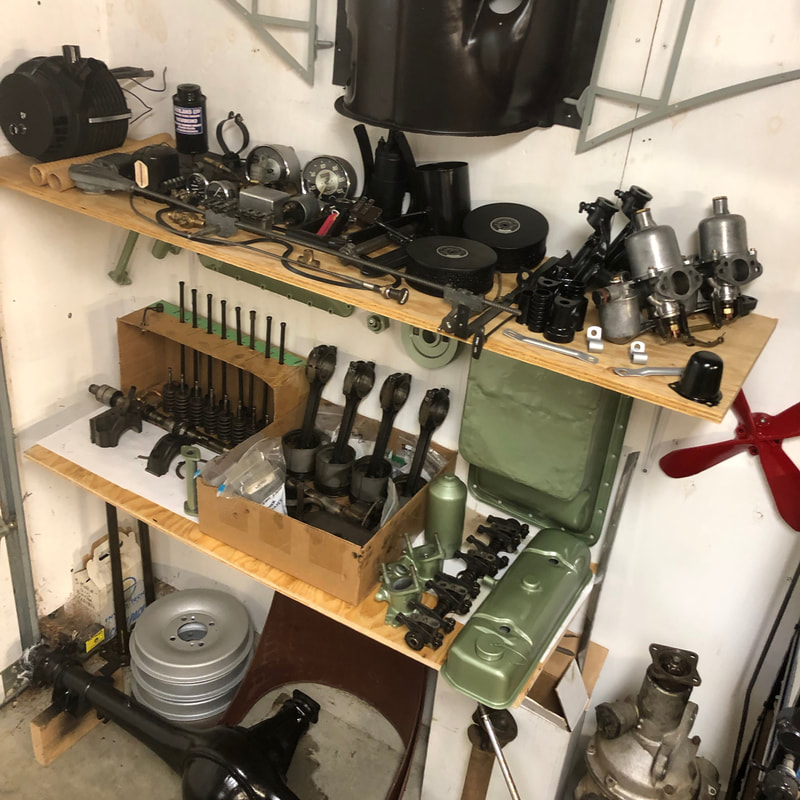 until next time -
2 Comments
Lyn
7/29/2019 08:09:47 am
You are a master craftsman! Thanks for sharing your gift with everyone Your comment will be posted after it is approved.
Leave a Reply. |

Archives
December 2023
|


 RSS Feed