 With Christmas behind us, the work has begun! This week I carefully removed and documented all of the B's original interior so that I can prepare her for some metal and paint repairs. In the meantime I'll have the opportunity to go through each piece of the interior trim and clean and refurbish as needed before putting it all back together. I took careful notes on the materials being used and the details of how it was originally trimmed, keeping track of all original hardware and the order in which things were installed. The first things to go in are the 1/4" strips of jute underlay that are cut to fit in all the slots of the main floor panels. These were glued in place and because mine are still so well stuck down and fragile, I'm leaving them there. The next pieces to install are any small bits of vinyl to cover any area's that are not covered by carpet or panels...
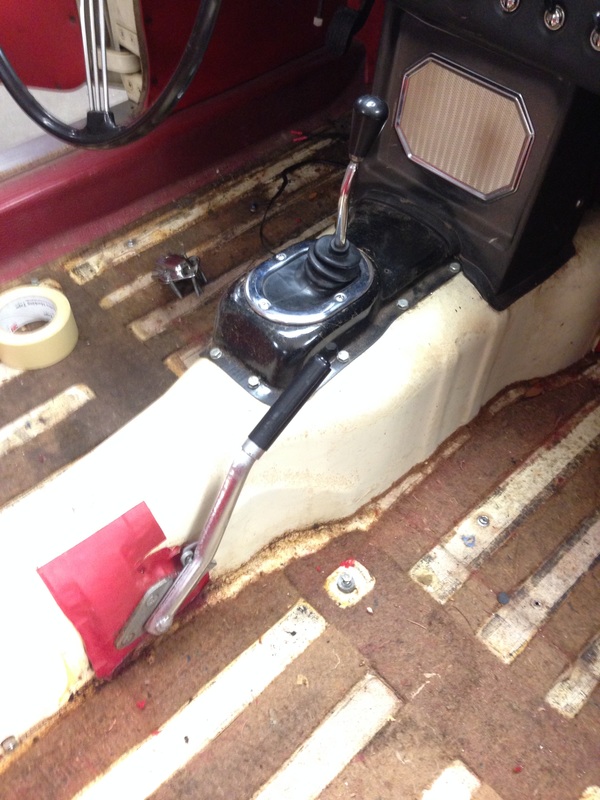
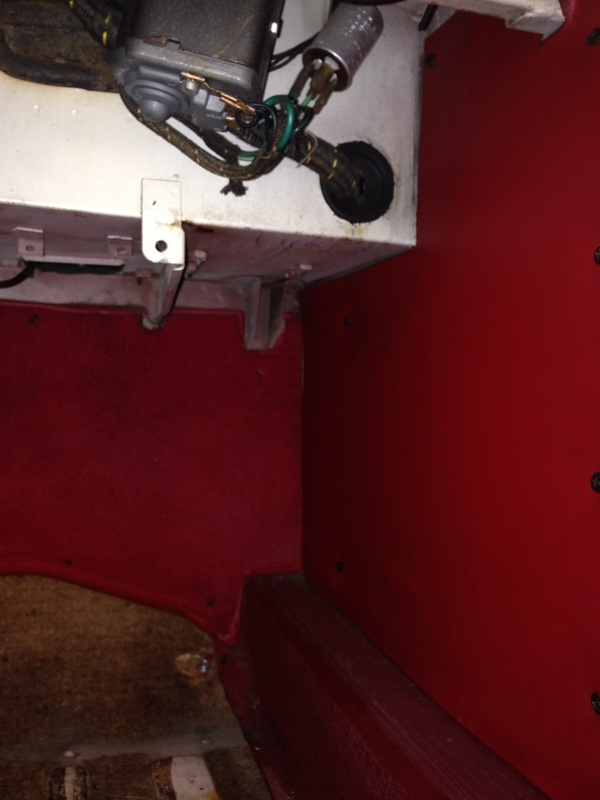
Here you can see the red vinyl applied around the handbrake lever and also some small pieces to cover the lower rear lip of both door openings. Note also that the dash and speaker panel would have already been installed before any soft trim.
The next pieces to go in were the 2 rubber sill covers. These are unavailable in any of the original colors except black now. They were glued in place with a bit of overlap onto the floors.
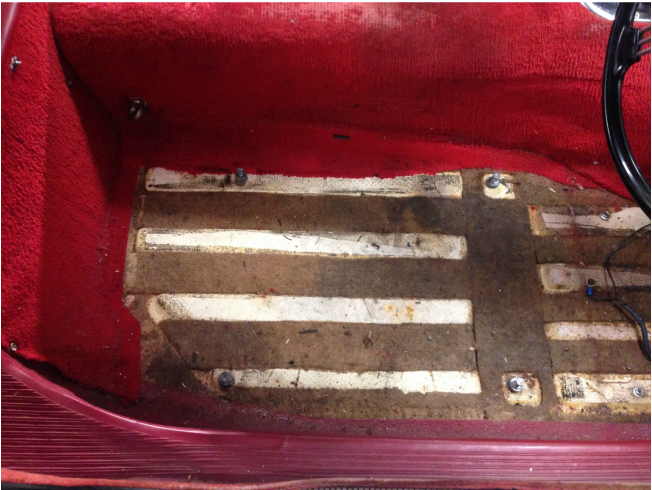
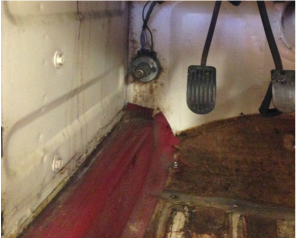
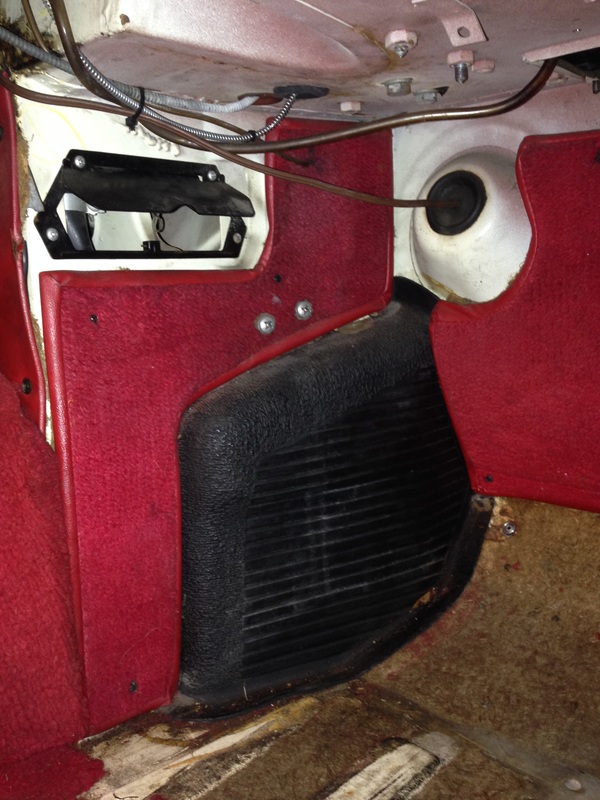
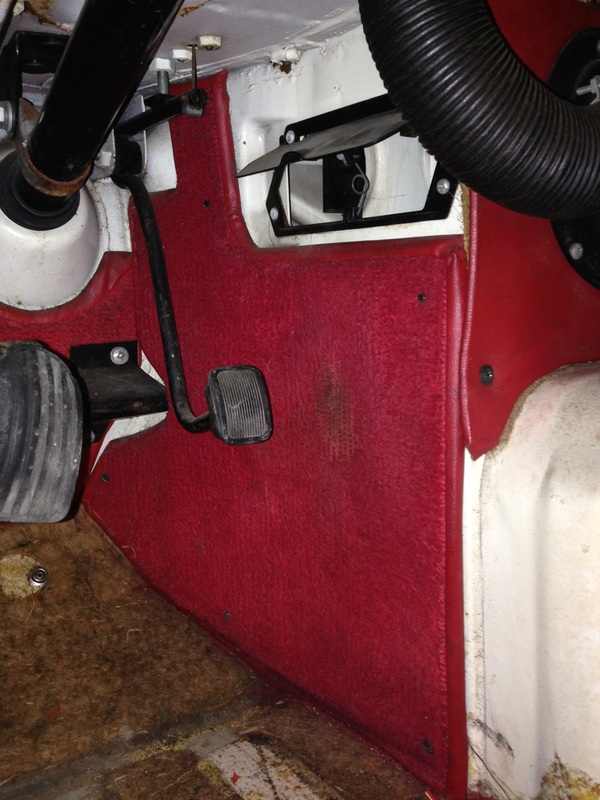
Continuing with some rubber, the always black - rubber starter motor cover is glued in place followed by the 4 uniquely shaped carpet covered toe board panels that go in around it and also on the drivers side. These footwell carpet panels are all individually sewn with vinyl edging and then trimmed to uniquely shaped panel boards. They are all screwed in place with black metal trim screws and cup washers with 1/4" jute under felt glued to the backside of each panel. Also to go in was the vinyl covered panel behind the speaker box that the demister vent hoses attach to. This panel is held in place with 4 black panel screws and washers.
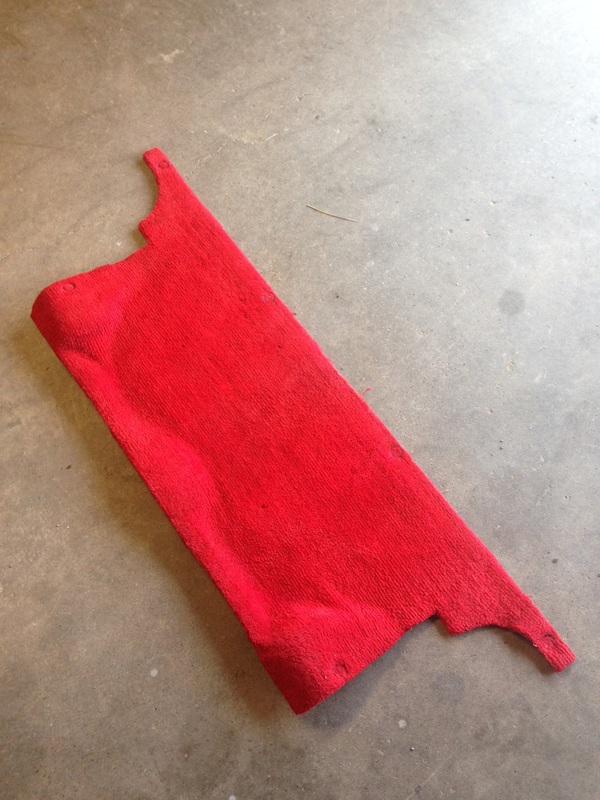
Next to go in are the rear wheel arch carpet covers. It needs to be pointed out the style and type of carpet that was used in MGB's, it was an un-backed loop pile carpet. Because of no heavy backing, this carpet was slightly stretchy for applications like these curved wheel arches. The wheel arches were glued directly to the metal on each side as one piece (no sewn seams like modern replacements have) with smaller pieces to cover the shock mounts butted up beside them. After that goes in the lower rear bulkhead carpet cover. One long piece to cover the entire panel with a 3"wide vinyl strip sewn and glued along the top edge. It was cut flush around the tunnel opening and rear sills with some overlap onto the floors. This piece of carpet had a few types of male ended snaps/fasteners installed for snapping down the tonneau cover and rear deck mat respectively.
Next and so often misunderstood - the main tunnel carpet section. This was made by first applying a 1/2" layer of dense jute to the tunnel and molding it around the shift dome probably by soaking it. After dry and shaped, the un-backed carpet was glued directly to the jute and moulded to shape in one big piece. No seams, just stretched and glued to shape! it was trimmed around the front and rear edges of the jute as well as around the speaker and handbrake openings to give it a clean look without any binding. The bottom edges along the floors were left about 3" long for overlap. There was also a leather tab riveted in place with a lift-a-dot snap behind the speaker opening.
Next comes the removable rear deck mat. Again like the tunnel, it was a moulded piece of 1/2" jute with the carpet adhered to the top of it. This created a stiff mat that would hold it's shape and fit perfectly without any gaps or overhang. Only the front leading edge was trimmed around the jute to give a clean edge look. It was finished off with 6 carpet snaps as shown.
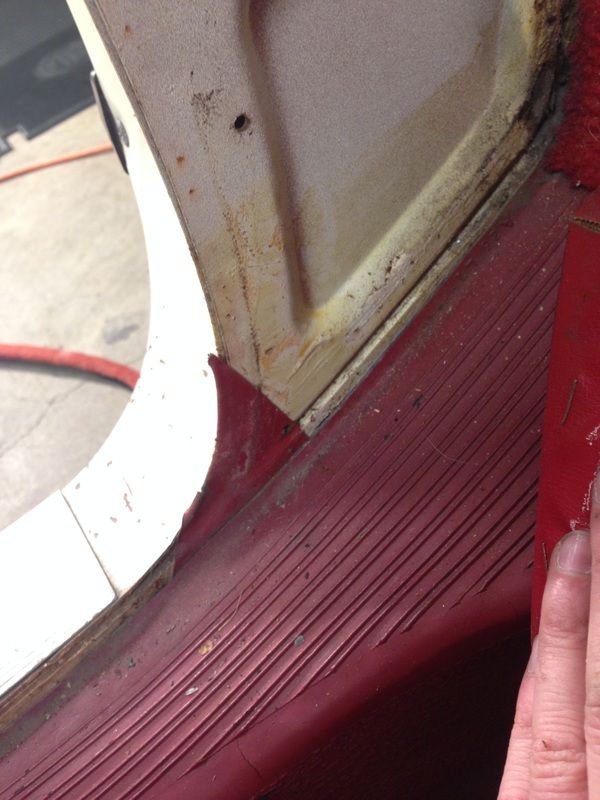
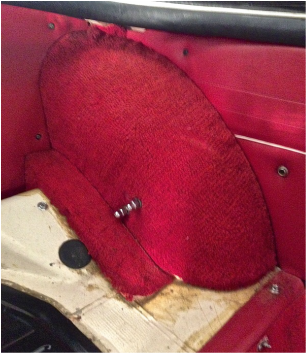
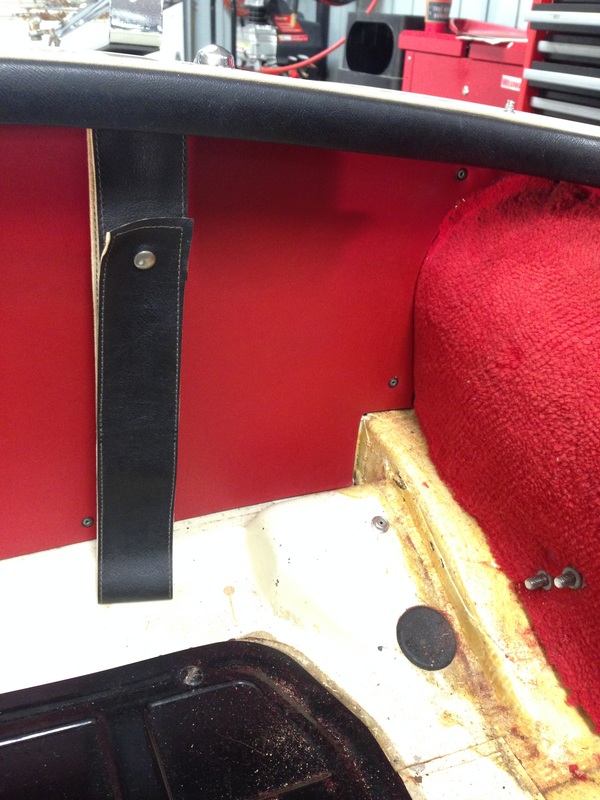
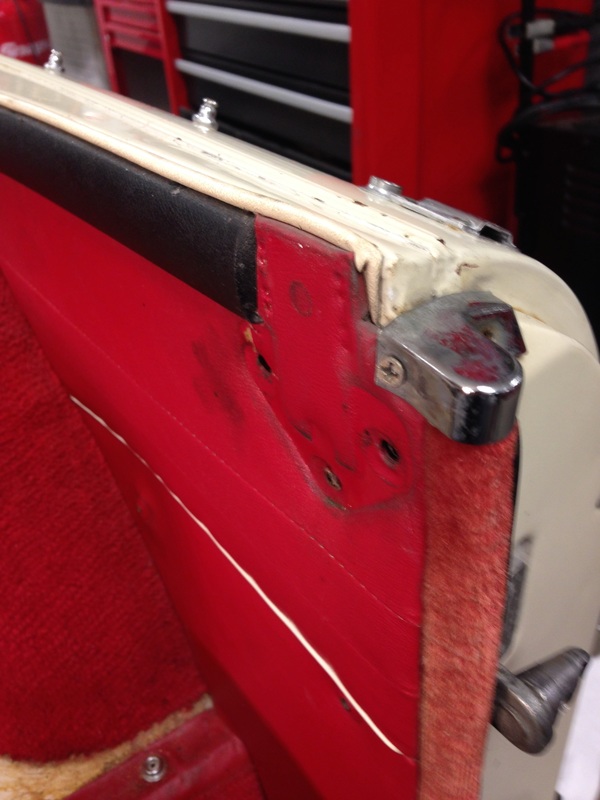
Next the rear cockpit rail which was black on all cars, it has a bead of contrasting piping along the top edge and is held in place by several sliding studs with nuts and washers accessible through nooks and grannies underneath. The black vinyl top stowage straps are installed next. Each vinyl strap is sewn with soft white cotton on the inside to protect top and a single snap in each. The rear bulkhead panel was a flat vinyl trimmed panel riveted in place tightly around the wheel arches with alloy rivets through tiny cup washers. The rear 1/4 panels were sewn vinyl covers with upper pleats and piping trimmed to masonite hardboards and screwed in place with more blackened screws and cup washers. The fuzzy red door seal pressed onto the door opening and buts up perfectly with the edge of the panels, the sill mats, and the edge of the front kick panes. Here you can see how the top chrome finisher covers the top edge of the seals and screws into the top corner of the panel. These seals are available new through MacGregor trim.
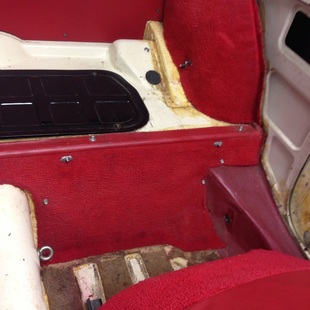
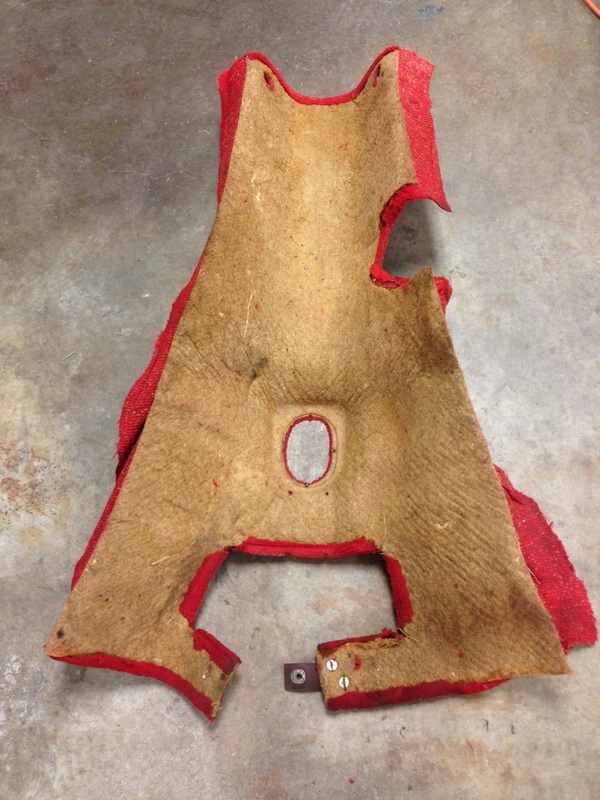
The rear 1/4 panels were finished with the chrome top mounting brackets and the top frame screwed to them with spacers. Each panel had 2 male snaps installed just below the piping for snapping the boot cover down to. The front kick panels were plain flat vinyl covered panels that fit snug and were screwed in place with more black screws and cup washers.
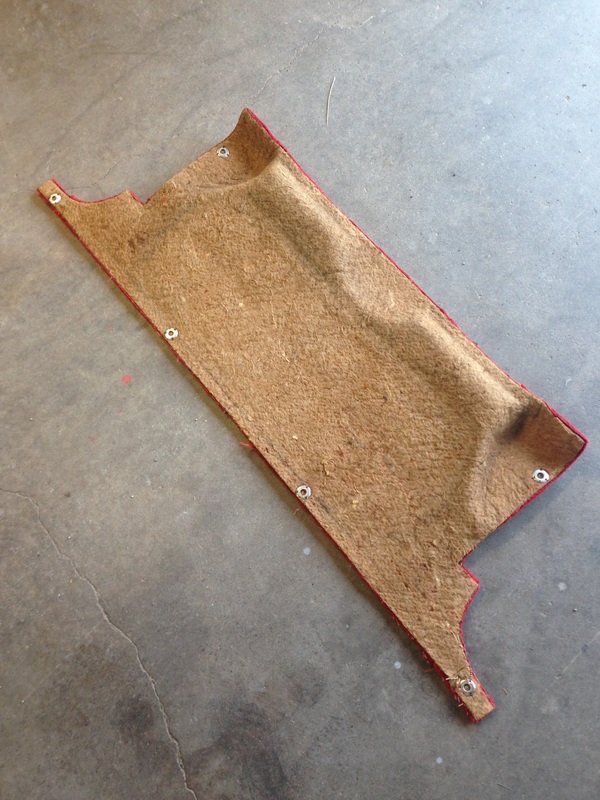
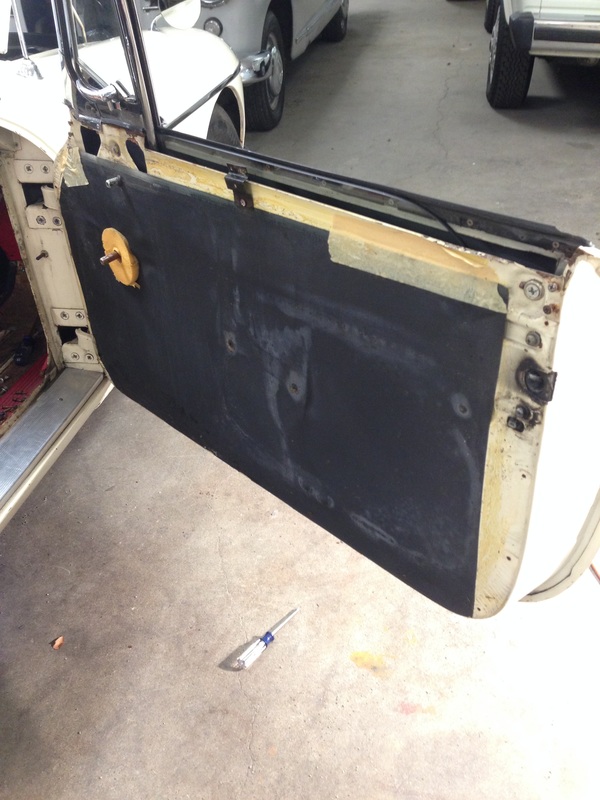
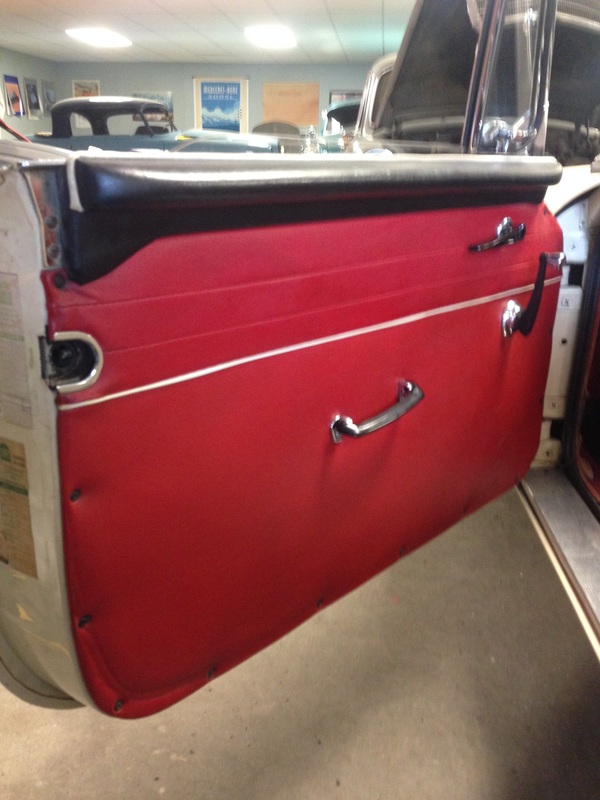
The doors had a thin black membrane glued over the metal to seal out moisture and then the door panels were screwed in place over top with foam circular pads sandwiched around the window cranks to prevent the panel from denting. The panels were trimmed in vinyl with pleats to match the rear 1/4 panels and again used black screws and cup washers.
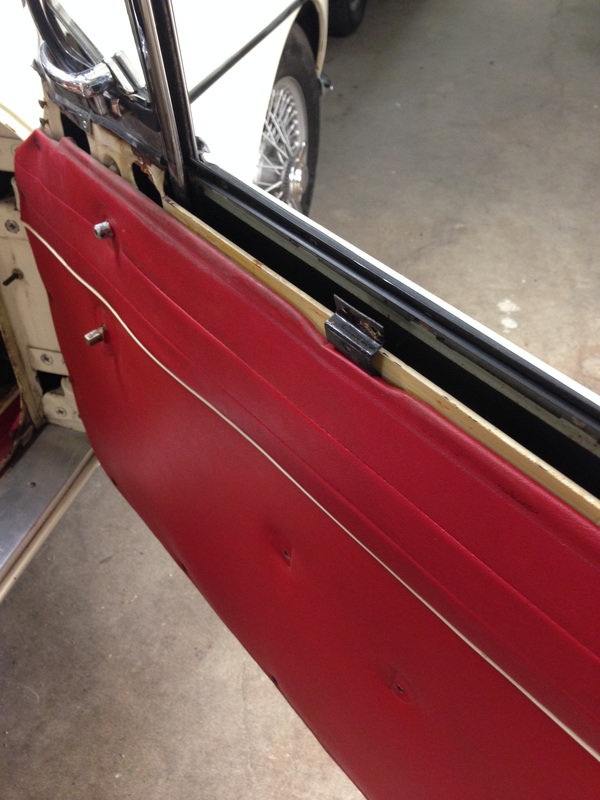
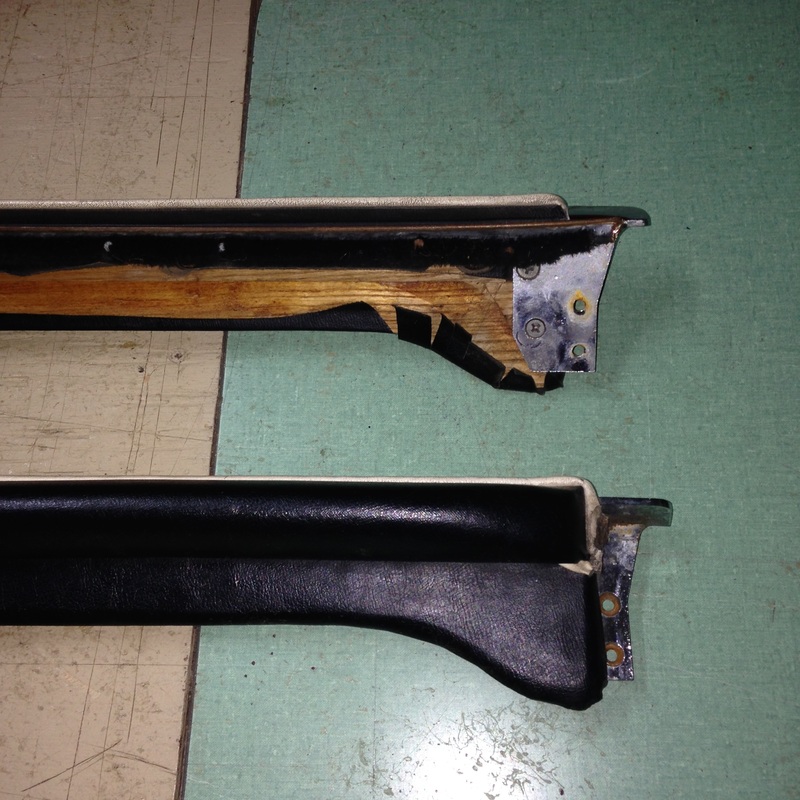
The early style door cappings were each a 2 piece assembly and always black. The inner wood shape was trimmed in black vinyl with the outer padded section screwed on from the back with piping in between. They were screwed in place with chrome screws and brackets at each end with brush seals and black piping to fill the gap along the window glass.  Finally the rubber floor mats were installed. These rubber mats are totally unavailable now. The front mats had 1/4" jute glued to the backside and the the mat was held in place with 4 snaps each. The under seat mats were also jute backed and held in place by the seat tracks bolted through black wooden seat runners. These will be carefully cleaned and possibly re-dyed to their original color.
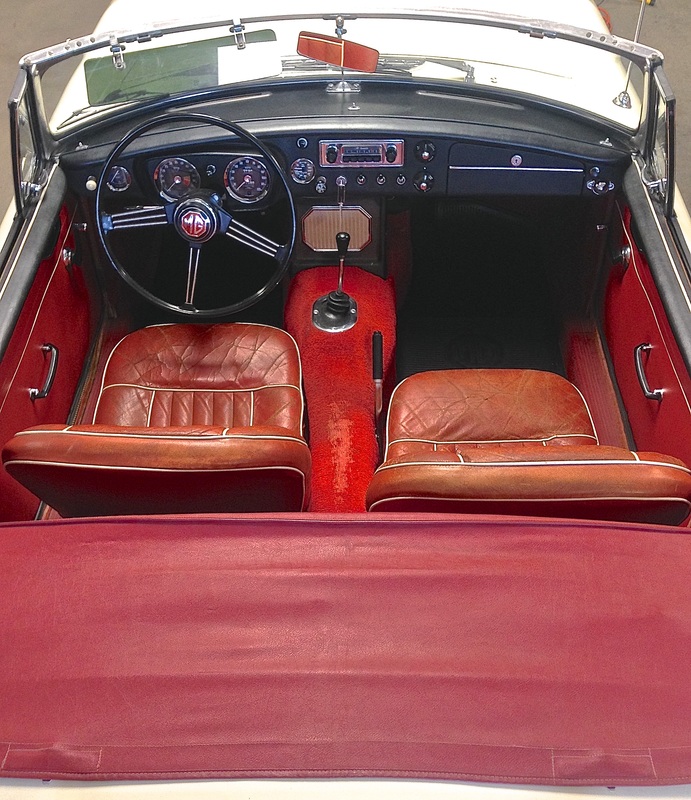
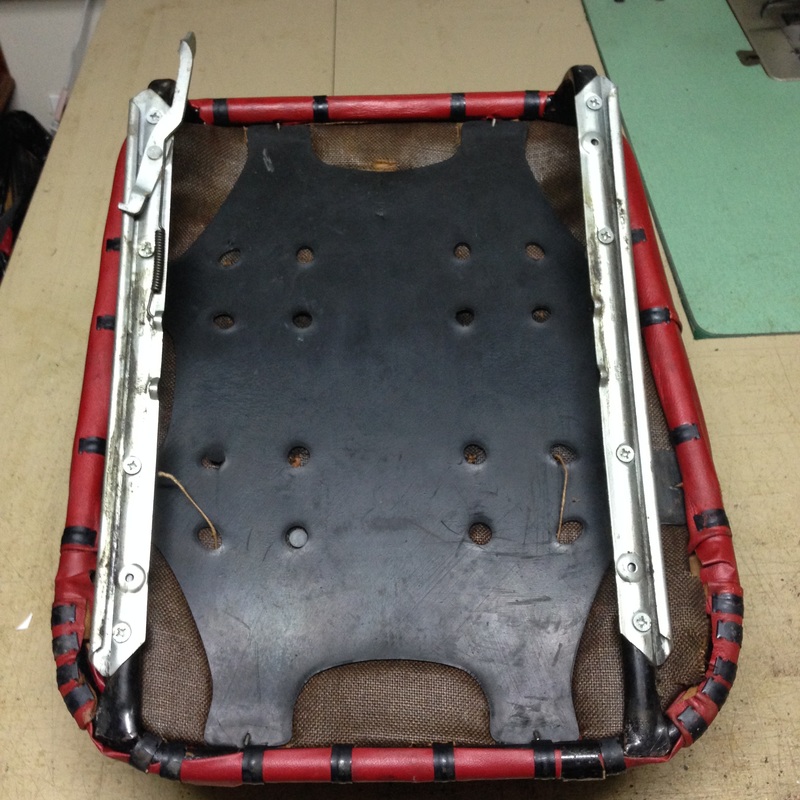
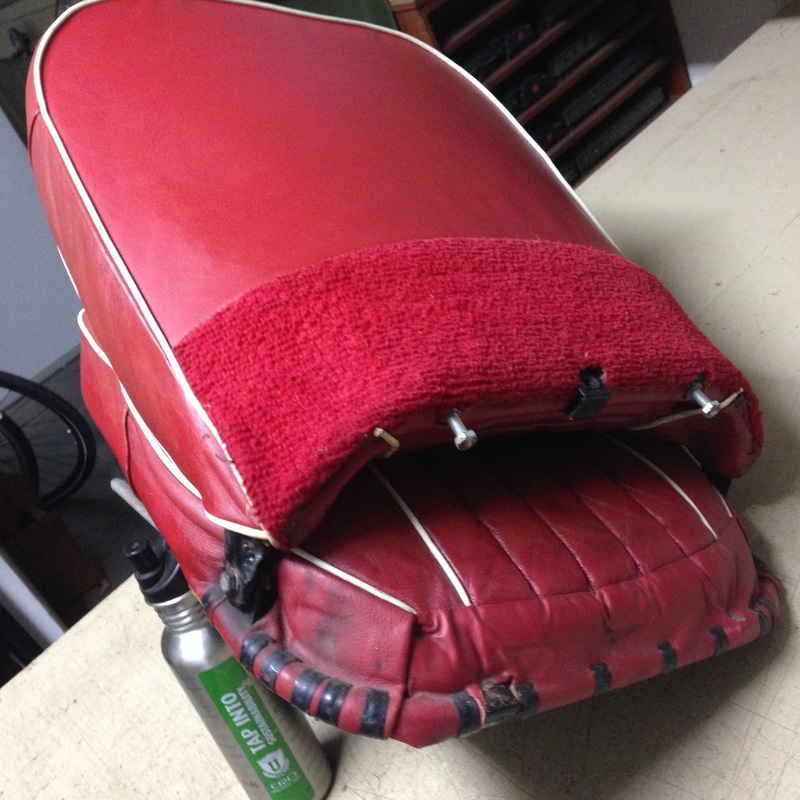
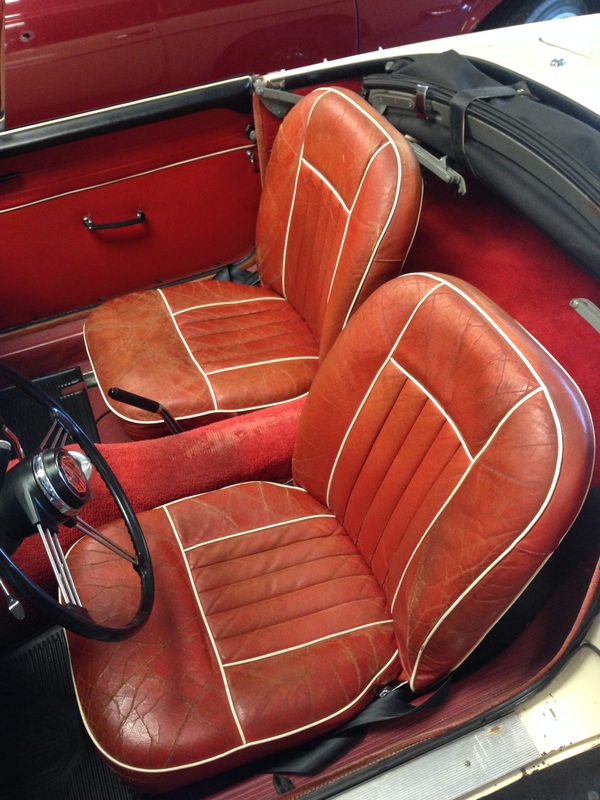 Finally the seats - nothing really new here, leather covers trimmed as so over moulded "dunlopillow" foams. Rubber diaghrams under the foam gave them a comfortable seat. The back rest rake was adjustable by 2 long bolts at the bottom of the squabs. All facings of the seats were leather except for the backs of the squabs which were vinyl with carpet along the bottom 6". The contrasting piping was also vinyl.
These seats as well as the rest of this interior are in such good shape for their age! I plan to clean them up, spruce up the foams and inner pieces and re-use them for as along as I can make them last. A lovely patina for such a pretty car! Ciao for now!
9 Comments
George Wilder
3/9/2016 03:10:29 am
The hood (roof) frame on your car looks very different to standard fitments
Geoff Chrysler
3/9/2016 06:39:20 am
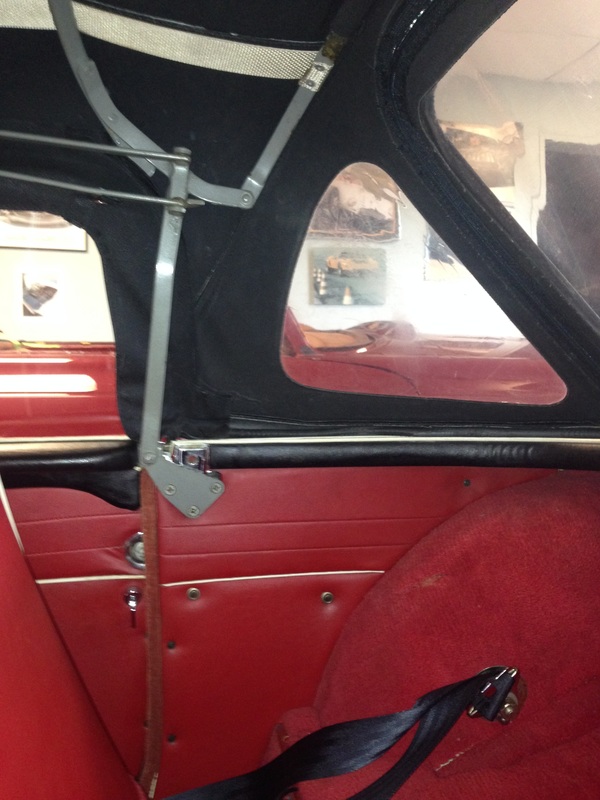
Yes that's the correct factory folding hood frame that the car came with. There were 3 different styles of these folding hood frames, the really early ones (only seen in '62), then this one, and then another later style that came in '71 I believe.
Kent Covingtin
3/20/2016 03:08:14 pm
Thank you for the detailed article complete with excellent pictures. I am a very big fan of the early 3 main MGB. When was your car produced? I have a Feb '64 white/red MGB myself in which I added OD. It is a California survivor car now on the East coast.
Geoff Chrysler
3/20/2016 03:27:09 pm
Thanks Kent, mine is also a Feb '64 car, I would love to see photo's of yours! They would have been identical sisters. I've been thinking of adding OD too, however it seems finding the right parts (like a vacuum switch) is just about impossible these days -
Steve
5/2/2016 06:14:35 pm
Fantastic detail and a great reference. I too have a Feb 64 white/red B.. An eBay purchase and currently in many bits!!!
howard Wellens
10/12/2020 08:26:40 am
I am working on a 1964 MGB ,white /red interior 7/3/2021 07:53:33 am
Roofing strategies we can find from here to get more knowledge on different services. So, I felt very happy to use these original interior triming services.
Alan Traylor
2/21/2022 12:40:05 pm
Great detail. I am a bit confused looking at the detail at the top of the door inside. You call that buffer a door capping? My passenger side has worn and exposed rope along the top. Are you saying this is where the 2 piece buffer (capping) meets? Will commercially available panels have this beading or rope detail?
Rob Tedrow
3/6/2023 07:45:35 pm
Thanks for posting. I’m finishing a 1963 vin 13389 and didn’t have a lot to go on regarding carpet and vinyl floor mats. Two things I saw that are different on my car: Your comment will be posted after it is approved.
Leave a Reply. |

Archives
December 2023
|

 RSS Feed