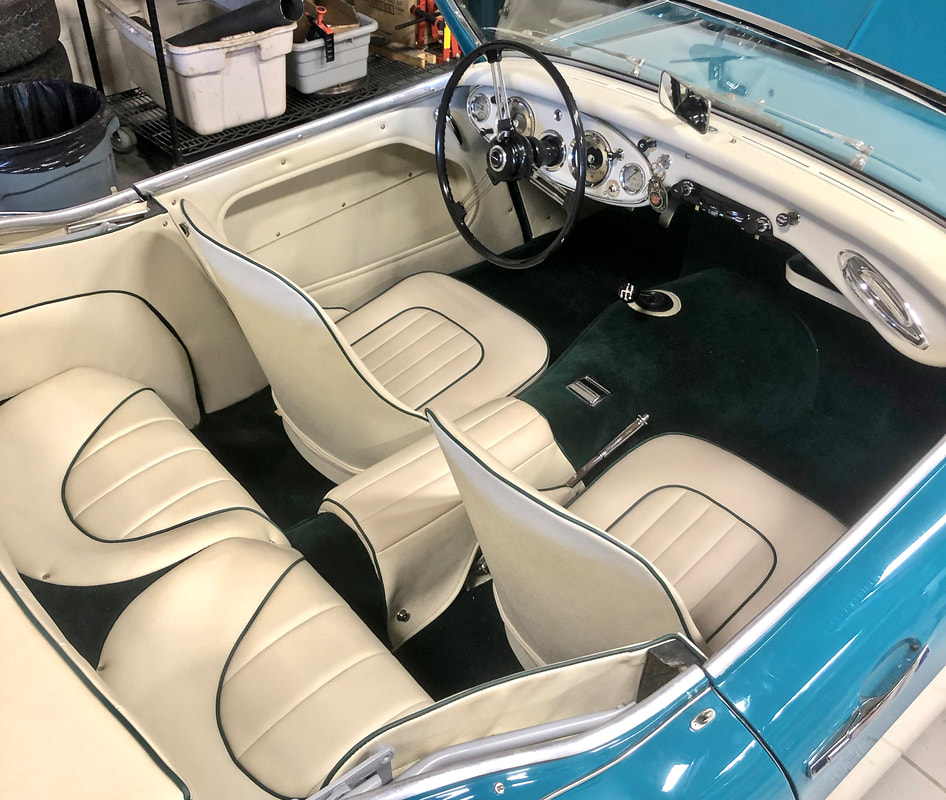
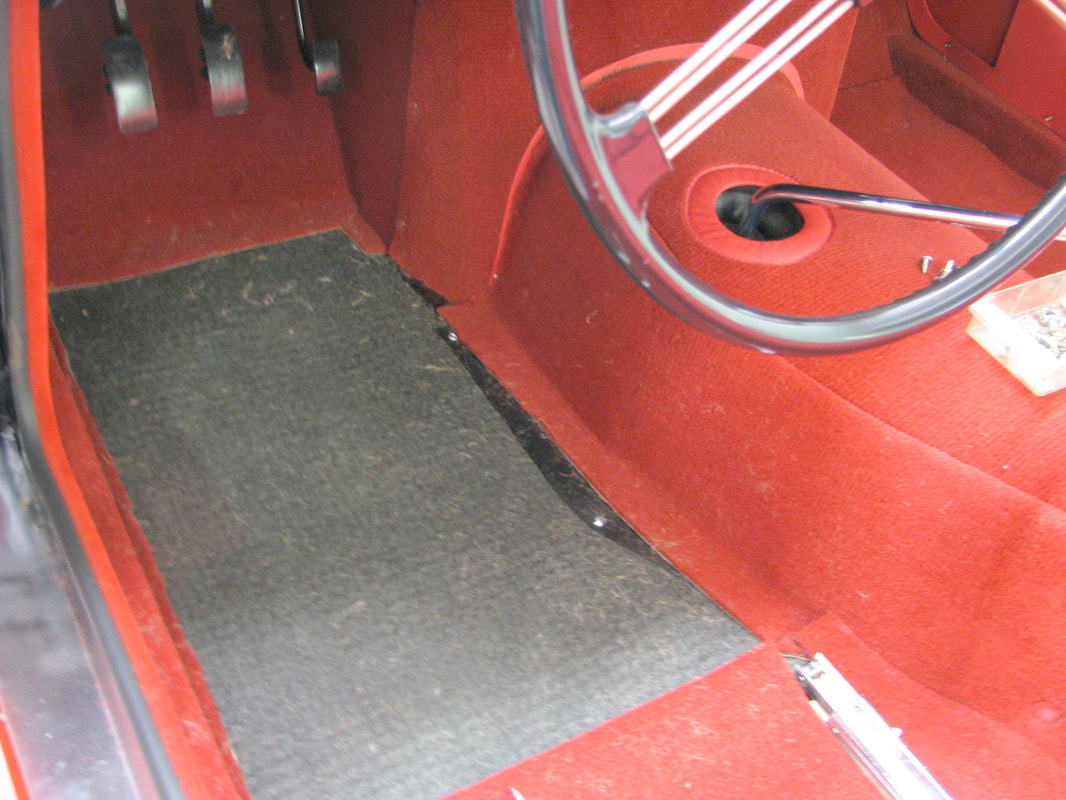
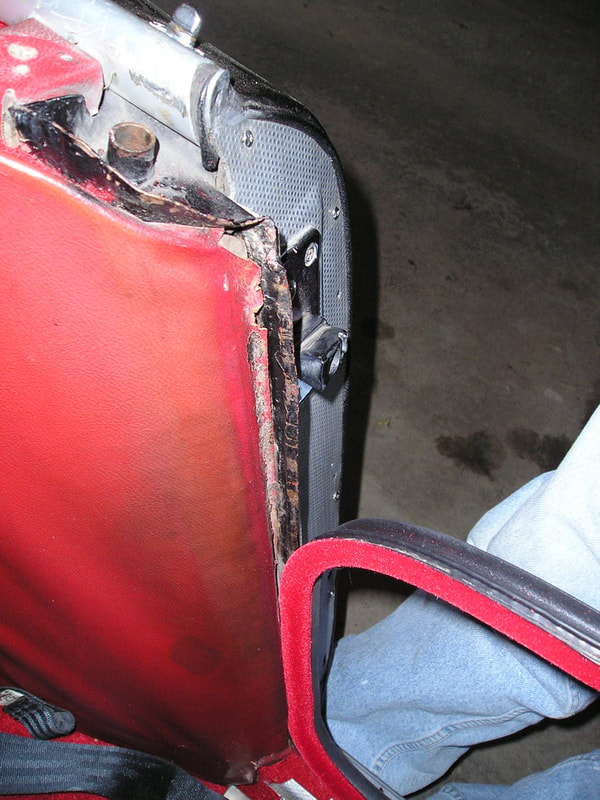
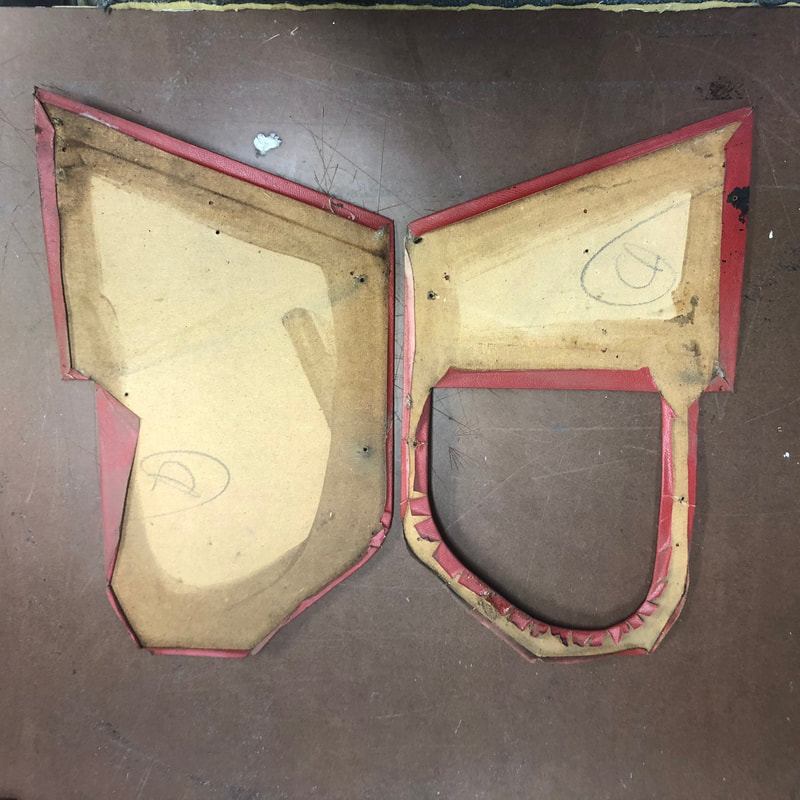
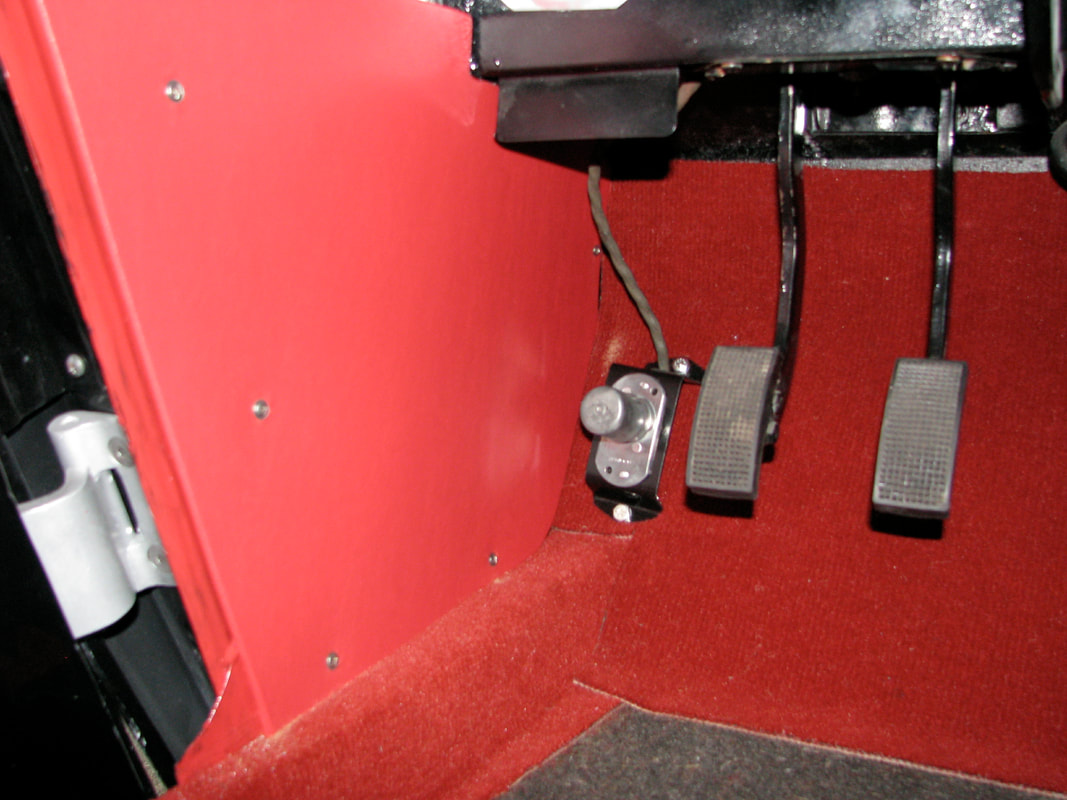
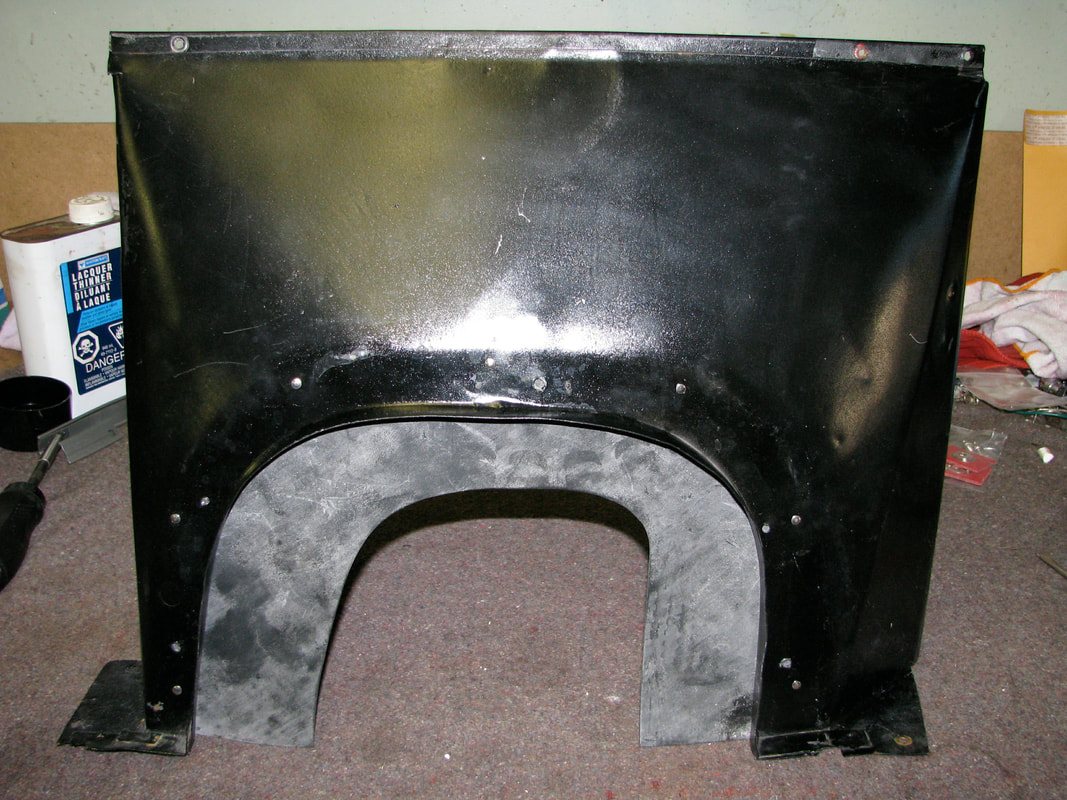
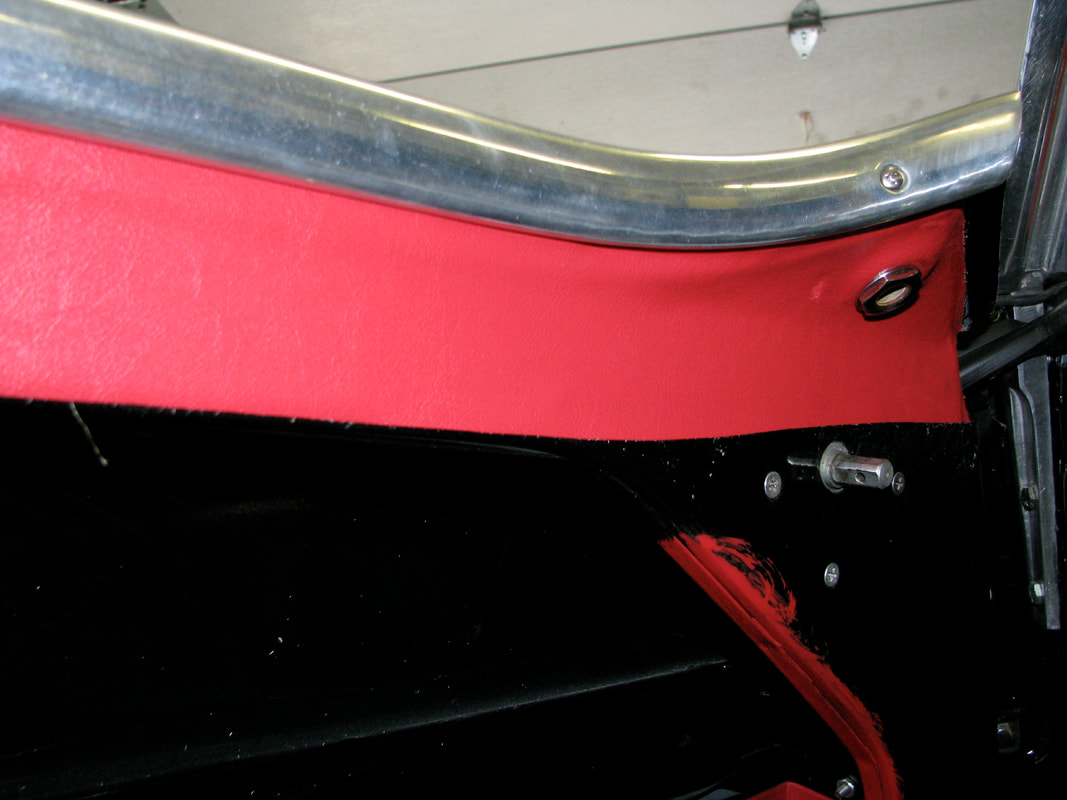
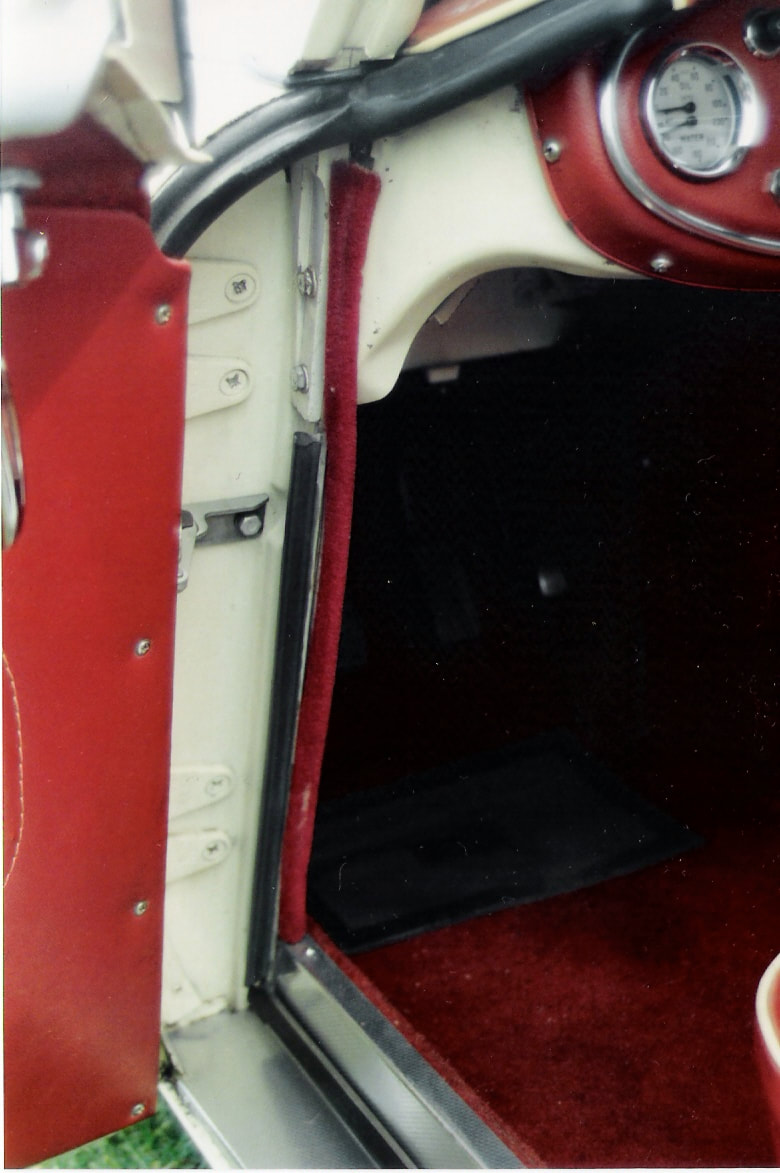
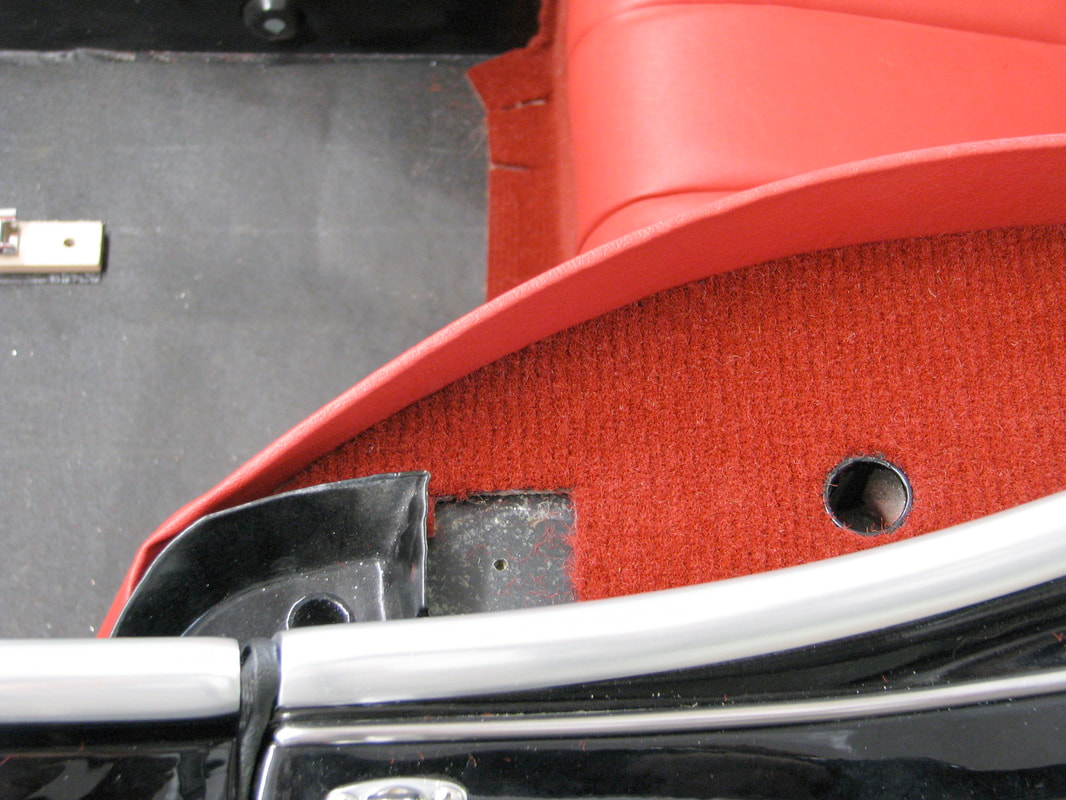
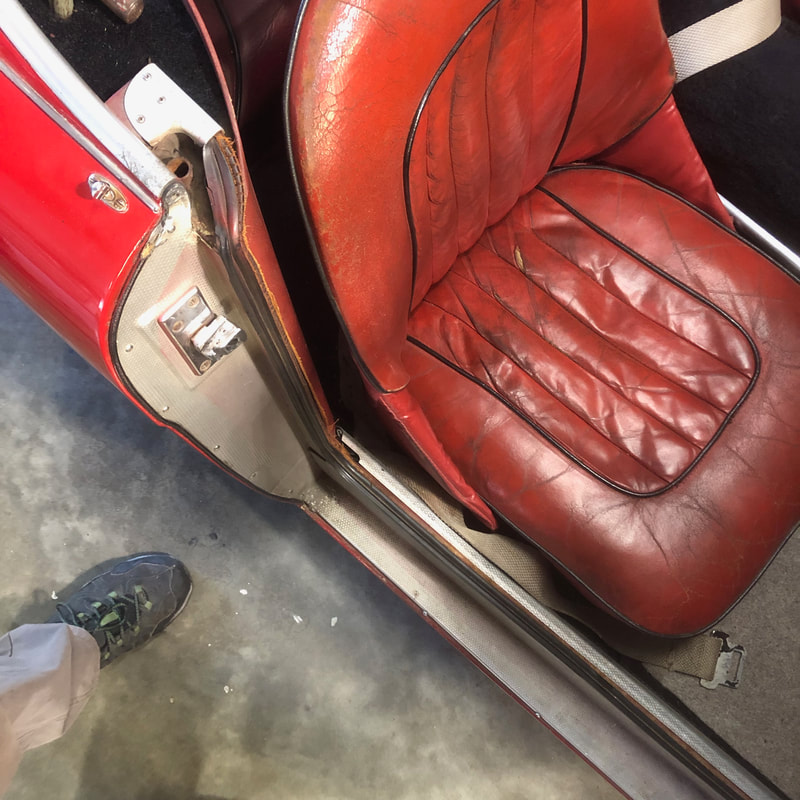
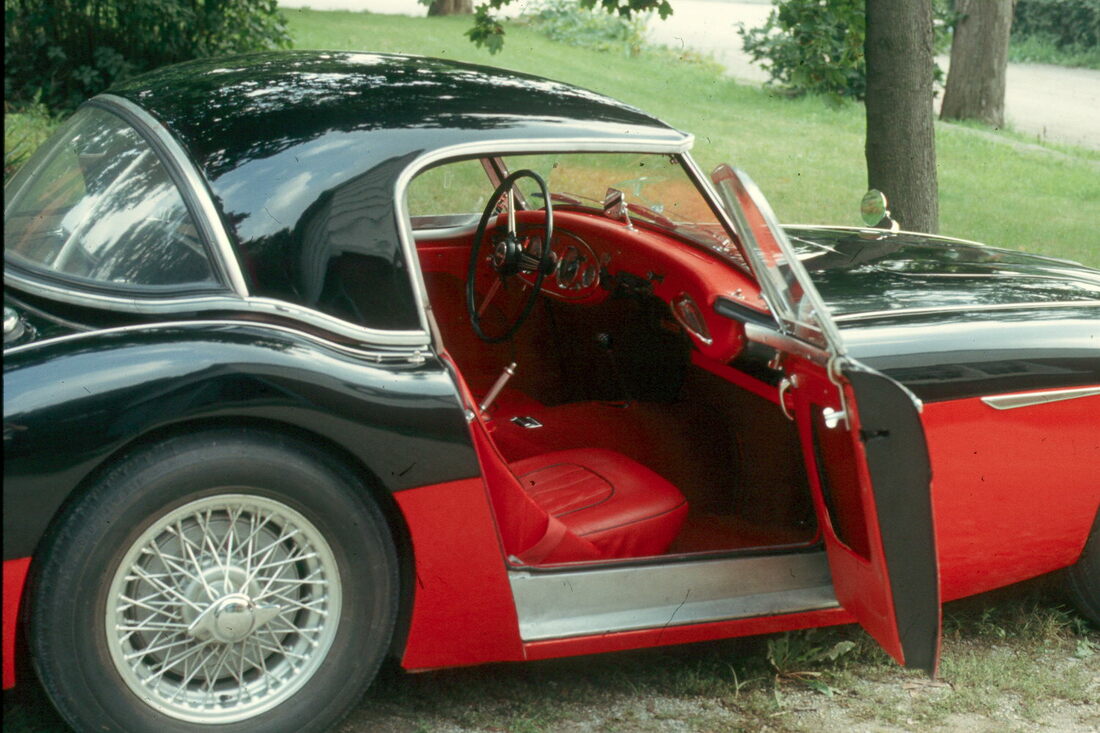
 It's been a busy year so far for Rightway Heritage Trimming, especially when it comes to Austin Healey trim. In doing so many of the 4 seat Healey 100-6/3000 roadsters back to back recently, I've had the opportunity to verify patterns, as well as document some interesting details I've noted time and again in the eveolution of components and trimming methods over the years.. When Austin Healey released the 100-6 in 1956 it featured a larger cockpit with 2 rear seats just big enough for a couple of children - suddenly Healey was becoming a real family mans sports car! For the first few years of the 100-6 BN4, production continued at the Longbridge factory as it had done with the earlier 100-4 models. However in 1958, production of the 4 seat BN4's was halted for several months so they could focus on the production and release of the new 2 seater 100-6 (BN6) When production of the BN4 finally resumed, they were relocated to the Abingdon factory which also coincided with several production detail changes. For the purposes of this article I will just be focusing on the interior details as they evolved on the 4 seat "roadster" models from the early 'Longbridge' BN4's, through the later 'Abingdon' BN4's as well as the BT7 models. The 2 seat BN6/7 models will be featured in a separate article - To start off, it should also be noted that it seems to have been common practice for the factory to hand paint several specific areas of exposed metal throughout the interior area in whatever colour matched the interior vinyl. For example - the front lower edge of the door opening was painted red on this BT7 - in fact the entire flange around the door opening that the door seal would press onto was hand painted red before trimming so as to hide any exposed metal. The edge of the inner door pocket opening was also hand painted: 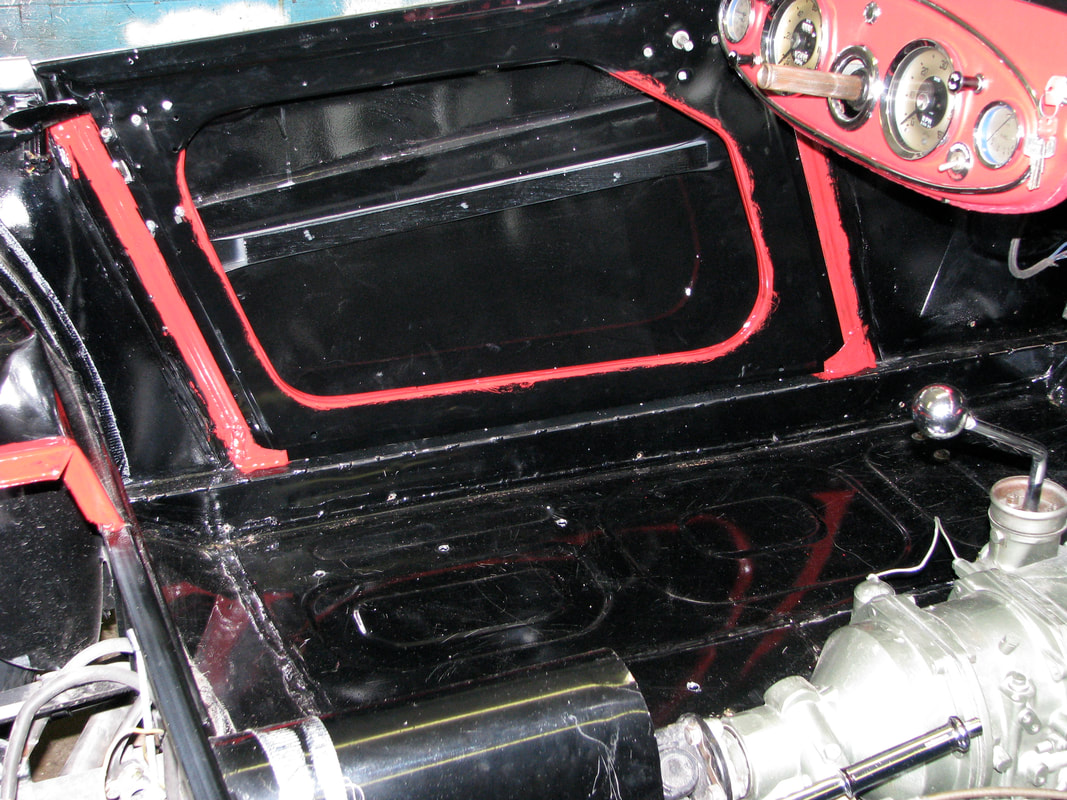 With the hand painting done first, the next step added at the factory was to cover the main floor pans with a layer of tar-paper, it's not clear what the reason for the tarpaper other than presumably to protect the floors from moisture. Then the inner sills were covered with pieces of Karvel carpet. These sill carpets would have been the FIRST pieces of carpet to be installed, having approx 1" overlap onto the floors and toe boards. Later the toe board carpets would neatly overlap the sill carpet in the front corners to prevent any gaps. 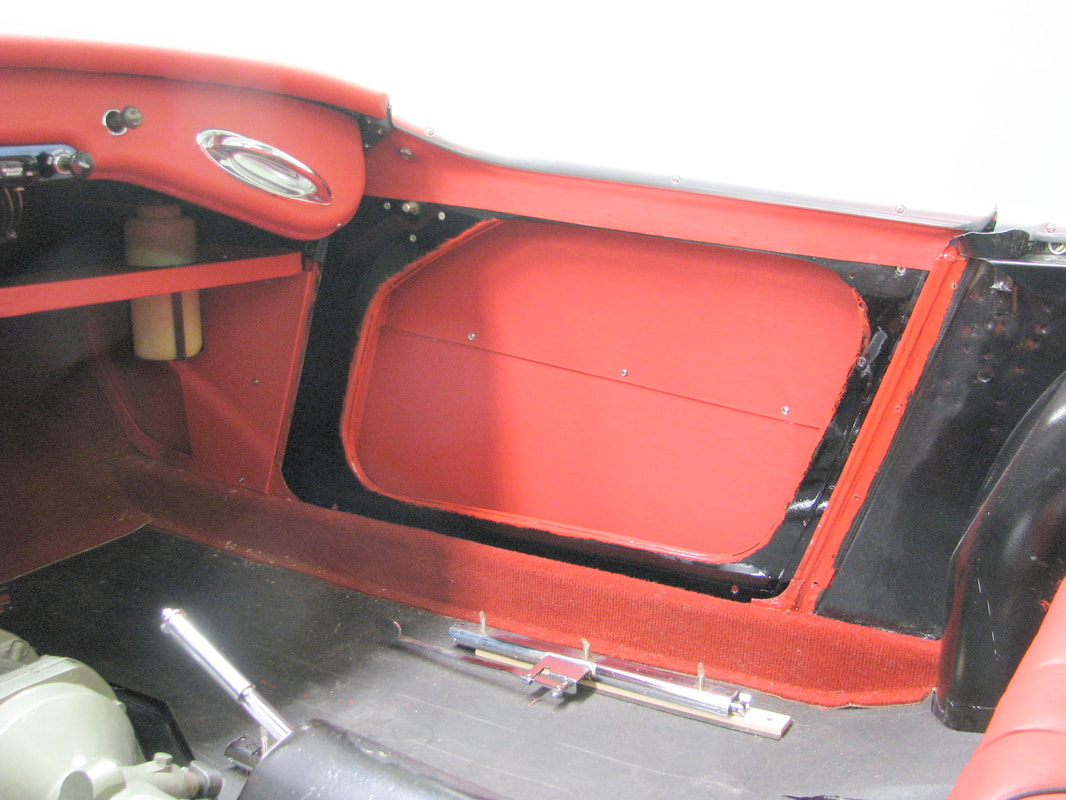 The toe boards and inner bell housing were first covered in some pieces of 1/4" jute with a black textured coating on one side. Then the jute was covered with some Karvel carpet mats glued in place. These pieces of carpet were cut neatly around the sills in the outer lower corners and then made a 90 degree bend in the inner corners so the carpet would cover the toes boards as well as the inner front tunnel area back to where the bell-housing panel would start.. 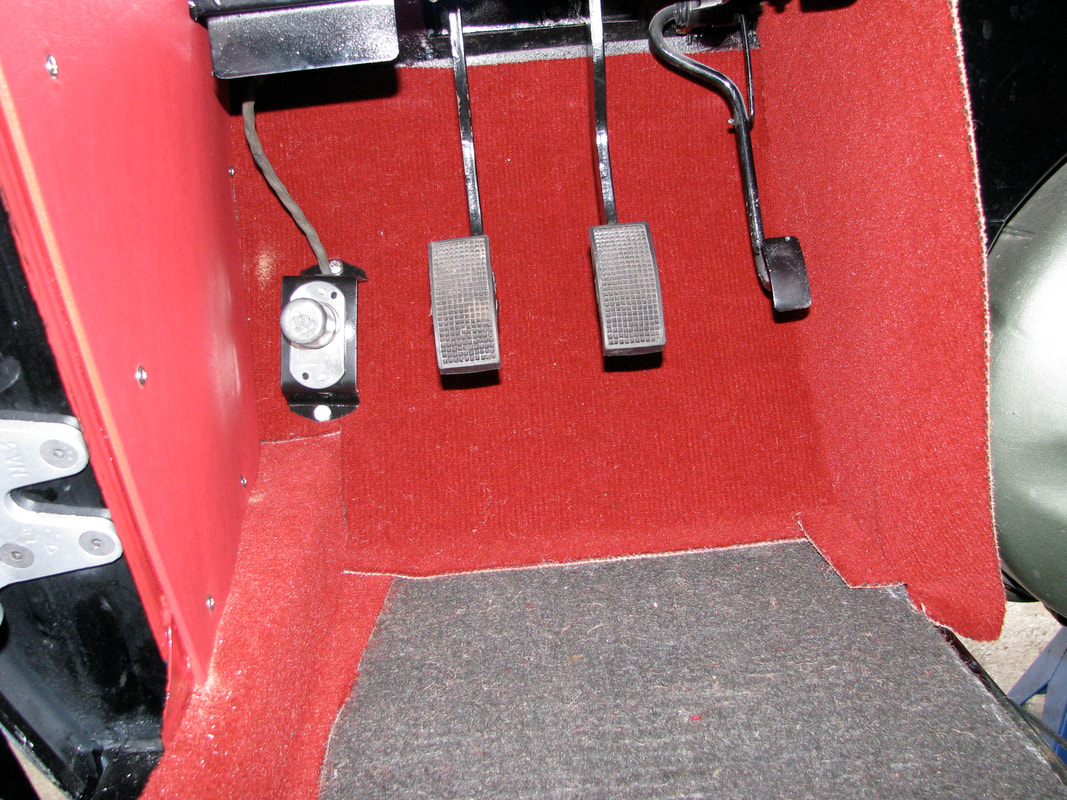 The kick panels were made of Masonite panel board trimmed in a thin non-stretch vynide type of vinyl. -Vynide was the standard type of vinyl used on Healeys throughout the years, it was quite thin, had a matching colour backing and a fairly pronounced 'leather' grain to it. (eventually later BJ8 models used Ambla instead of vynide) On the right hand side only, the kick panel had a large D shaped cutout with a separate piece of vinyl glued to the body behind it which provided a bit more toe room for RHD cars. This R/H foot-well detail was standard on all 100-6/early 3000 models regardless of what side the pedals were on. The panels were held in place using #6 phillips oval head trim screws and countersunk cup washers - these screws and washers were the standard used for all Healey interior trim panels.
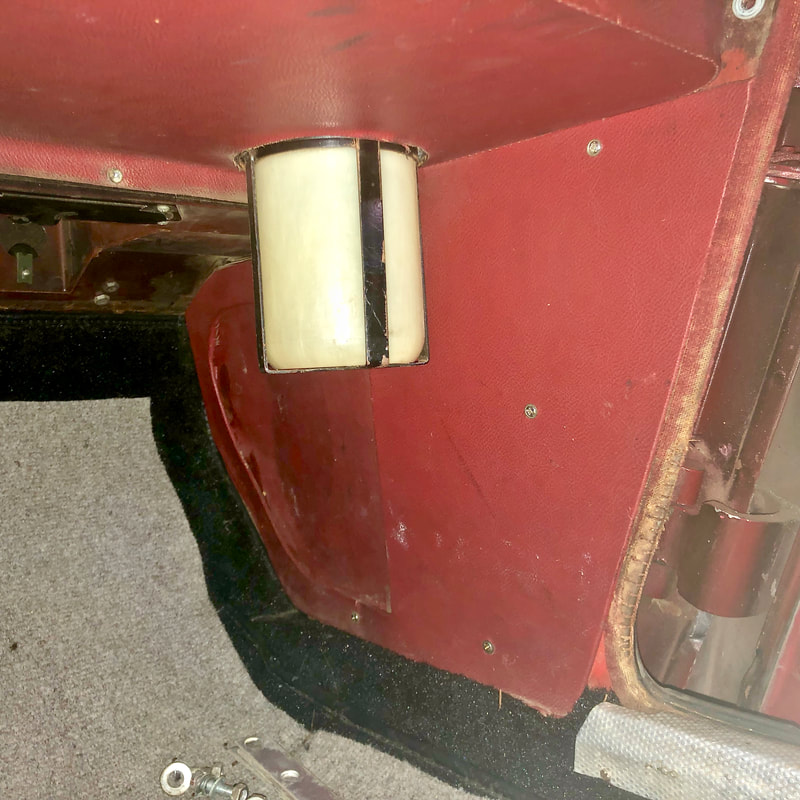
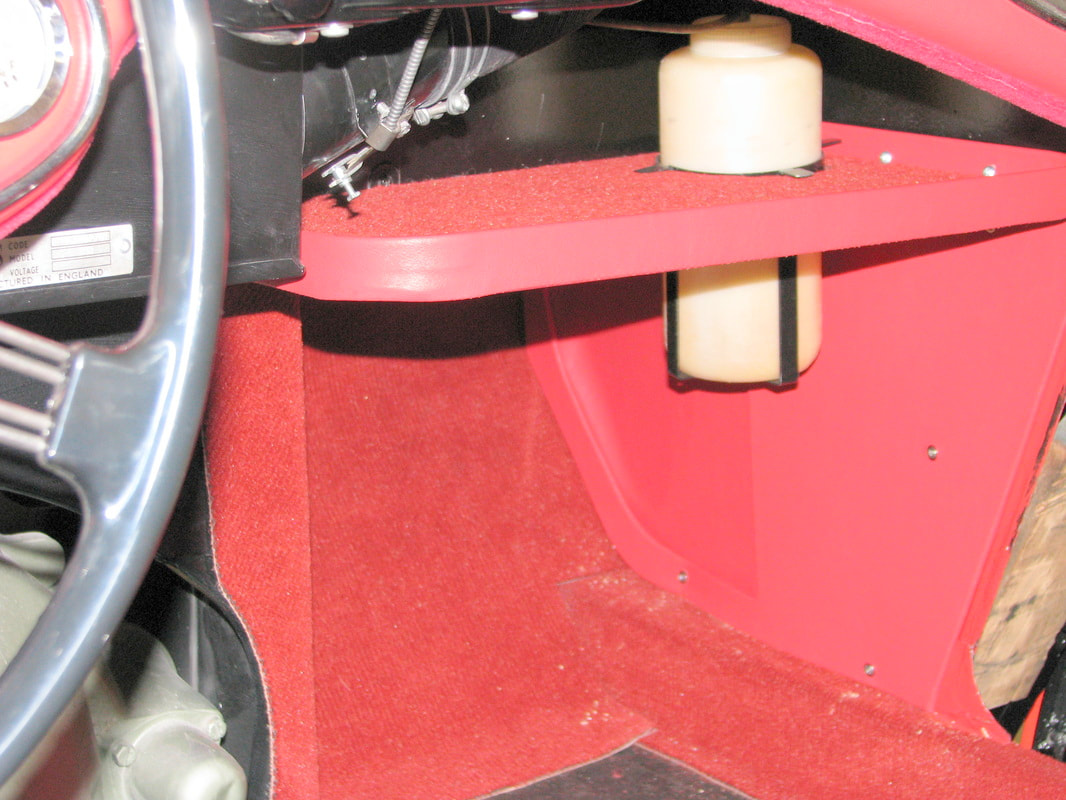
There was a neatly trimmed steel parcel tray under the dash on the passenger side. It was trimmed with a sewn vinyl cover that covered the entire bottom and front perimeter edge, and had a piece of Karvel carpet glued in on top of the tray. There was also a round cutout for the washer fluid bottle and bracket to sit into...
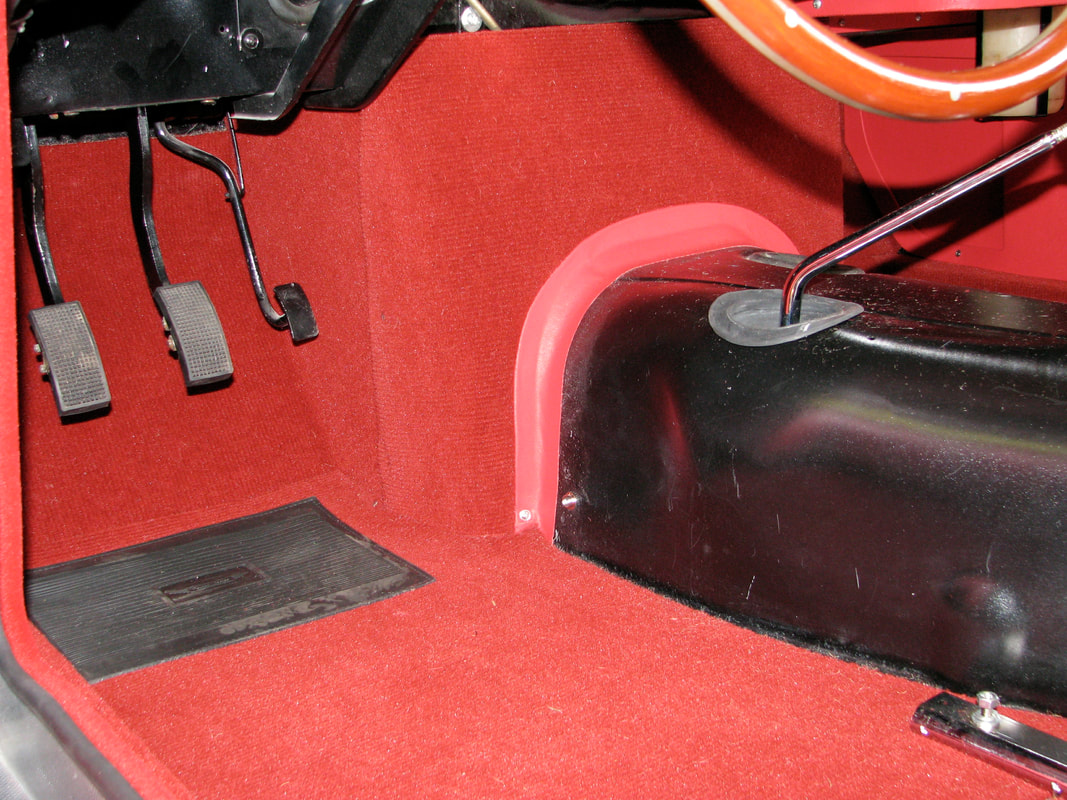
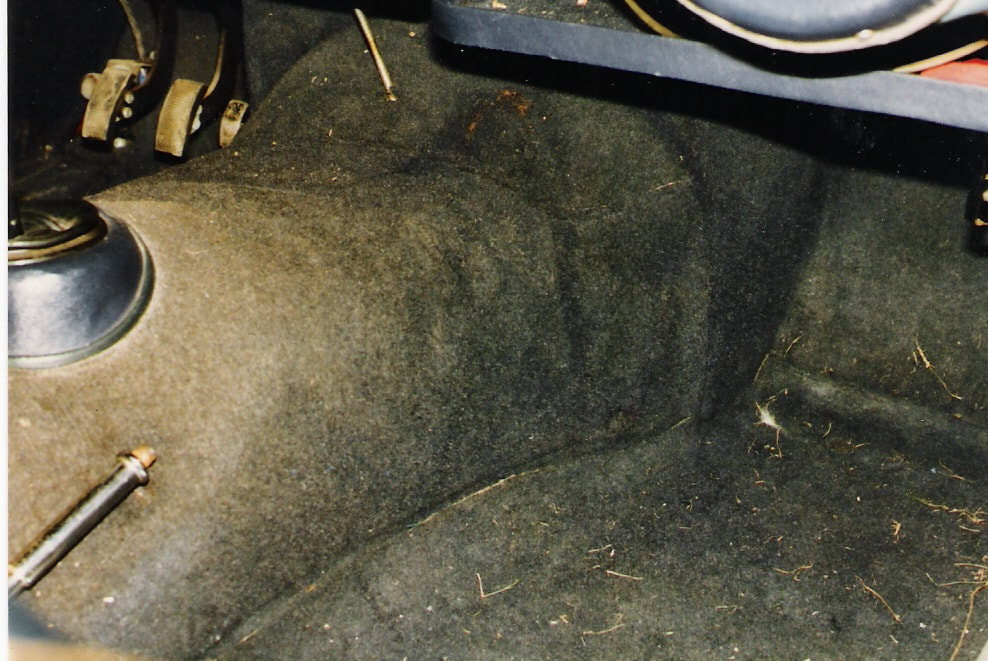
The main floor pans having first been covered with a layer of black tar paper, followed by some more black coated 1/4" jute under the front mats only, and then the Karvel floor mats which were snapped in place over the jute mats. The drivers side mat had a rubber heel pad sewn to it with the "Austin" logo in its center. More Karvel mats continued under the seats with slotted cutouts for the seat tracks. They were all unbound and used 3 prong brass carpet snaps. 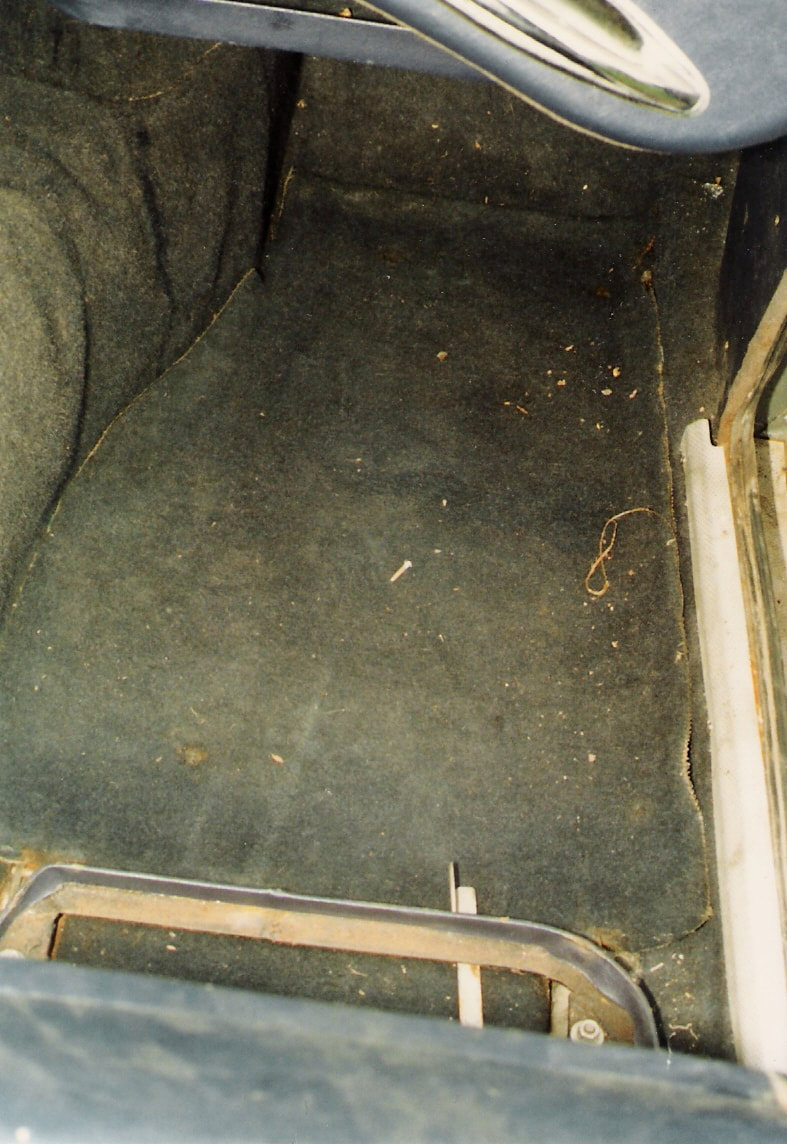 On side shift cars only, there was a separate curved steel panel that formed the front tunnel bulkhead. This panel had a rubber seal riveted to it that hung down and sealed around the gearbox. Like the toe boards, it too was covered in a layer of jute, followed by Karvel carpet that was trimmed around the edges of the panel. The panel was held in place with #6 trim screws and washers up either side and into the floor...
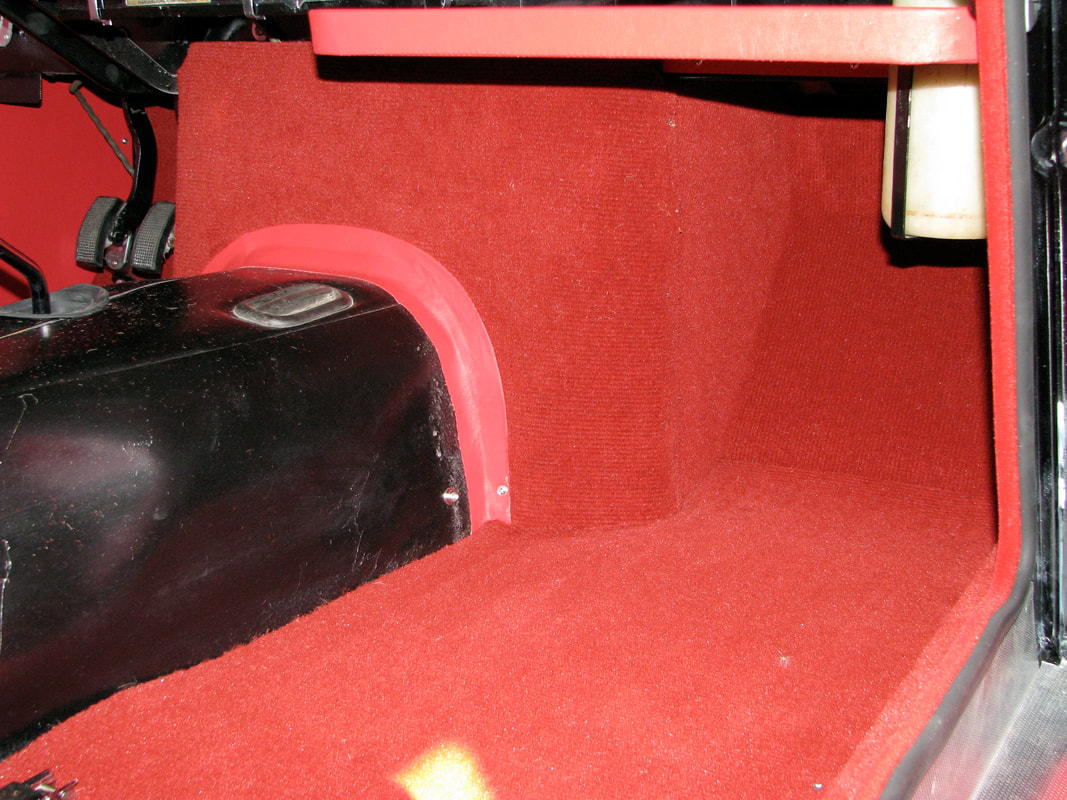
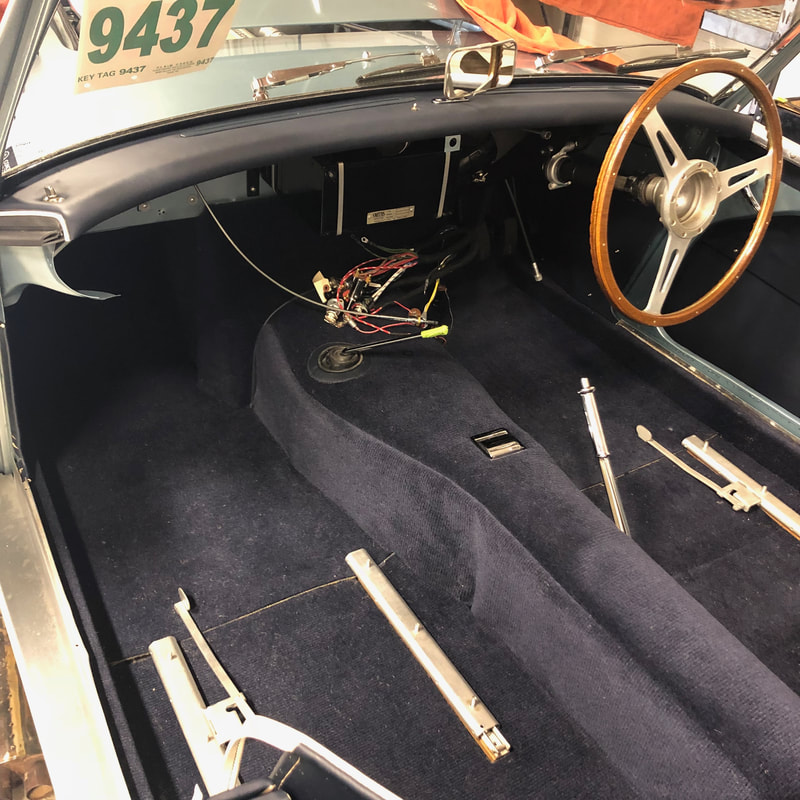
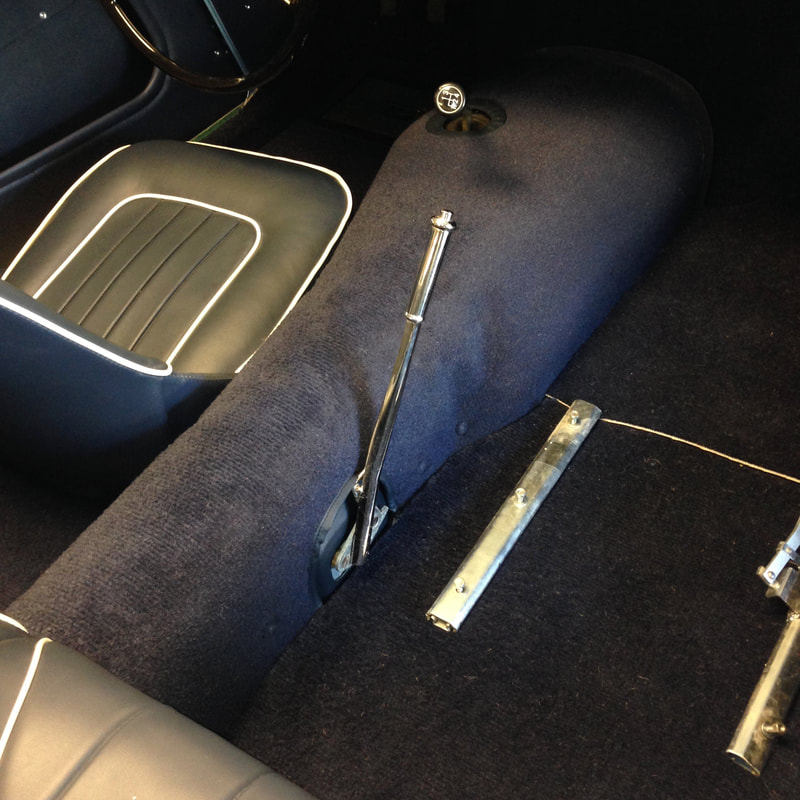
The main tunnel body on side shift cars was similar in shape to the earlier BN2 models. It was painted black and held in place with screws into the floor and the forward bulkhead. There was a vinyl cover over the front lip of the tunnel body where it met the forward bulkhead panel. The Karvel cover was sewn with a longitudinal seam, with a 5/8" binding around the shift opening and some more 3/8" binding around the handbrake cutout. Jute insulation was glued to the underside of the carpet cover and the entire cover was snapped in place over the tunnel body extending all the way to the rear bulkhead.
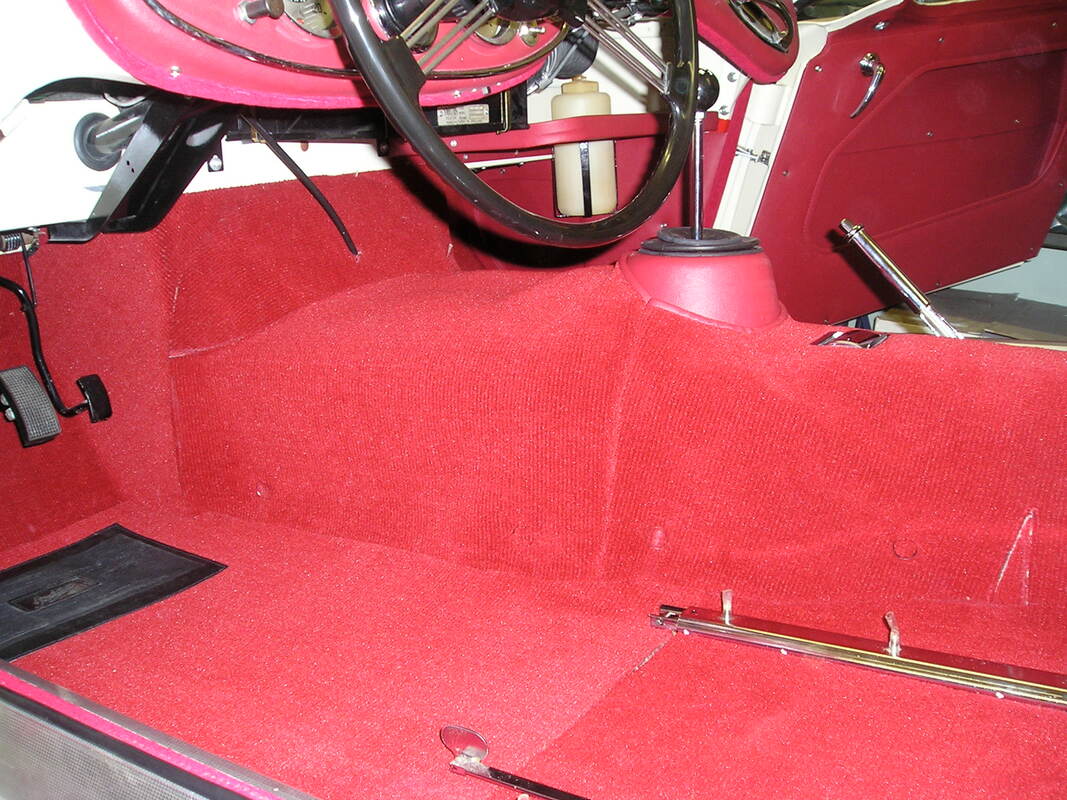
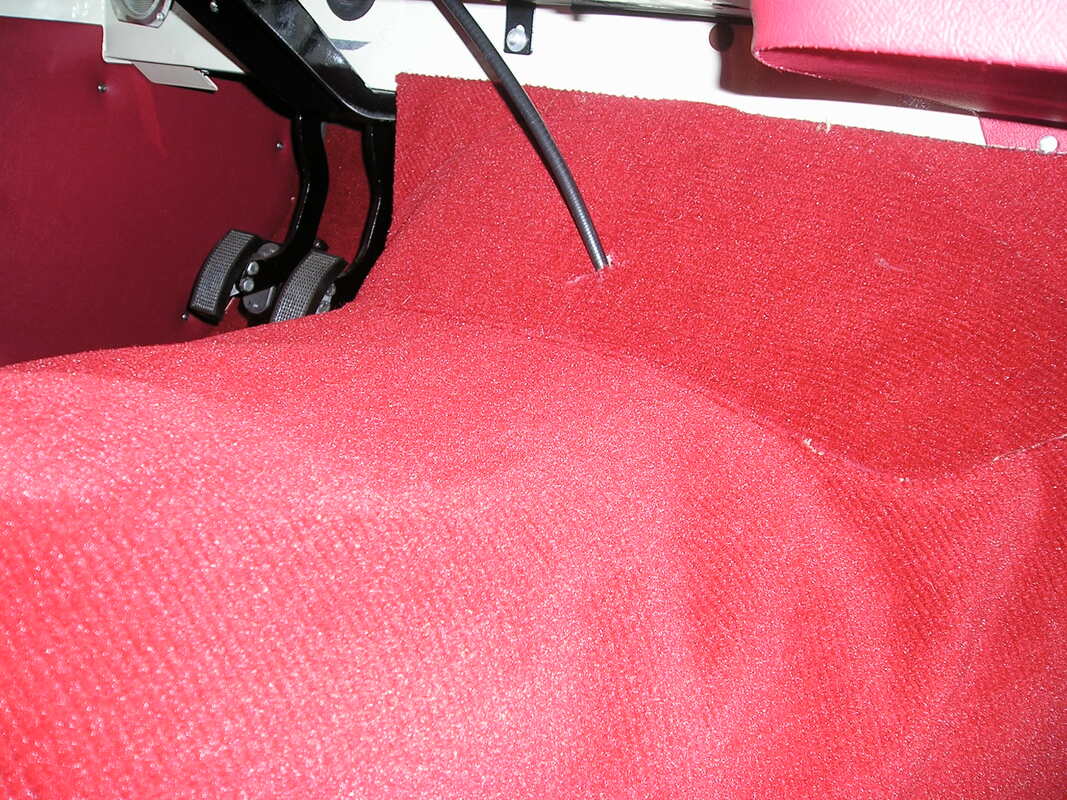
 On later center shift BT7's, the tunnel body was made of fiberglass. It had a vinyl cover glued over the shift hump, and its Karvel carpet was sewn with a few seams and darts to help it loosely conform to the shape of the tunnel body with the center shift hump protruding through a bound hole in the carpet. There was also some binding sewn around the handbrake cutout and a vinyl cover was glued to the rear tunnel extension around the handbrake lever...
There were several different styles of center armrests that evolved over the years of Healey roadster production. The first style seen on early Longbridge BN4's from 56-57 was a very similar design to the previous BN2 design, with a pleat length of 15.5" - It was a saddle design with 3 leather pleats on top and vinyl sides that extended to the floor:
The second style which turns out to be quite rare, was a similar 3 pleat design, but with sides that only extended down a few inches on either side. This style has appeared on BN4s during the Longbridge/Abingdon transition era of late '57/'58.
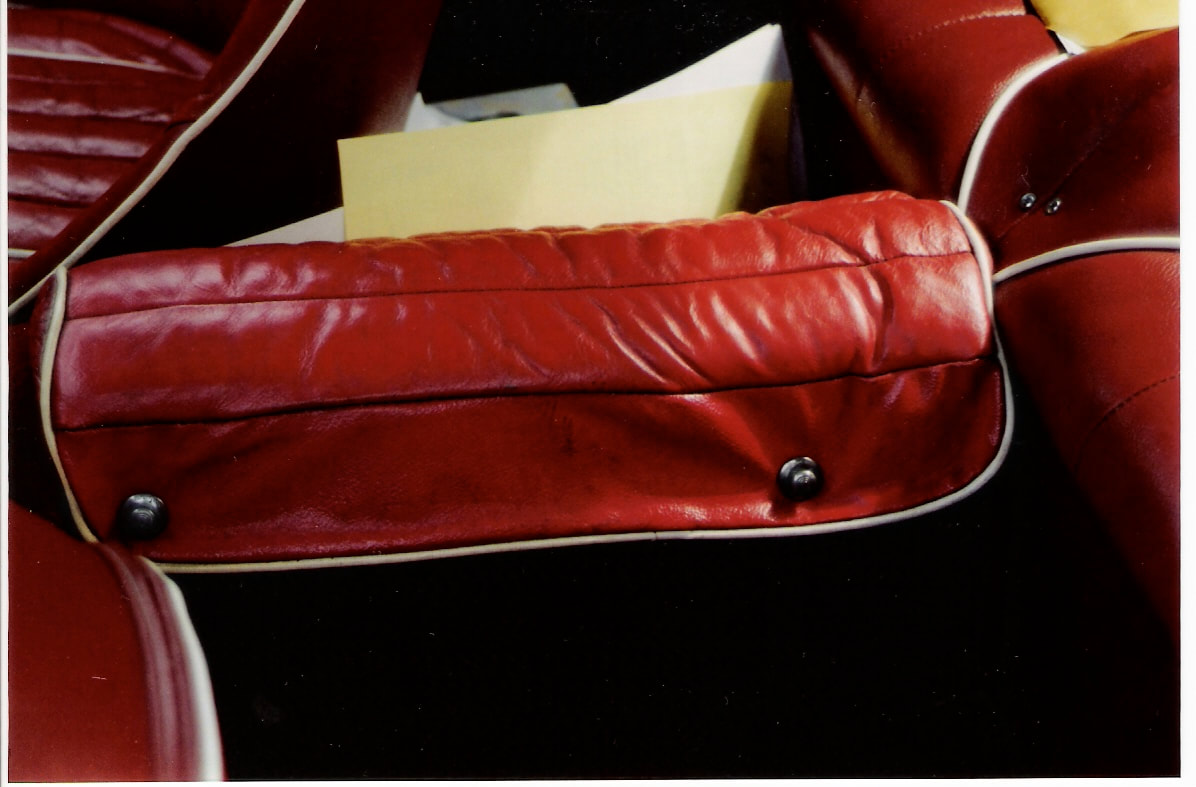
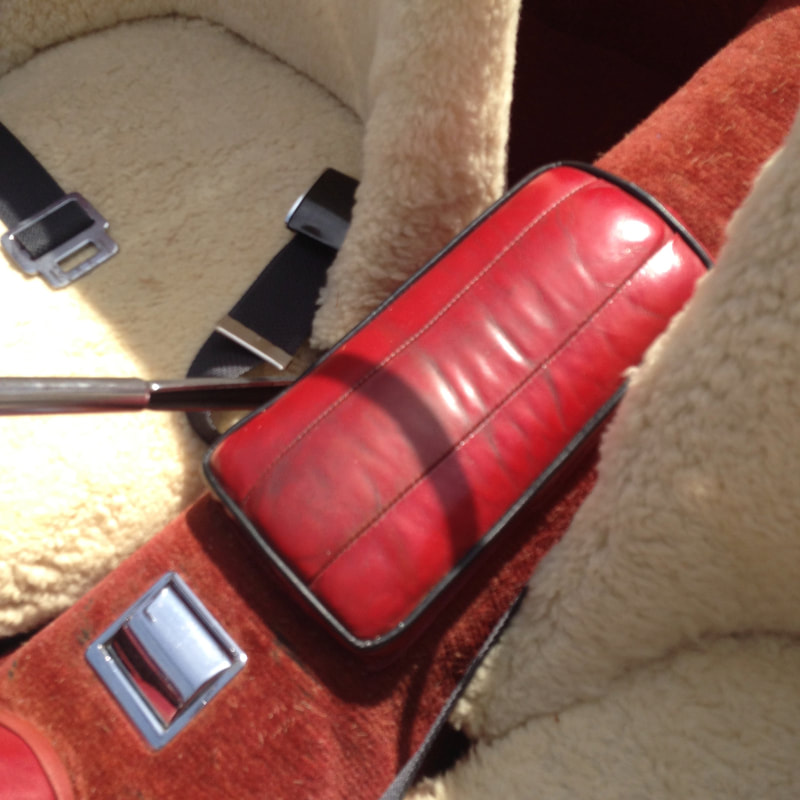
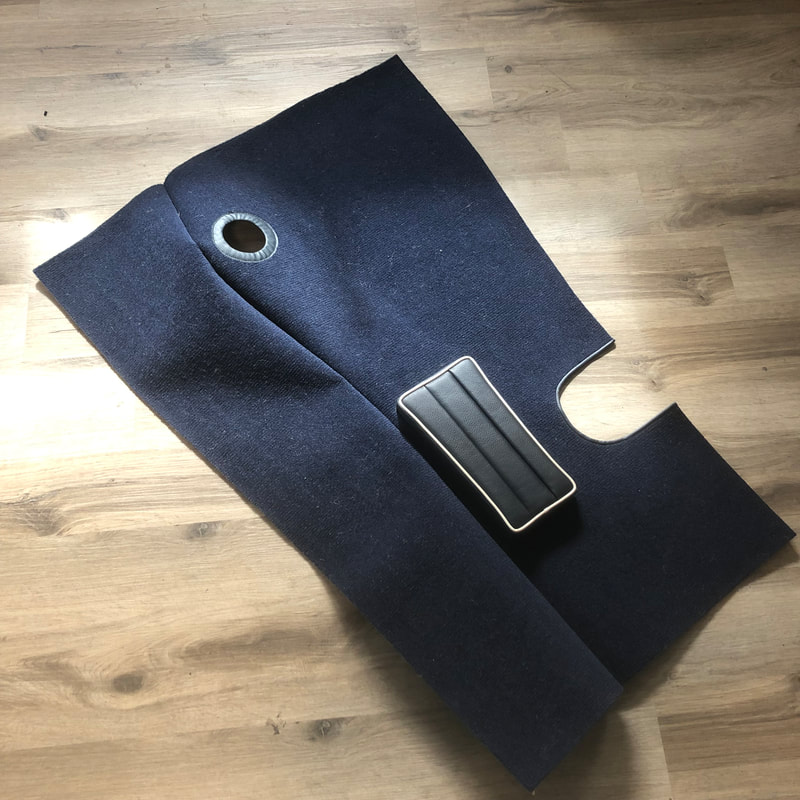
Finally they decided to go with this 3rd style armrest that was used on late BN4s and all BT7s (-as well as 2 seat BN6/7's and later BJ7 models). It was a smaller tapered rectangle design with 3 leather pleats on top (the center pleat being wider), and piping with vinyl edging. This armrest was actually sewn directly to the carpet:
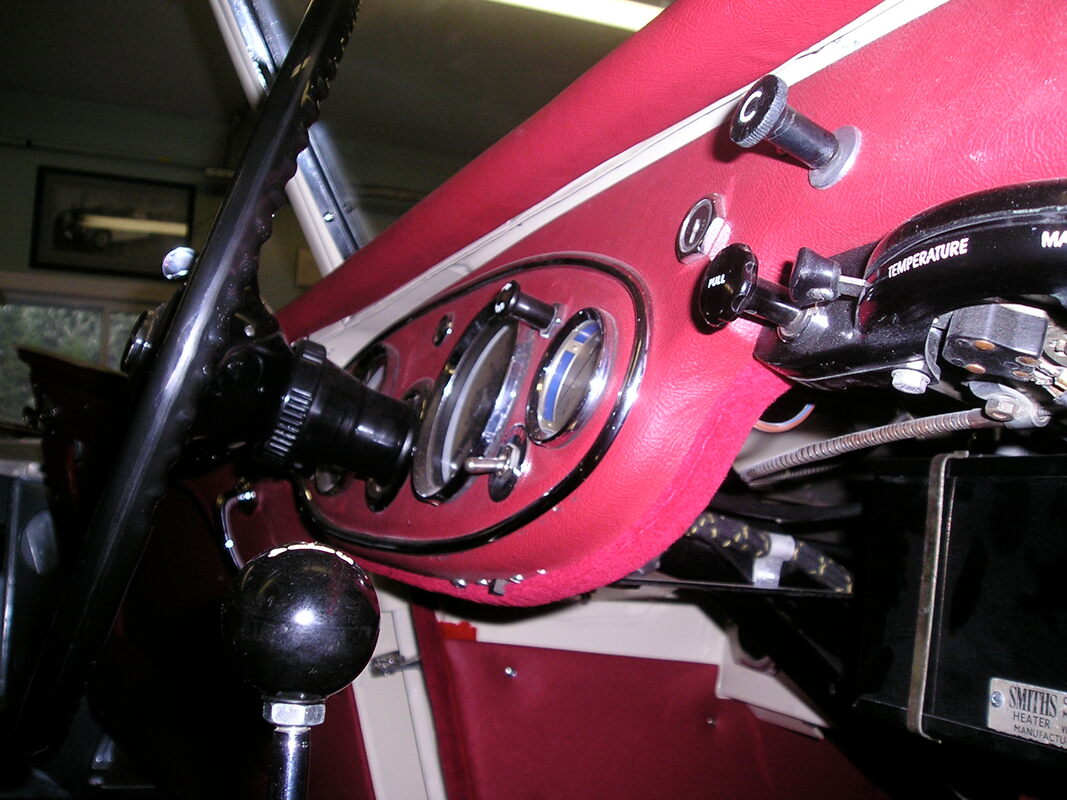
Moving on to the dash and dash top; as an added luxury on the Healey roadster models, the dash was now fully trimmed in vinyl rather than being painted like previous BN1&2's. On the earliest Longbridge BN4s, the vinyl was simply glued around the edges, then almost immediately the factory started adding small clips to the bottom edge, and by late '57 they had a thin C shaped edging that pinched the vinyl around the lower edges and gave it a finished look. This edging was painted to match the interior vinyl colour. As production moved to Abingdon around 1958 we saw this edging replaced with a fuzzy snap-on trim that also matched the interior colour: 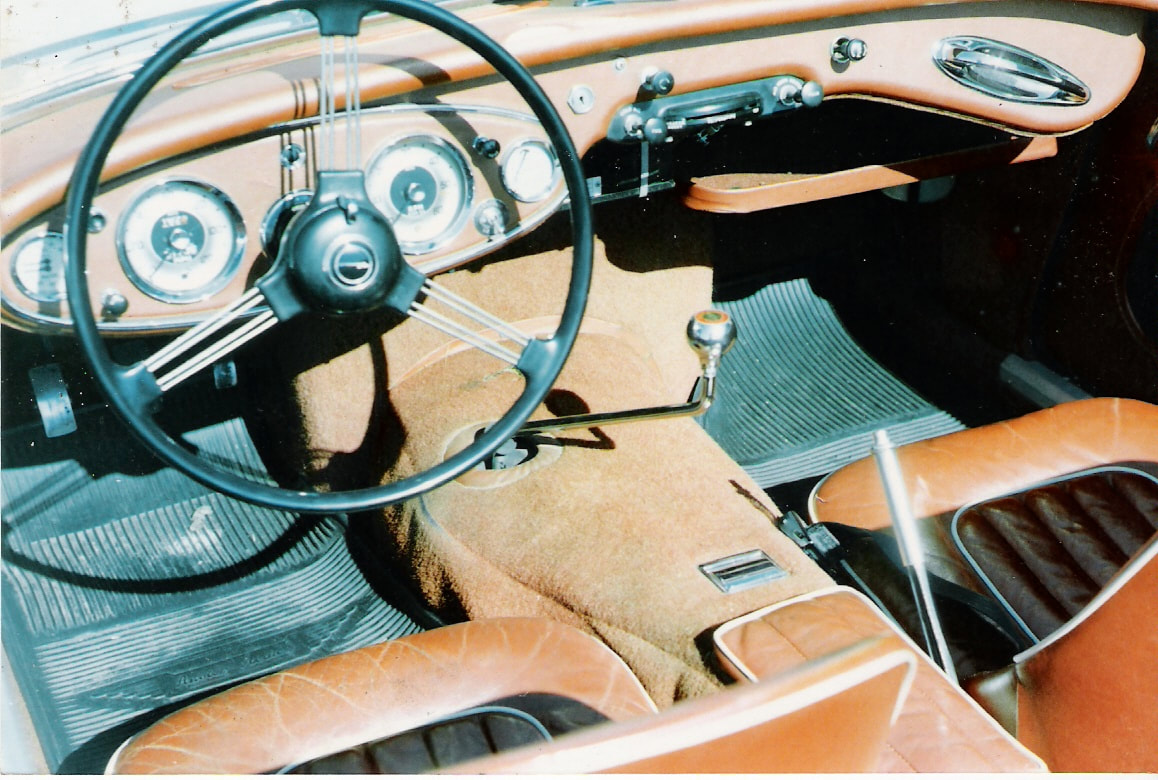
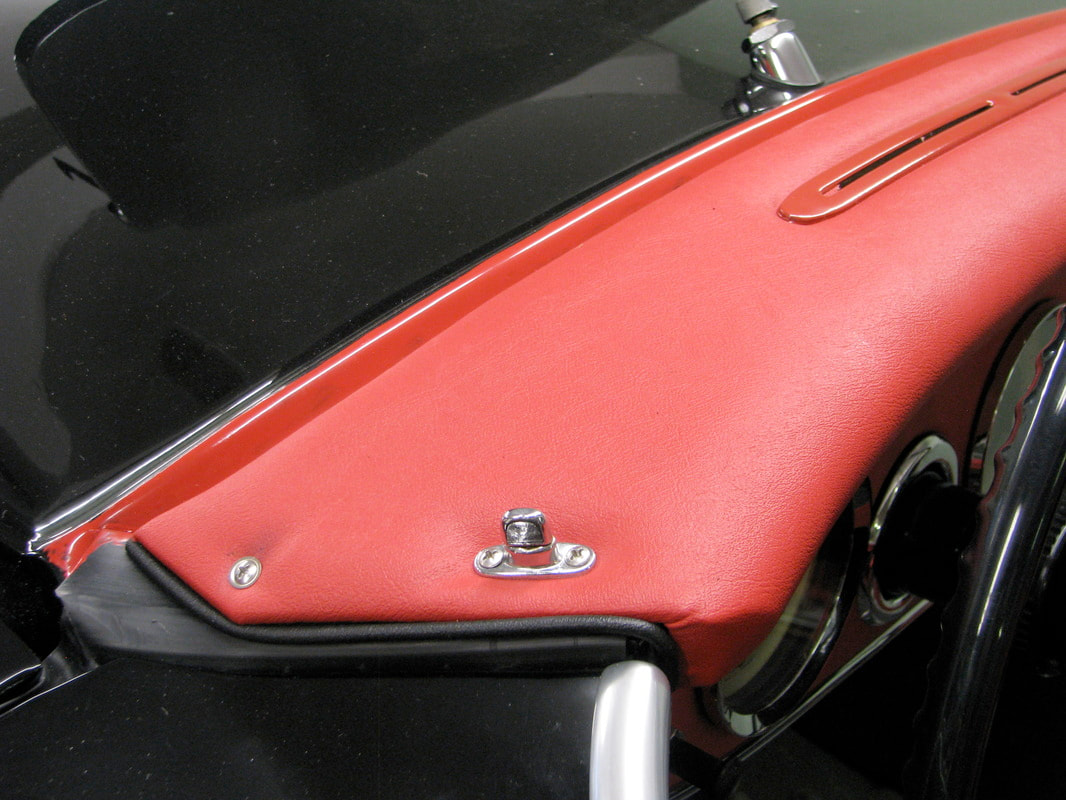
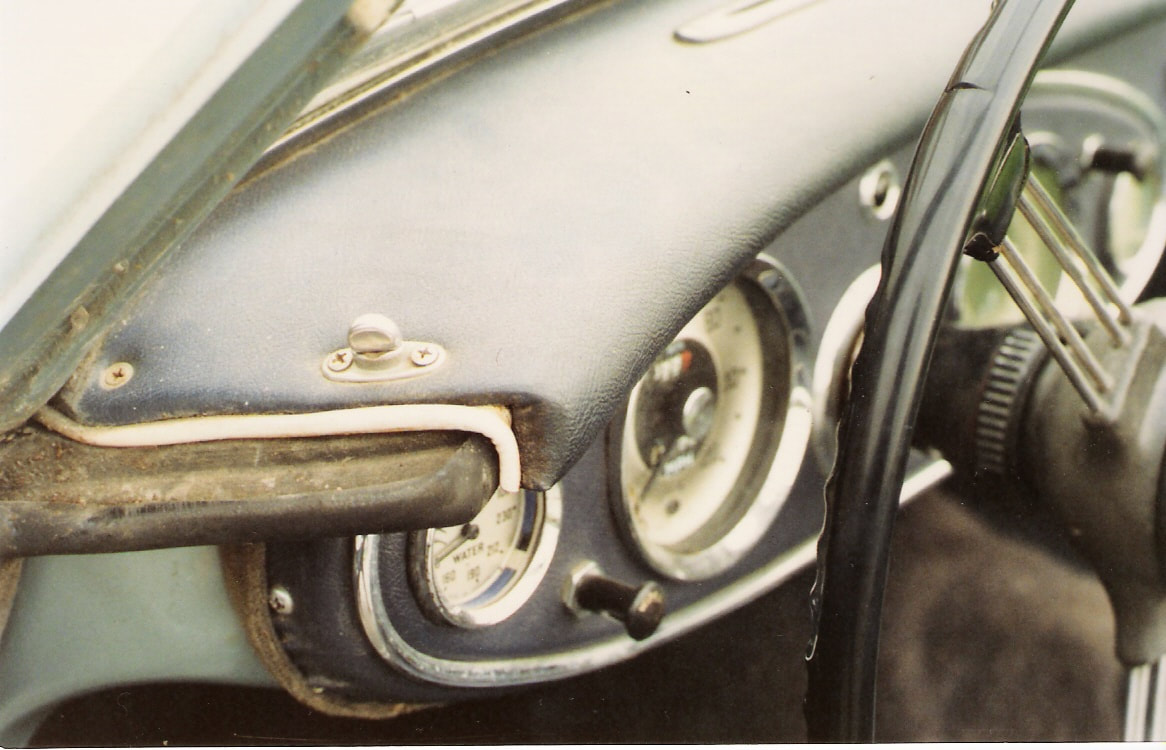
There was also a padded dash top panel with a D shaped padded crash rail along the rear edge. The panel was made of 1/8" birch ply with a tapered 1" thick lip along the rear edge that the D rubber was glued to. The entire panel was trimmed in vinyl with contrasting piping on each end to finish the edges where they met the scuttle seals. There were 2 aluminum demister vents in the dash top that were painted to match the interior colour. More of the interior colour paint was used to paint the raised lip on the front shroud under where the windscreen rubber would sit to hide any exposed body colour between the front of the panel and the windscreen rubber. The entire panel was held in place with a pair of trim screws, and turn snaps at either end, and the rear view mirror in the center, with a long threaded Tenax stud for the tonneau beside it...
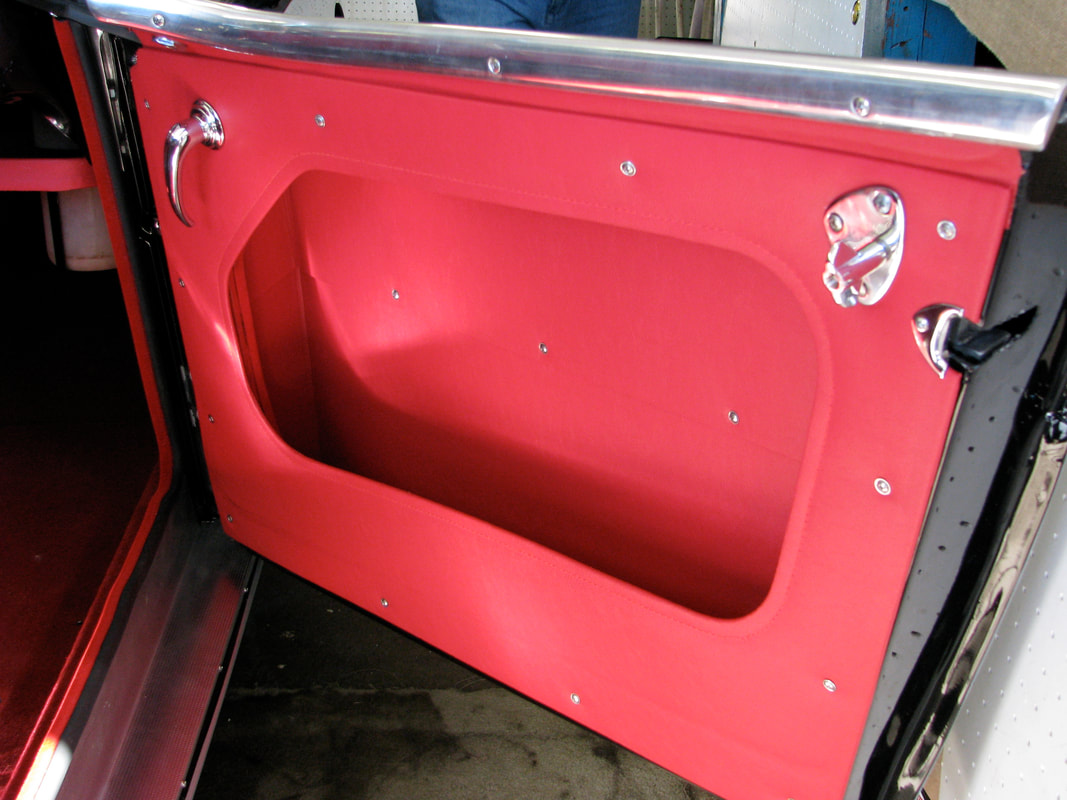
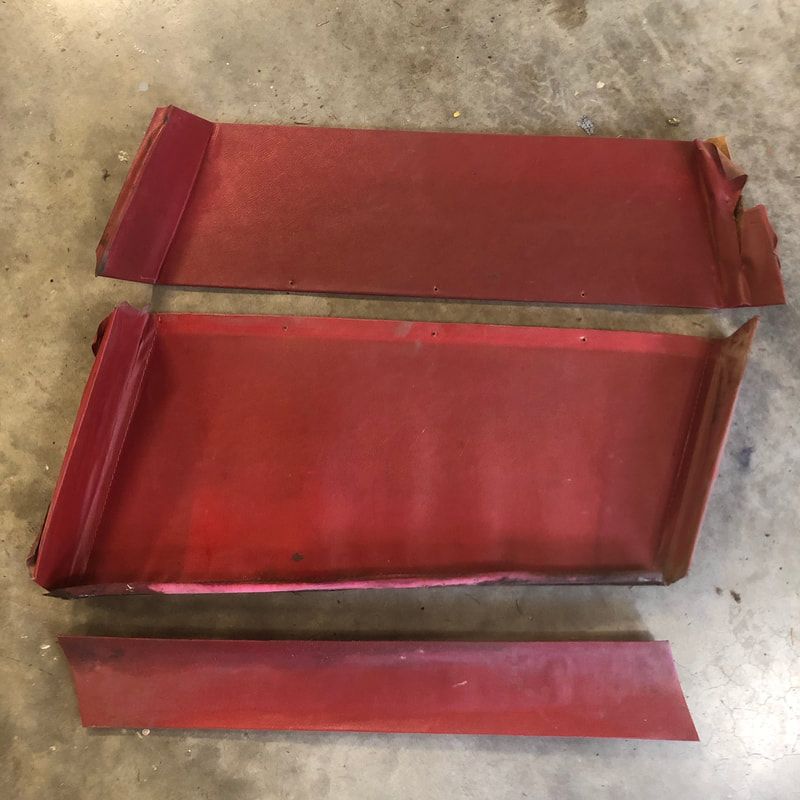
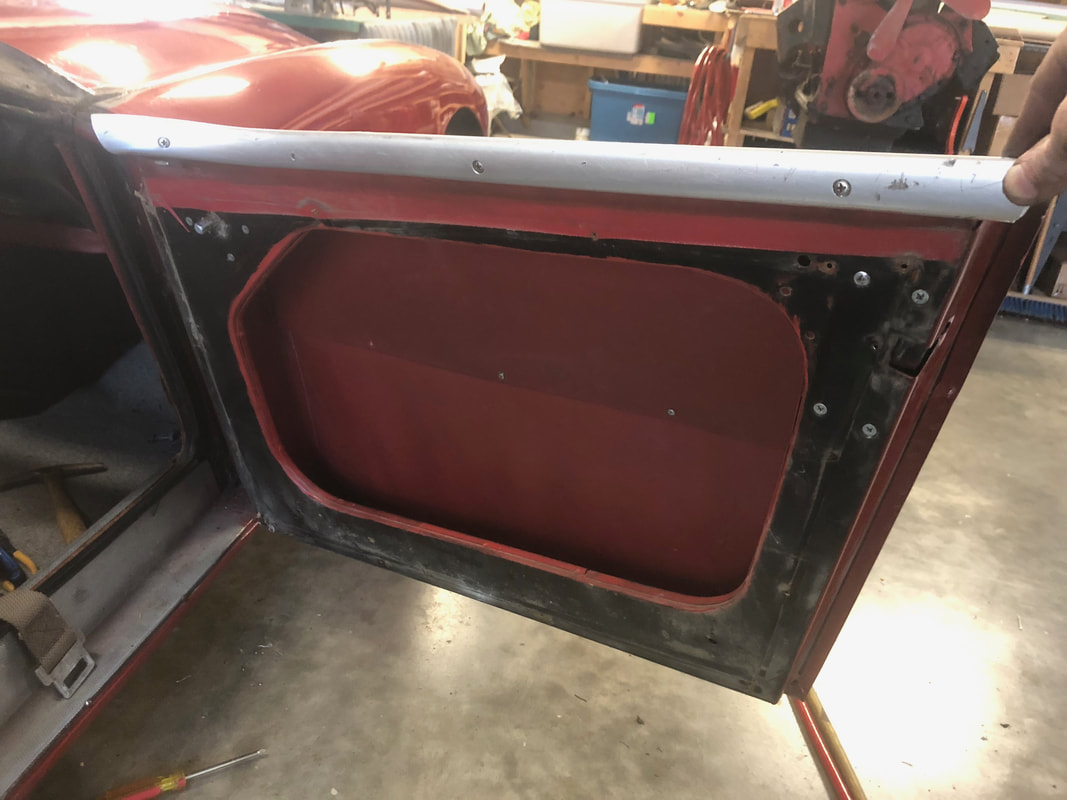
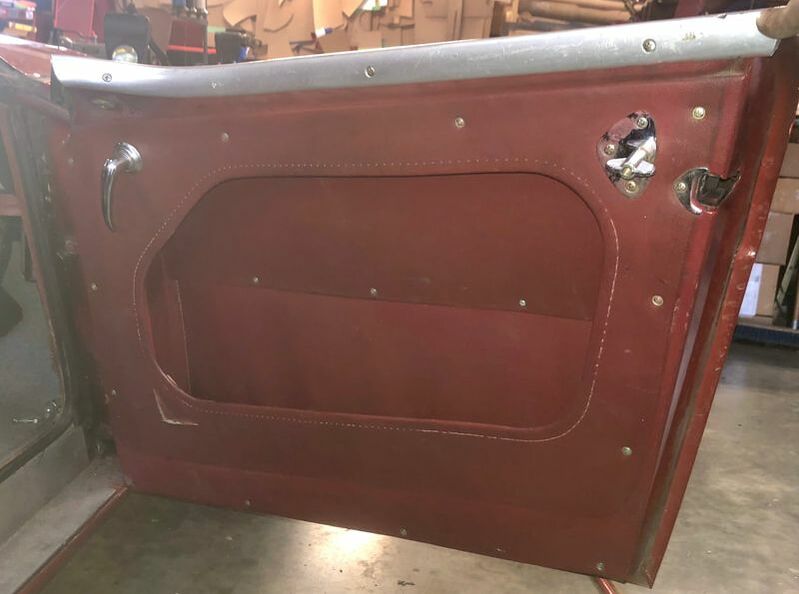
The door panels were trimmed in a series of vinyl covers and panels. To start, the factory hand painted the exposed metal edges around the inner door pocket opening. Then there was a vinyl cover glued to the upper door that would be overlapped by the cockpit rails and main door panels later. There were 3 inner door panels trimmed in vinyl that all fit inside the door pocket area. They consisted of a larger lower panel that was sometimes stitched around the lower edges. followed by an upper panel that fit above and slightly overlapped it with 3 screws holding them in place against the inner wood rail. Finally there was a smaller curved panel that wedged into the bottoms of the door pocket area to finish them off.
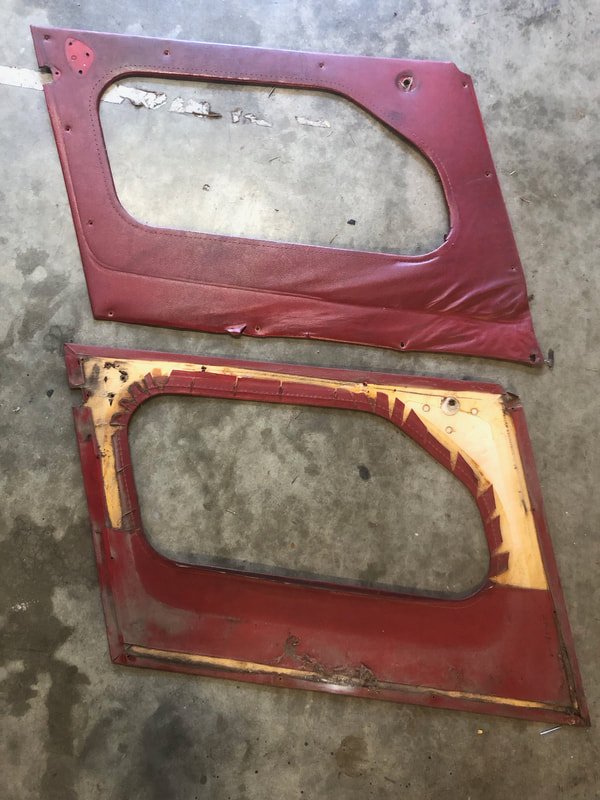
Then the main door panels were screwed in place over top. The main door panels were made of 1/8" birch ply with a very thin cotton padding on them covered in vinyl. The backs of the panels had more vinyl to cover the lower portion of the panel. Then the entire panel was sewn with a stitch line about 1/2" in from the edge of the pocket opening. It was attached to the door with more #6 trim screws and cup washers and finished with the chrome door handles, latch finishers and rear side curtain brackets.
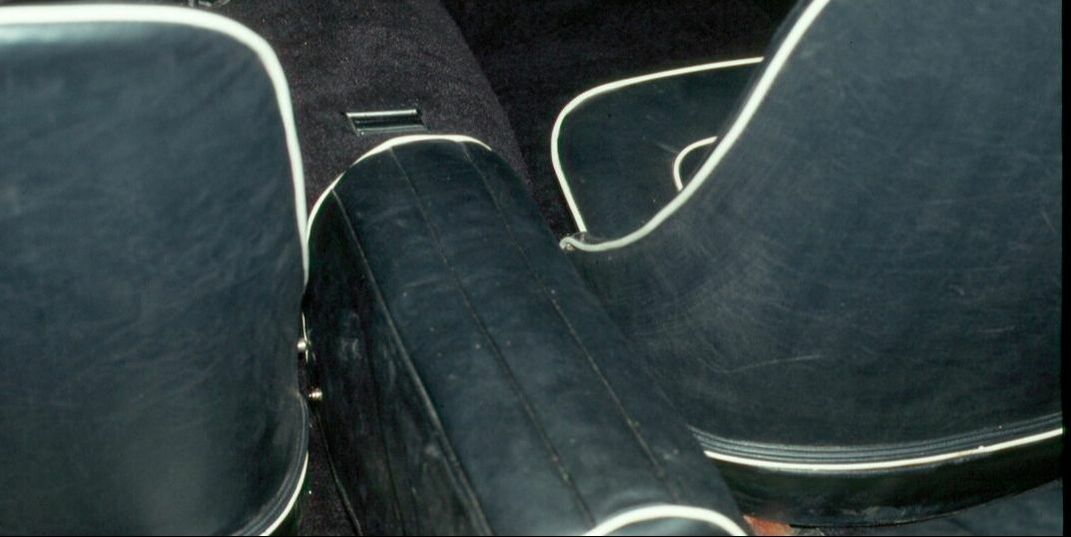
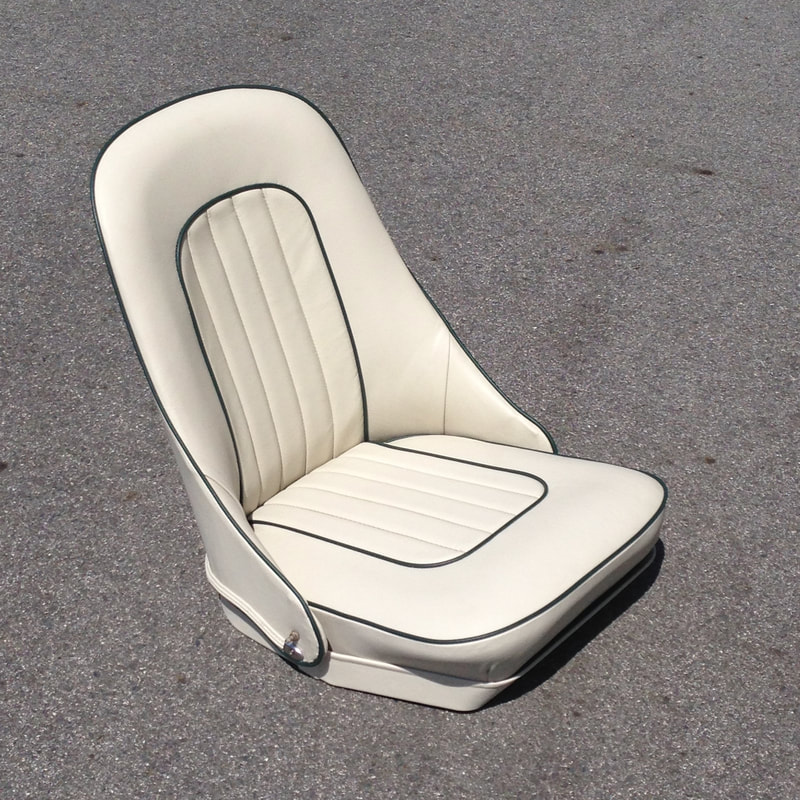
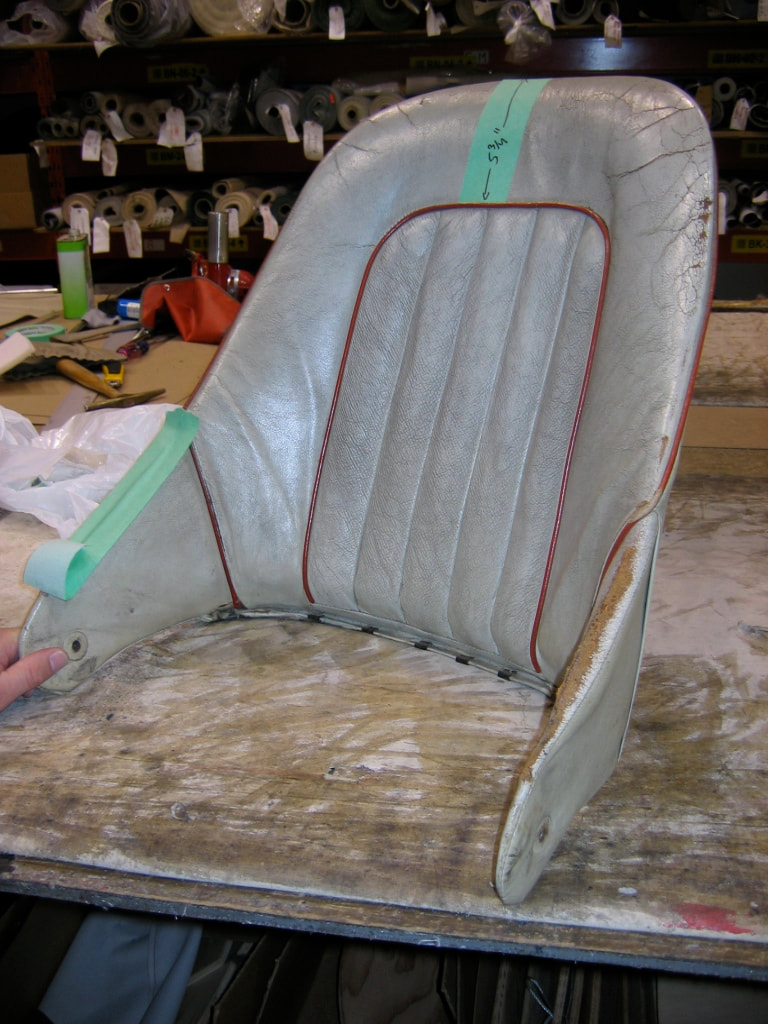
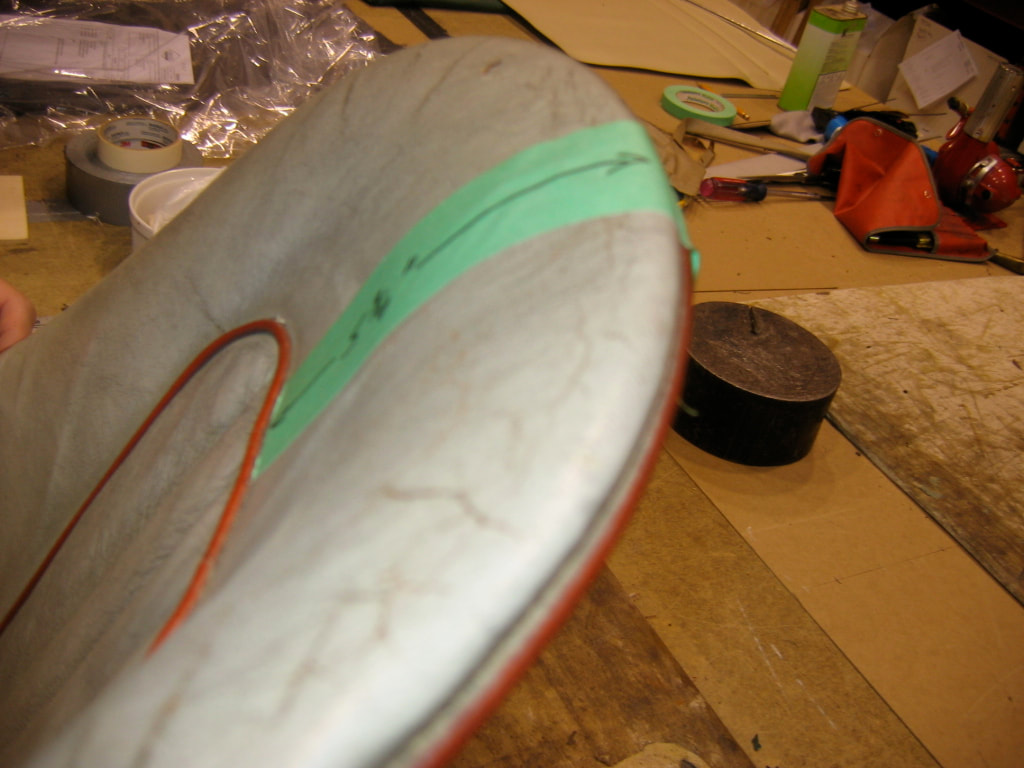
 The seats on BN4s are another thing that went through an evolutionary change through production. The earlier Longbridge cars had the exact same seat design as the previous BN1&BN2's, they had wooden seat cushion frames, and wooden tack strips used on the backrests to secure the leather and vinyl covers along the bottom edges. The easiest way to spot these earlier style seats is to note the direction of the piping as it follows the outer edges of the backrest all the way down around the lower pivot arms:
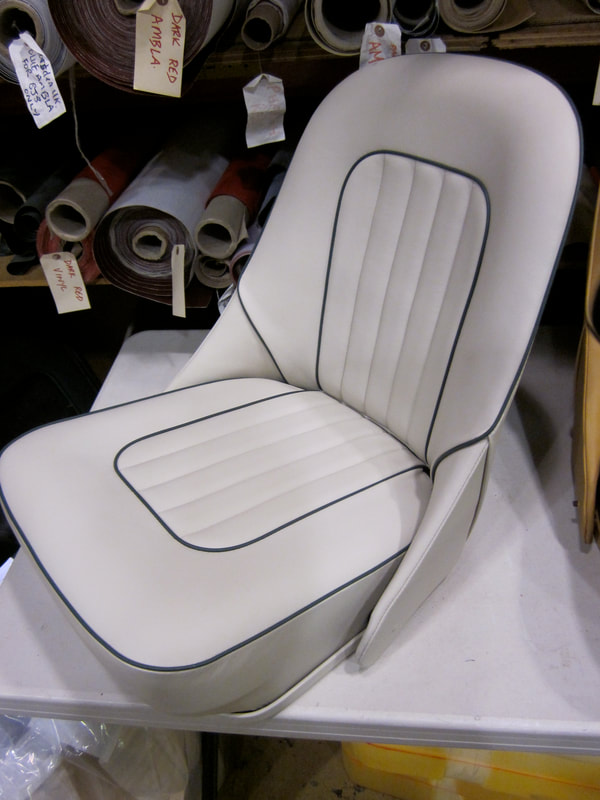
Then as production geared up to introduce the new 2 seat BN6 model in early 1958, we saw this new style of seat appear which had all the wood and tacks replaced with steel and clips. The seat cover design had changed a bit as well, with the characteristic piping now being diverted down to the base about 10" short of the pivot arms. The pivot arms now had separate sock-like covers instead of piping and hidem. Notice also the shorter angle iron style of seat base frame - the earlier style had a much taller frame design:
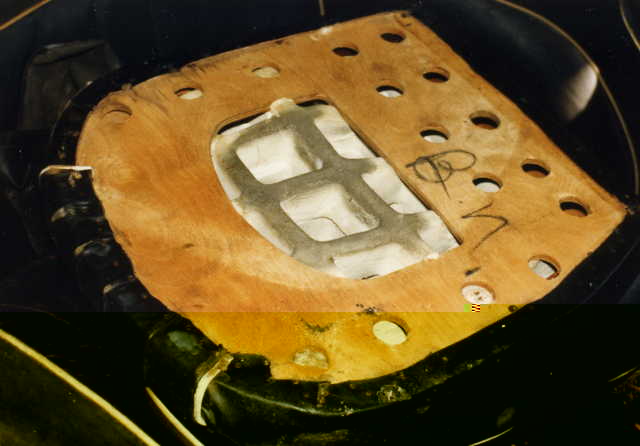
The cushions were now made with a steel frame instead of wood. The pleats were pulled under the frame and glued & snared on little hooks in the frame. The front and sides were held in place with little clips pushed onto a flange edge. There was also an air hole on the bottom of these early steel frames which made the bottom of the 'Dunlopillow' seat foam clearly visible:
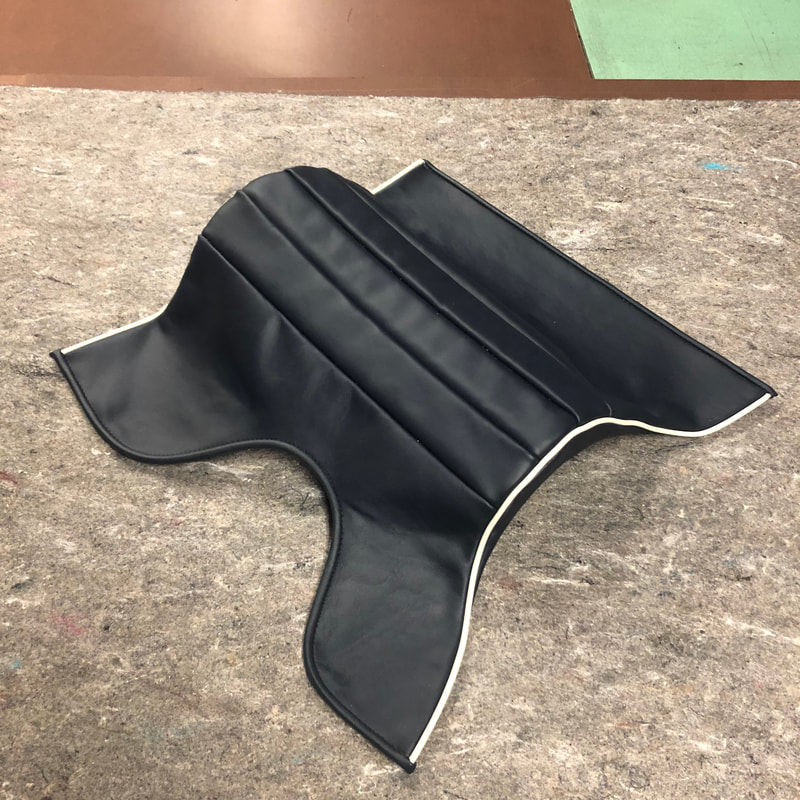
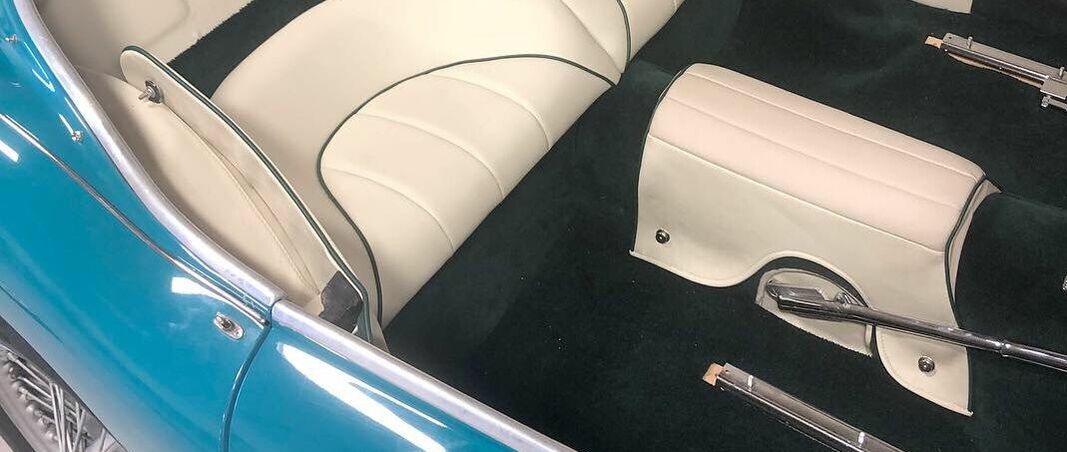
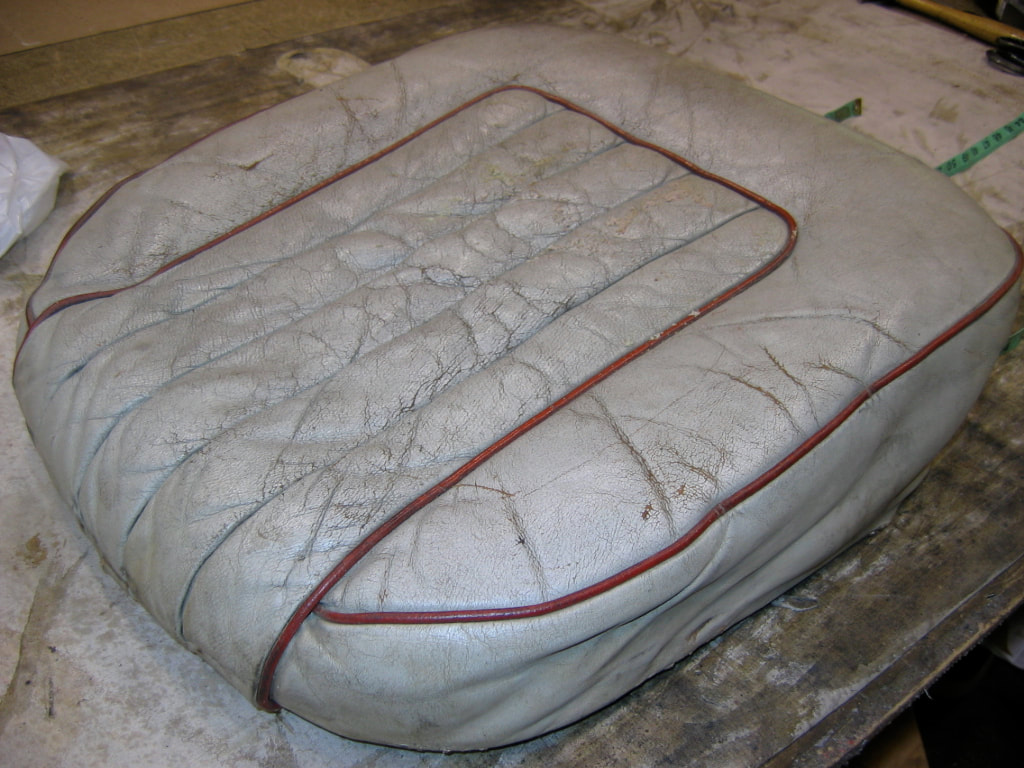
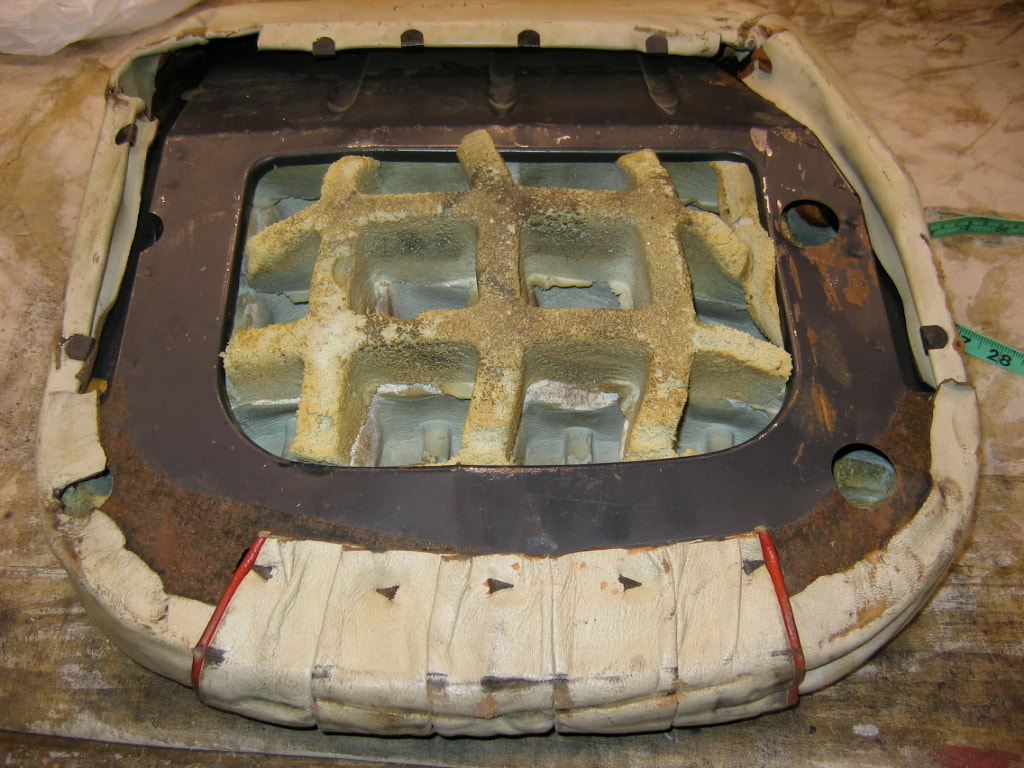
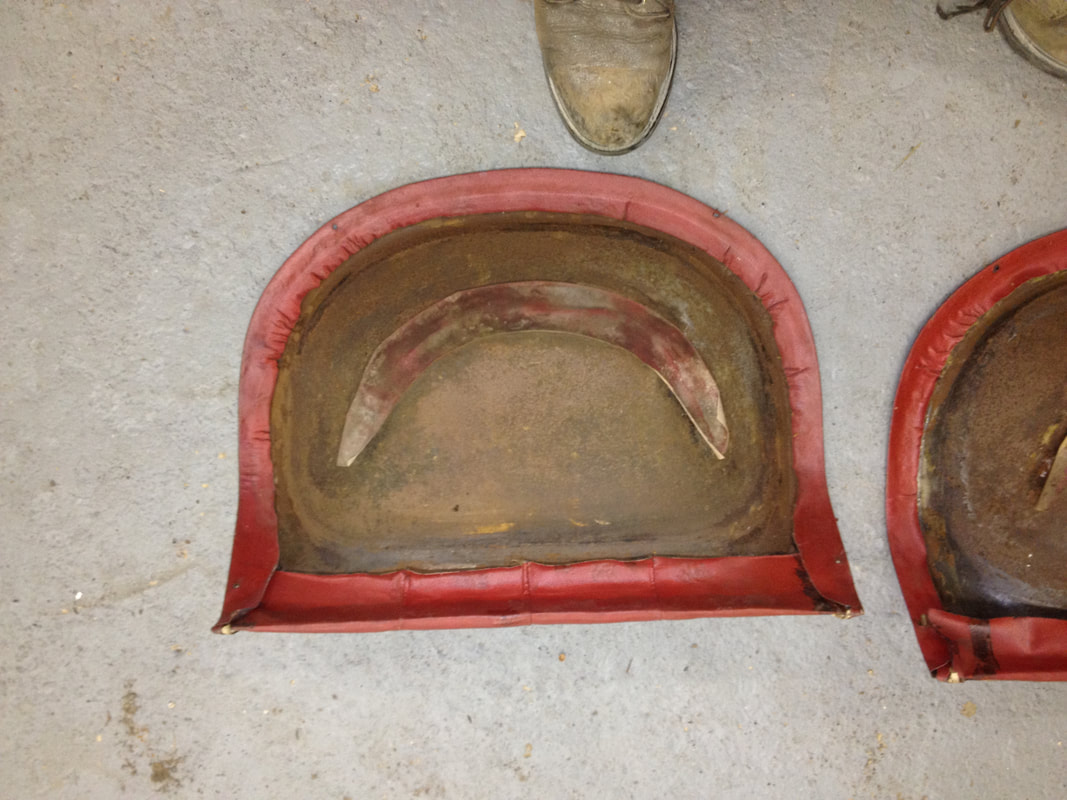
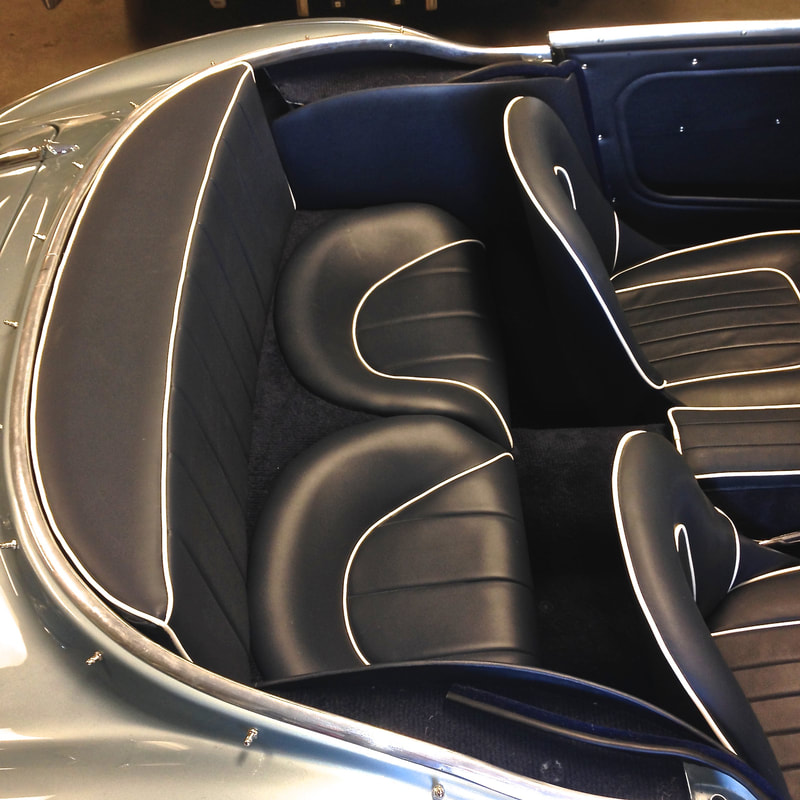
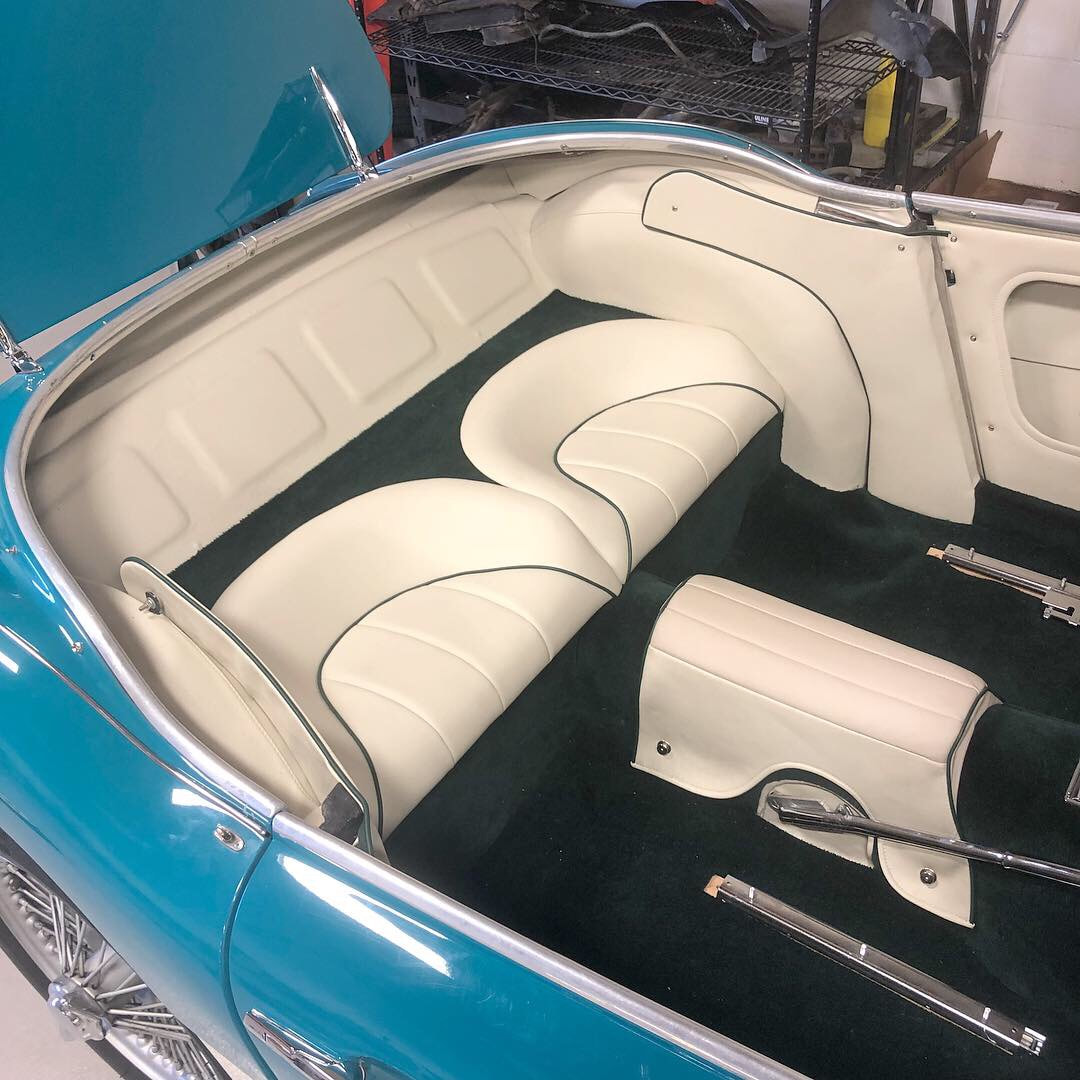
The next small detail change to come with the seat design was the addition of mesh being added to the large cutout on the bottoms of the cushions. Presumably to prevent the foam from collapsing too far through the hole when sat on. This mesh was seen added to seat frames in mid - late 1959 and lasted at least until mid - late 1960. It seemed to also correspond to a change in the Dunlopillo foam design being changed from square waffle cutout in the bottoms to smaller round cutouts. 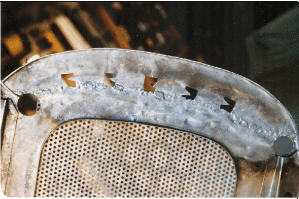 Not too long after, at least by late 1960 - the cushion frames had solid steel bottoms without any large cutout. This style frame would continue on until the end of production: 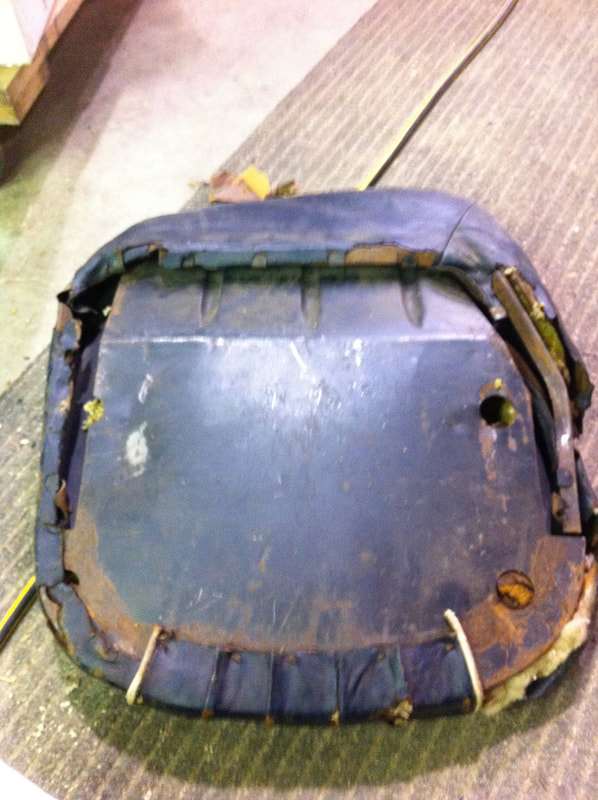 Moving to the rear seat cockpit area, the 4 seat roadsters all had a pair of these small tractor seat style seat cushions: They were a shaped steel pressing with a combination of horse hair pads covered in layers of wadding and a sewn vinyl cover with contrasting piping. The each had 4 pleats and the pleated section was actually hand stitched to the steel base pan. The heavy gauge thread that remained visible on the bottom of the pans has often been found taped over to protect it from road spray from the rear wheels. 
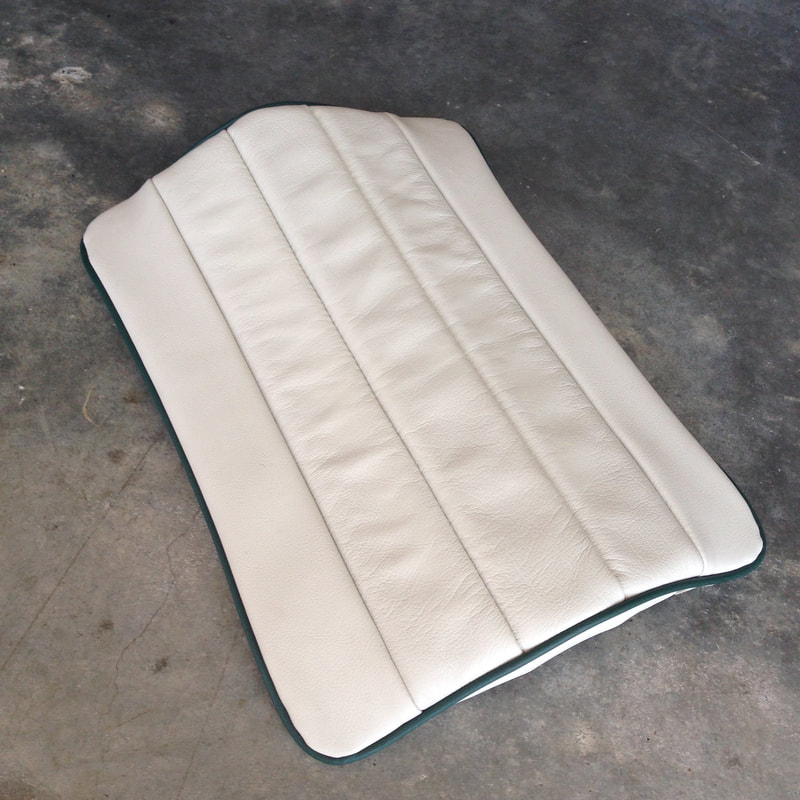
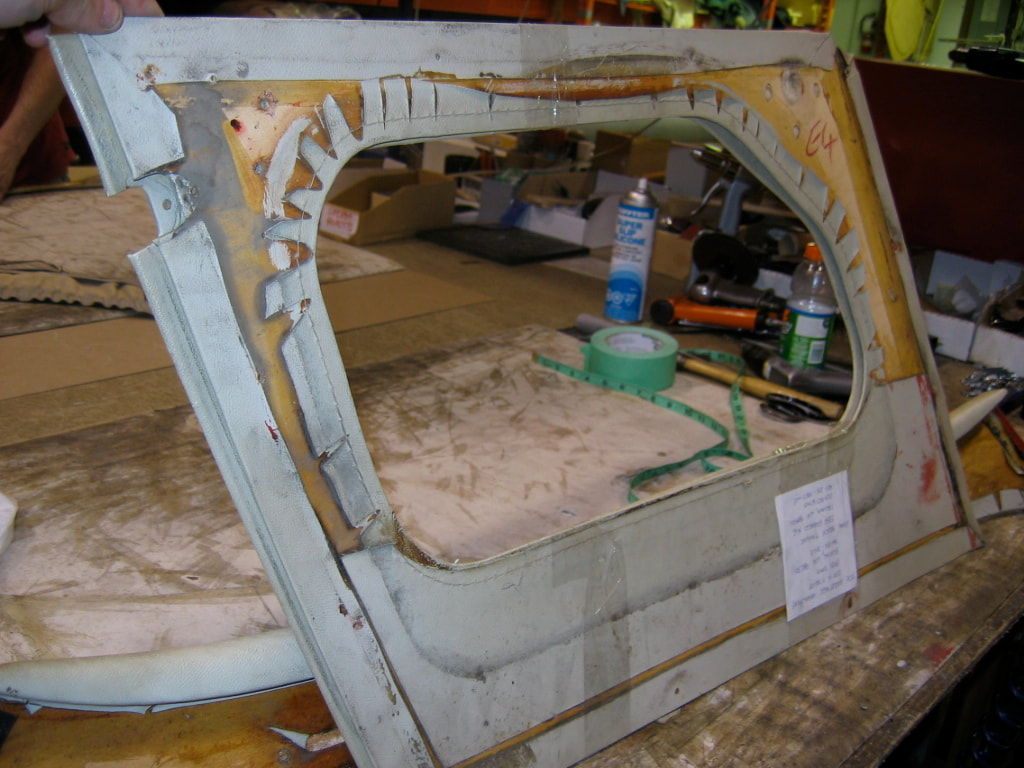
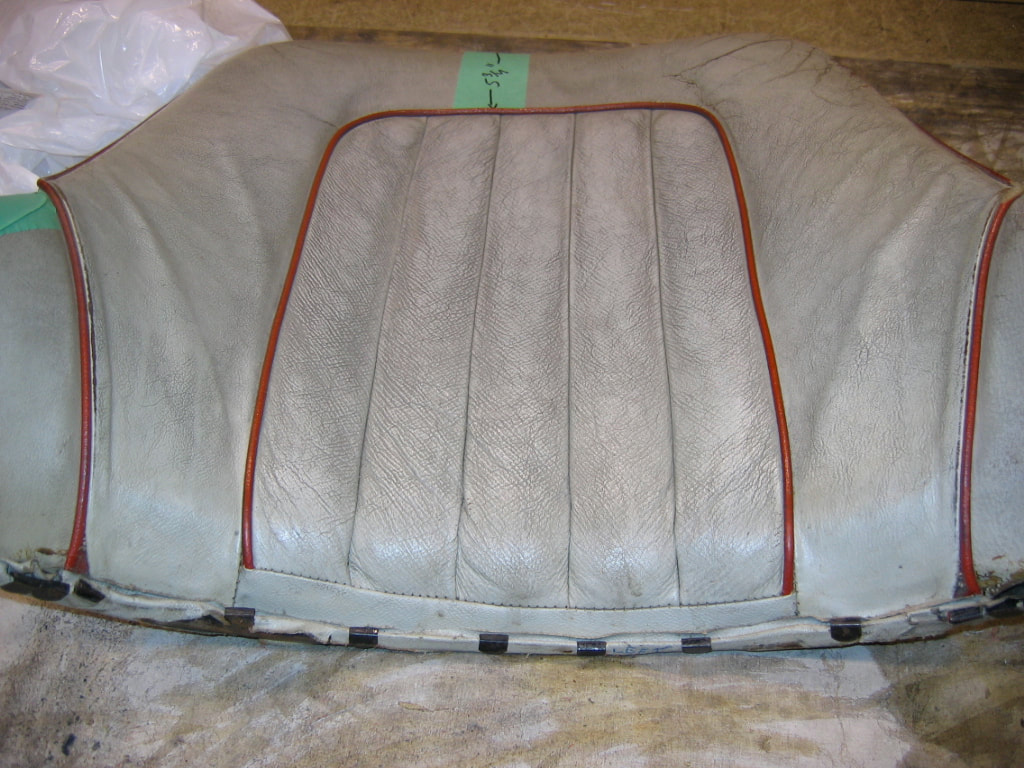
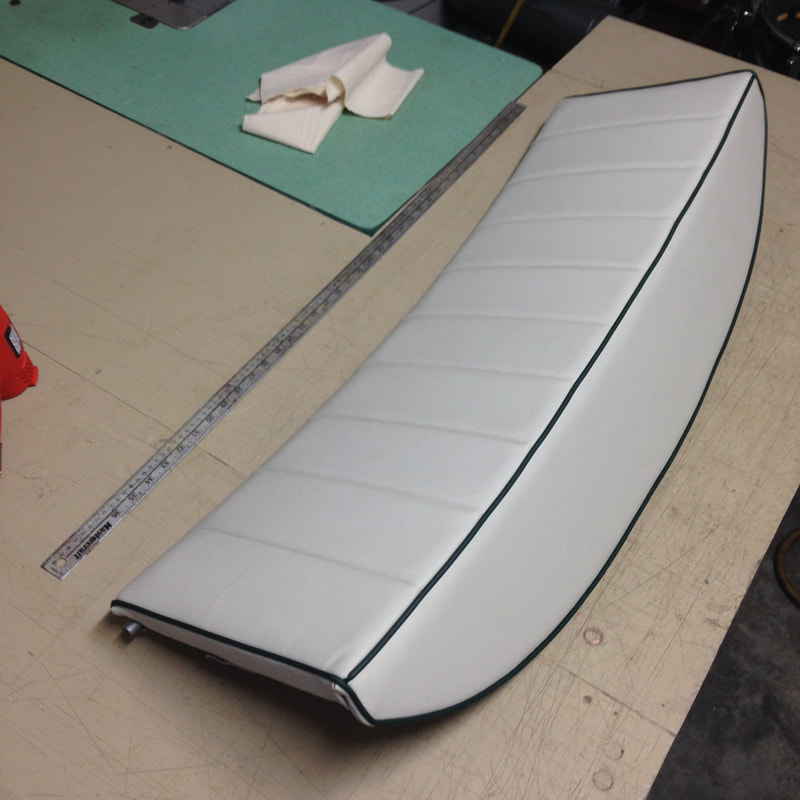
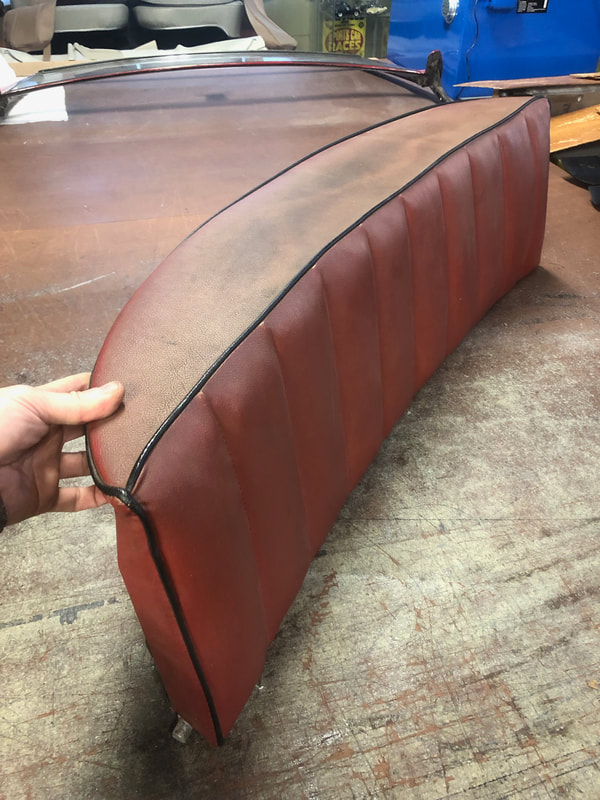
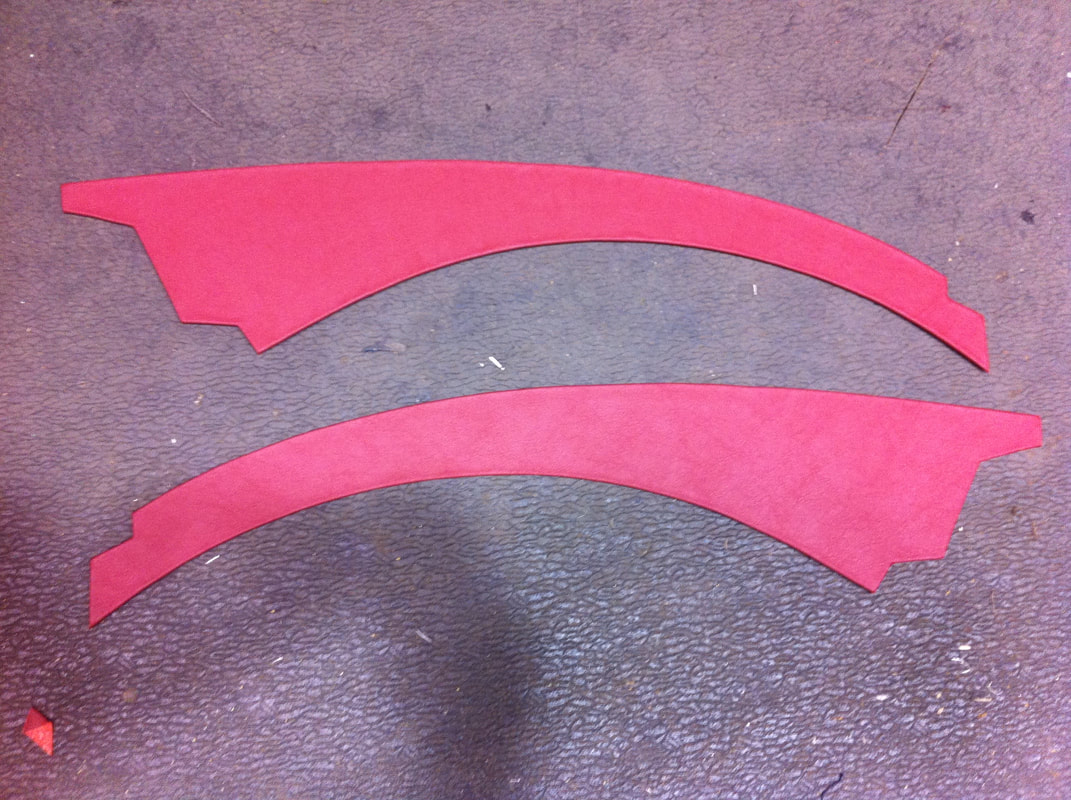
The rear backrests could easily be lifted out or folded down for stowage of the soft top. The earlier Longbridge cars had a slightly deeper top panel - measuring 6.5" at the widest/center point. Later BN4/BT7s were slightly less at 5.5" This was to accommodate the different style top frames used on the earlier cars. The assembly was made of 1/4" Baltic birch plywood, with 1" square wood rails glued and screwed together. It was trimmed front and back in vinyl with 10 pleats across its front face and contrasting piping. Upholstery tacks were used to trim the covers in place.
Notice the small straight sections on the top outer corners of this grey Longbridge backrest compared to the pointed corners on the later red BT7 backrest... 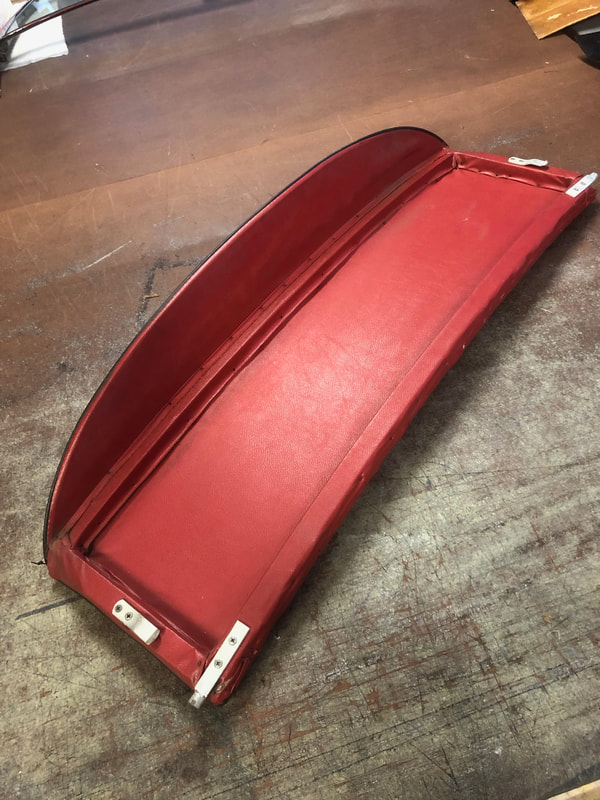
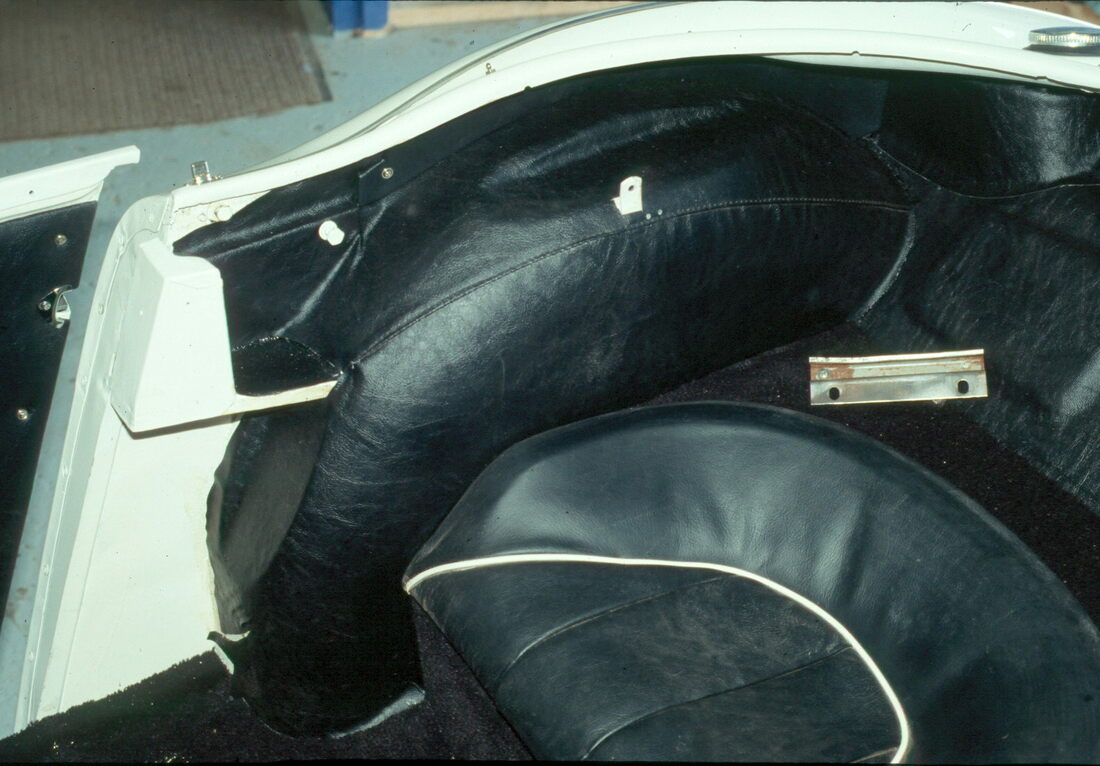
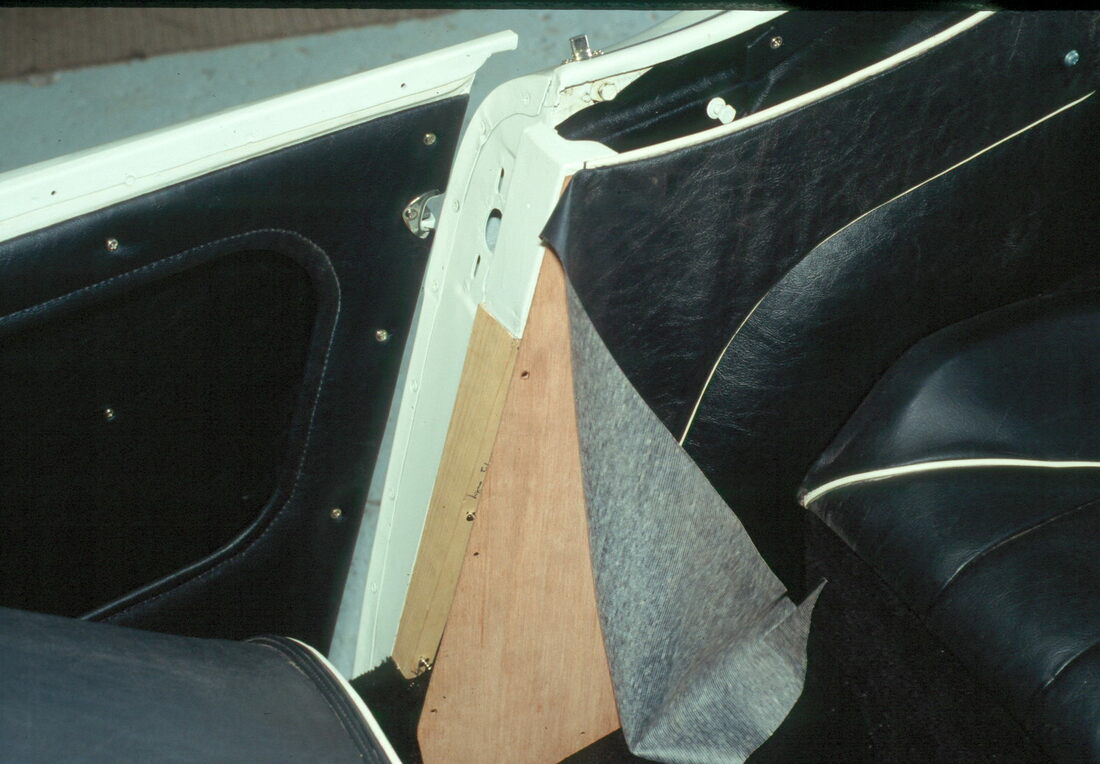
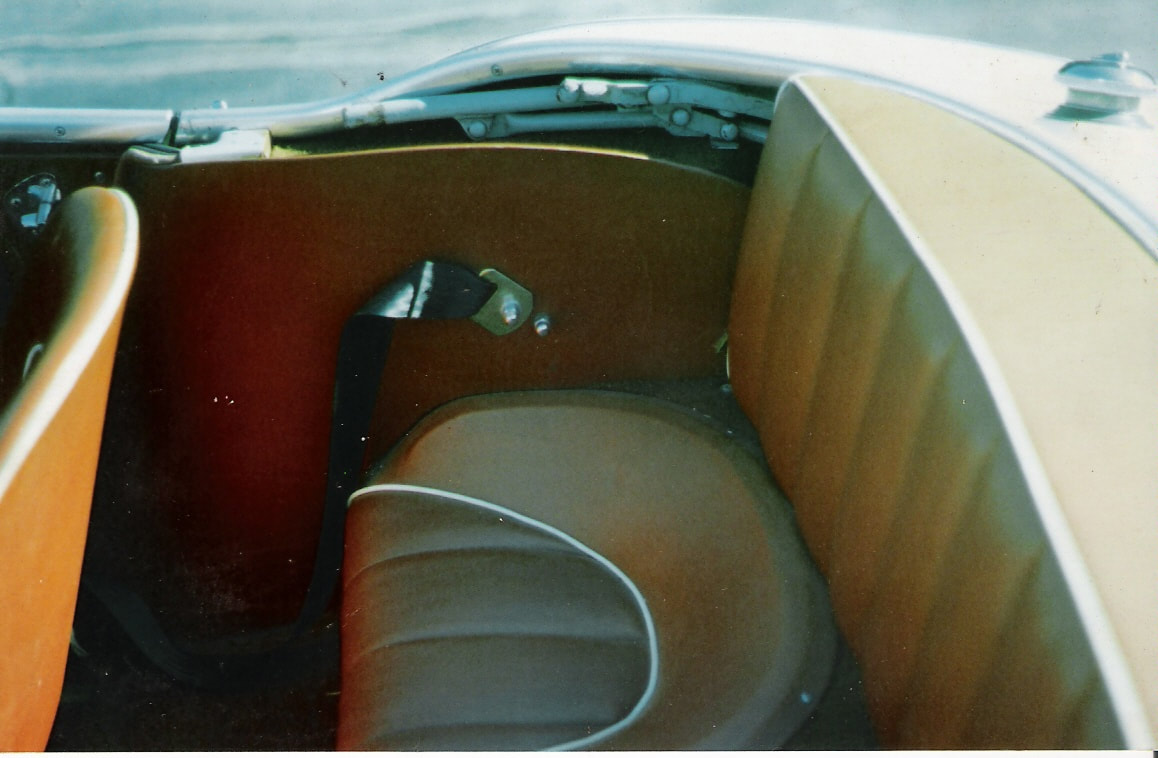
The rear quarter panels and wheel arches on the early Longridge cars looked as follows: The wheel arches were first trimmed with a sewn vinyl cover. Then some angled hardwood pieces were screwed in through the outer rear door post. The rear quarter panels were made of birch ply and trimmed with a sewn vinyl cover with contrasting piping. The panel was screwed to the hardwood sections at the front and to a small welded bracket at the rear. Finally another vinyl covered finishing panel was screwed on top of the hardwood sections to finish it all off along the front edge. 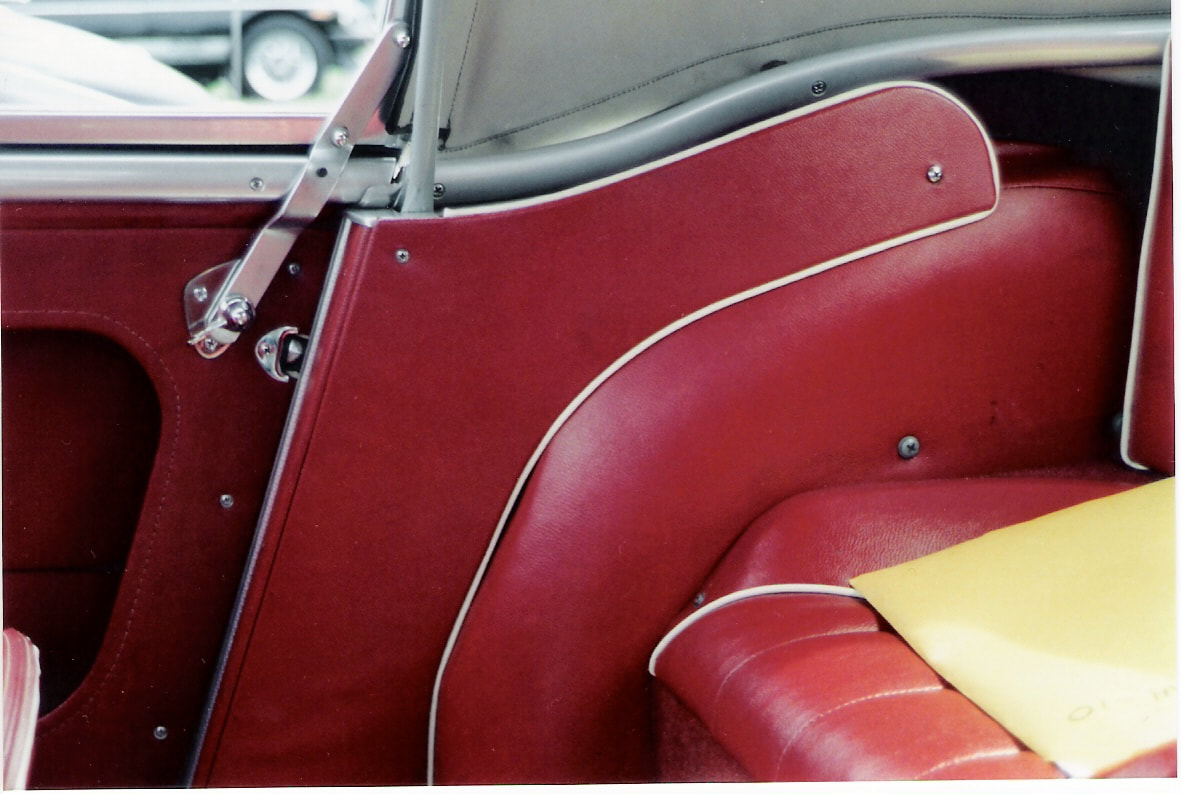
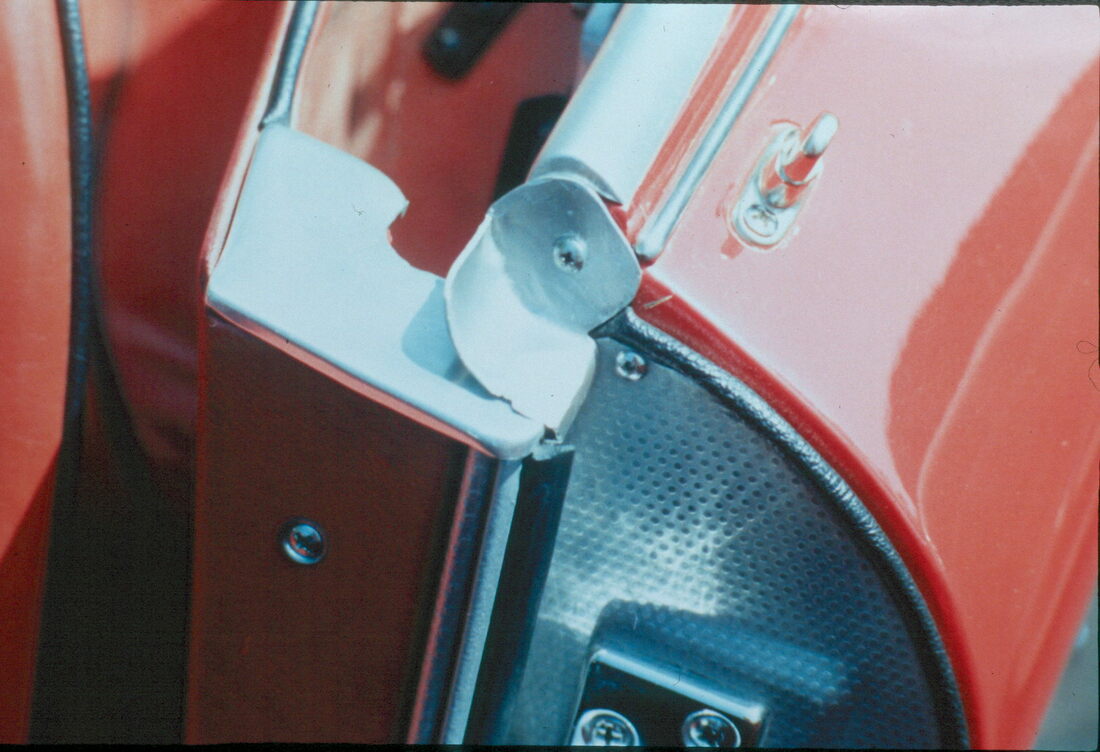
The Longbridge BN4 door seals consisted of some polished aluminum strips screwed to the outer door trims containing some corresponding rubber seal strips. Here you can see the door seal details on this original early BN4: At the front edge of the door opening a strip of Furflex draft seal was glued to the front inner edge under the kick panels and tucked under the windshield posts: Notice also the strip of black piping used to finish the outer edges of the rear door post trim. All 100-6/3000s used black piping here regardless of the interior colour.
The early Longbridge BN4s also had these small vinyl trimmed panels tucked in above the rear wheel arches to finish those areas, the entire rear bulkhead behind the rear backrest was also trimmed with a large vinyl cover glued directly to the painted metal bulkhead panel.
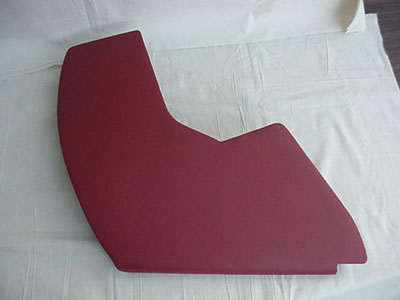
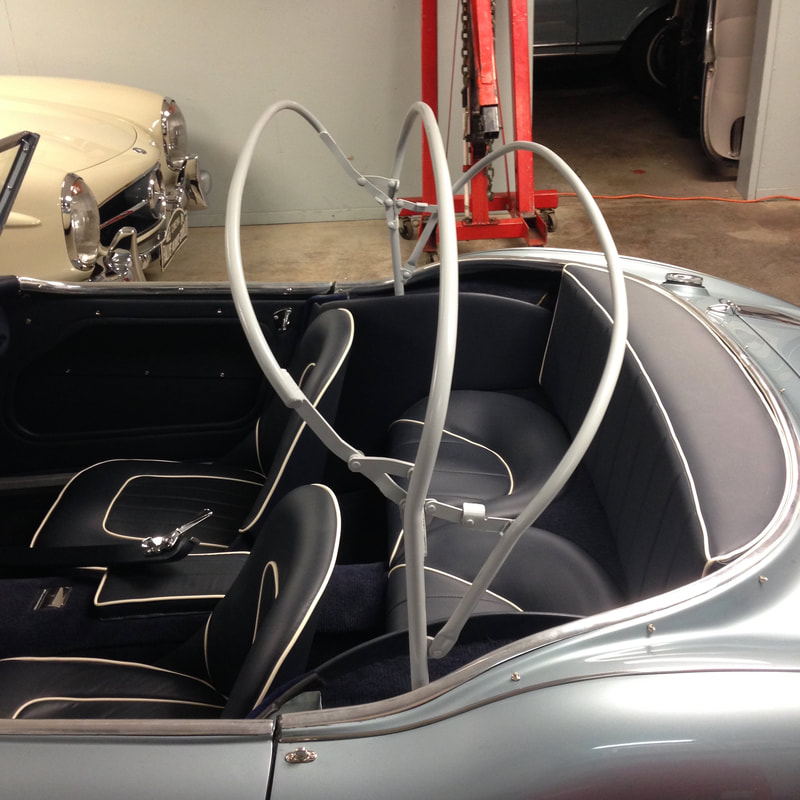
On later BN4s and BT7s, we saw a new style of removable top and frame that was able to fold down even smaller. The rear backrest became slightly less deep and the rear quarter panels were redesigned to look like this:
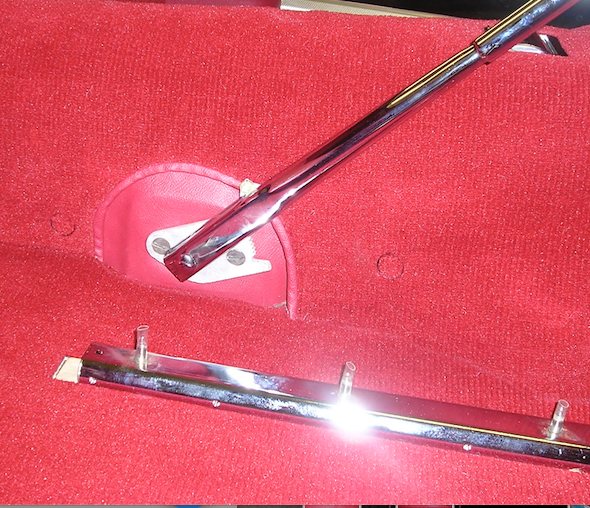
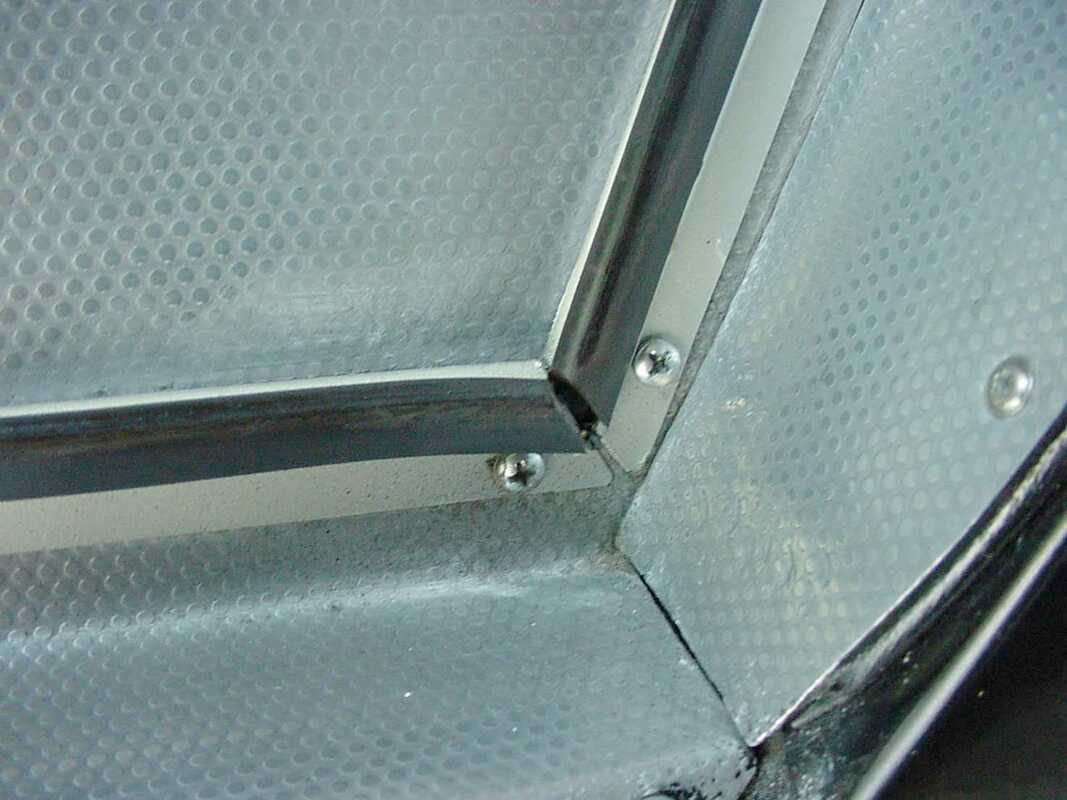
There was carpet that finished the top of the panels with cutouts for the new top frame location holes, and around some small vinyl covered wood blocks used to carry the plated door seal end finishers..
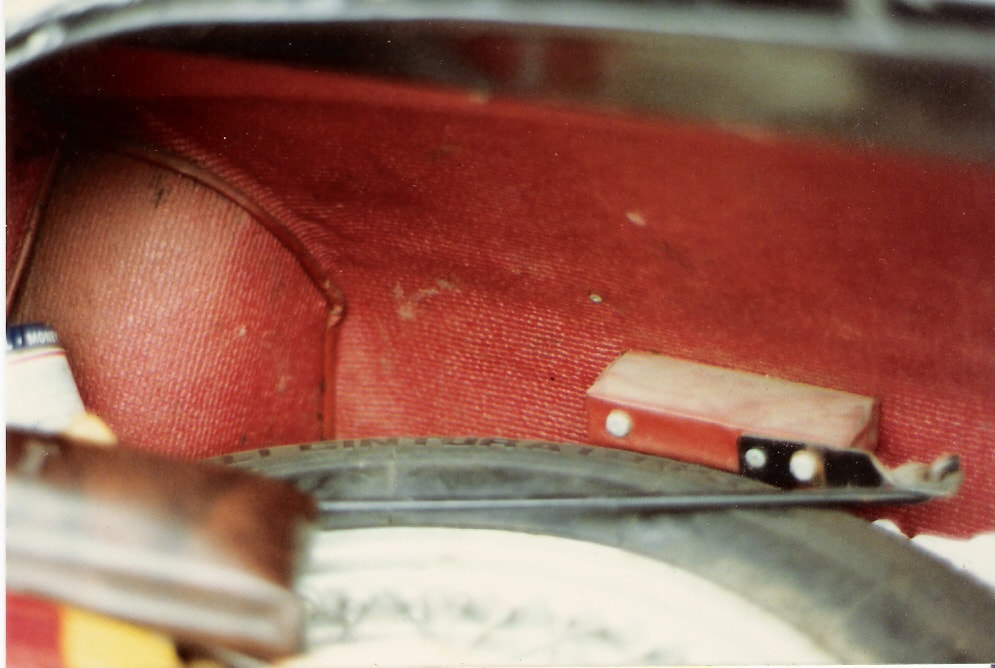
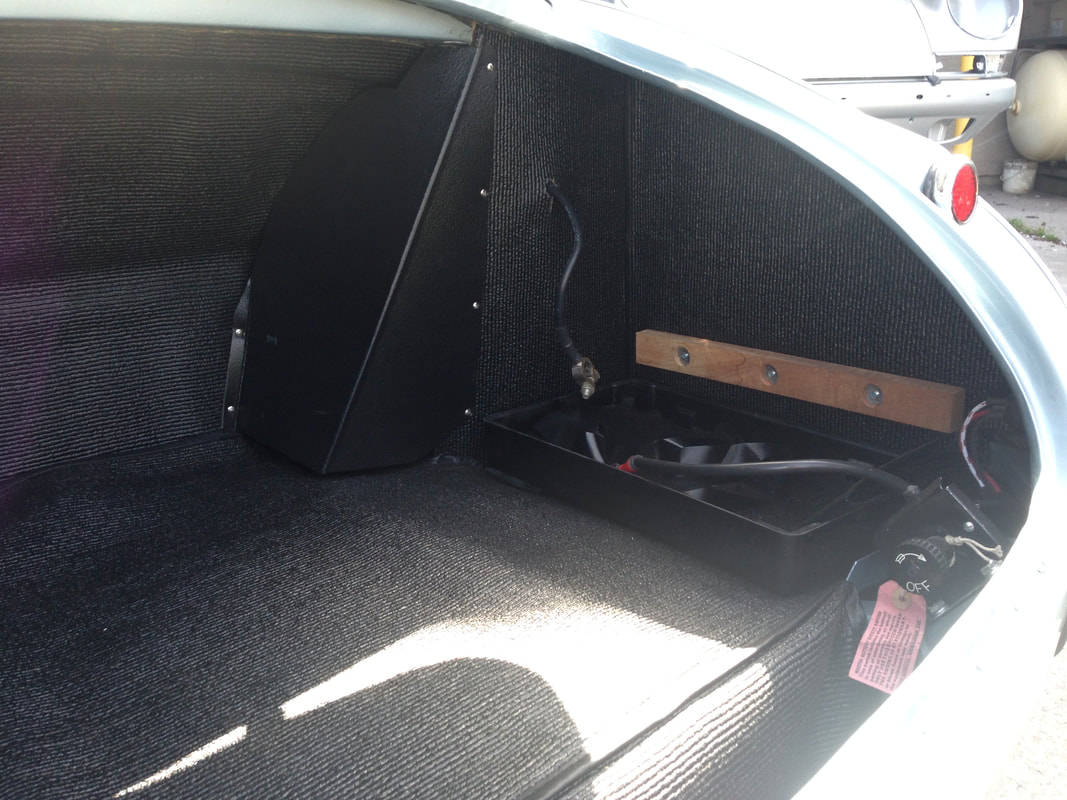
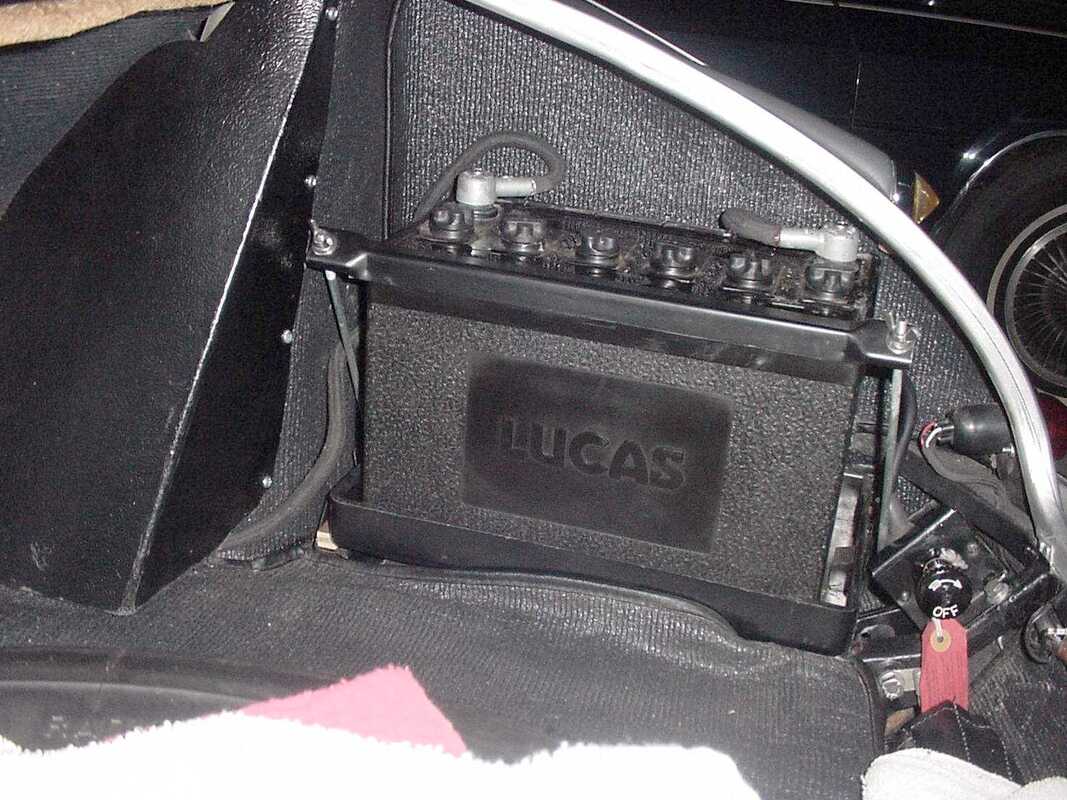
 Behind the rear backrest, some more small sections of Karvel carpet were used to finish the corners, however they stopped trimming the entire rear bulkhead in vinyl. The door seals on these later roadsters were a press-on style that had rubber on the outer edge and a fuzzy colour matching trim along the inner edge. This seal pressed onto a flange all the way around the door opening front to back. 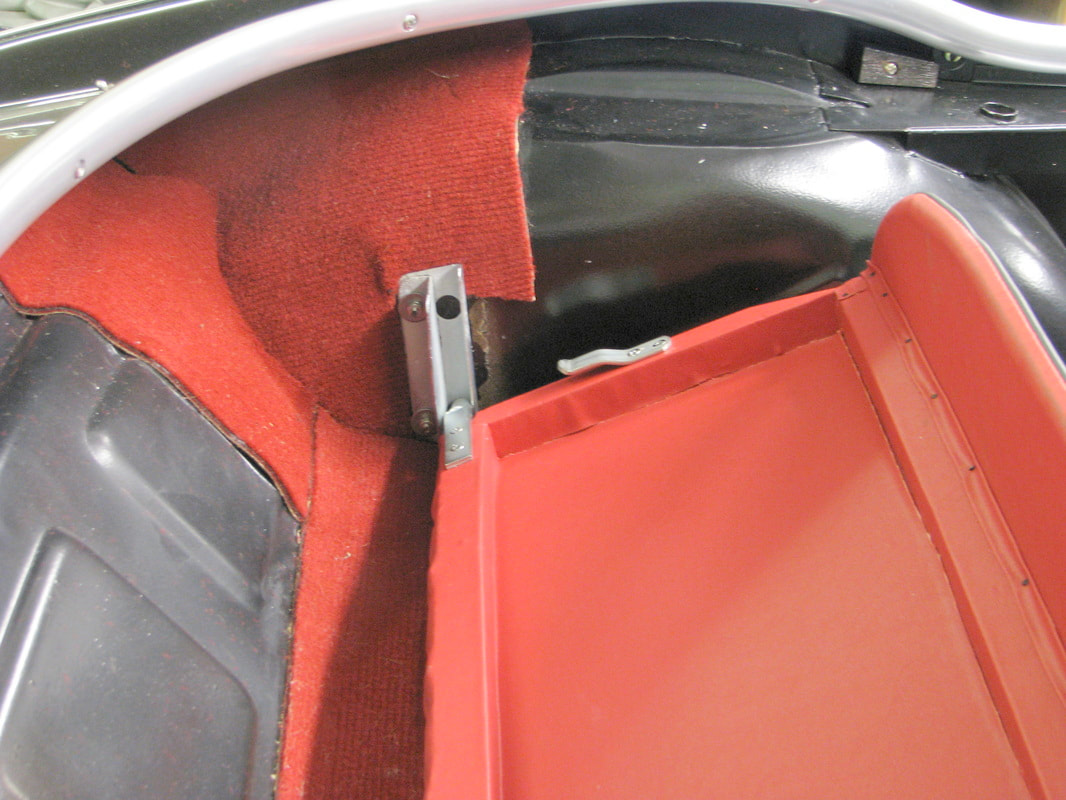 The boot linings of all the 100-6/3000 roadsters was done in Armacord. Early Longbridge cars saw the Armacord in matching colour to the rest of the interior. While later BN4s and and BT7s they decided to switch to all black. The spare tire was wedged between 2 vinyl covered wood blocks and held in place with a securing bar and natural leather belt strap and buckle. The fuel neck was concealed by a grained panel board and the 12 volt battery was clamped down on the right side with a black vinyl cover over its top. 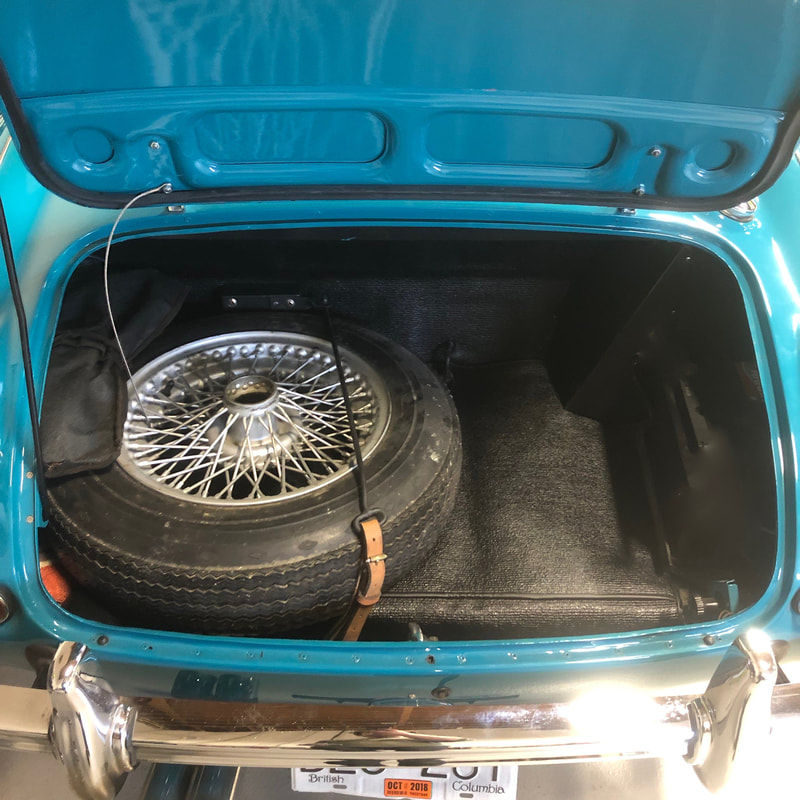
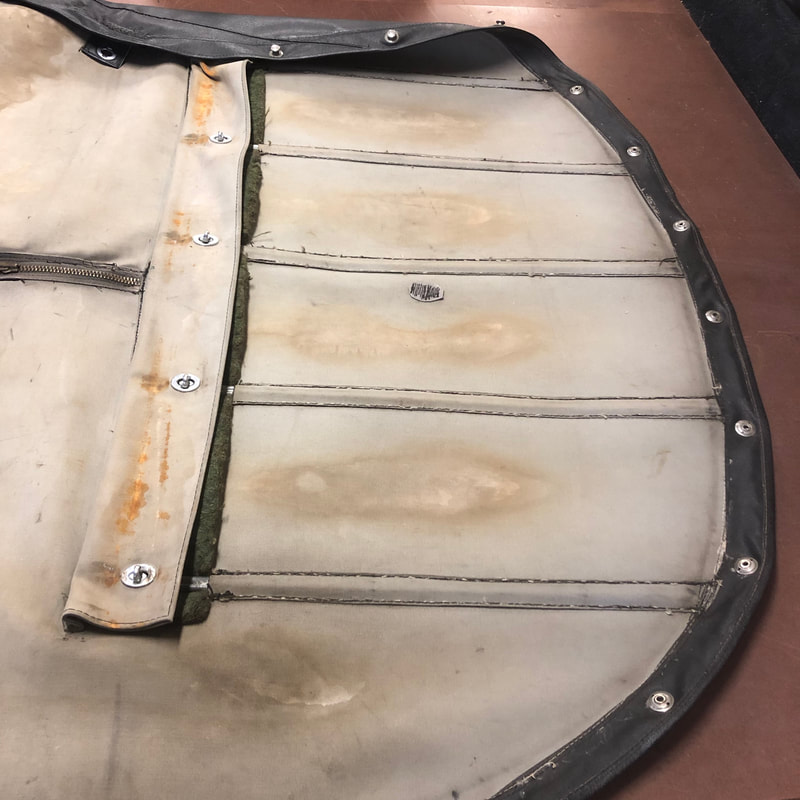
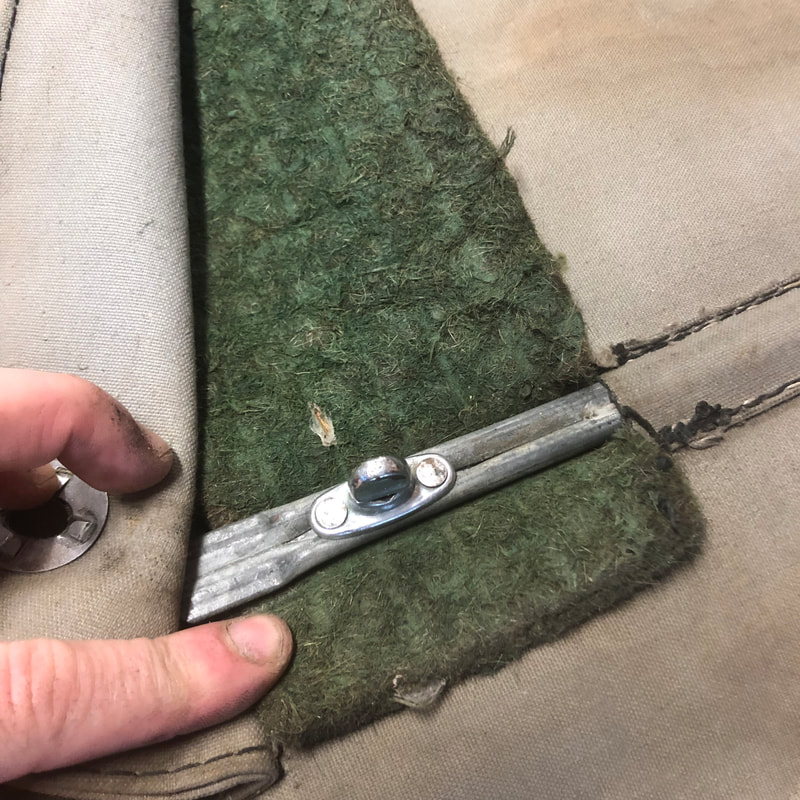
The tonneau cover on the 100-6/3000 4 seaters seems to have remained the same design throughtout production. The tonneau bar however came as either a single piece or in 2 pieces. The rear section of the cover had a series of 5 bars that slotted into corresponding sewn pockets providing stiffness and giving it a clean look. The tonneaus featured a 'Lightning' brand zipper and used a series of Tenax snaps as well as turn snaps in the four corners in front and behind the doors. 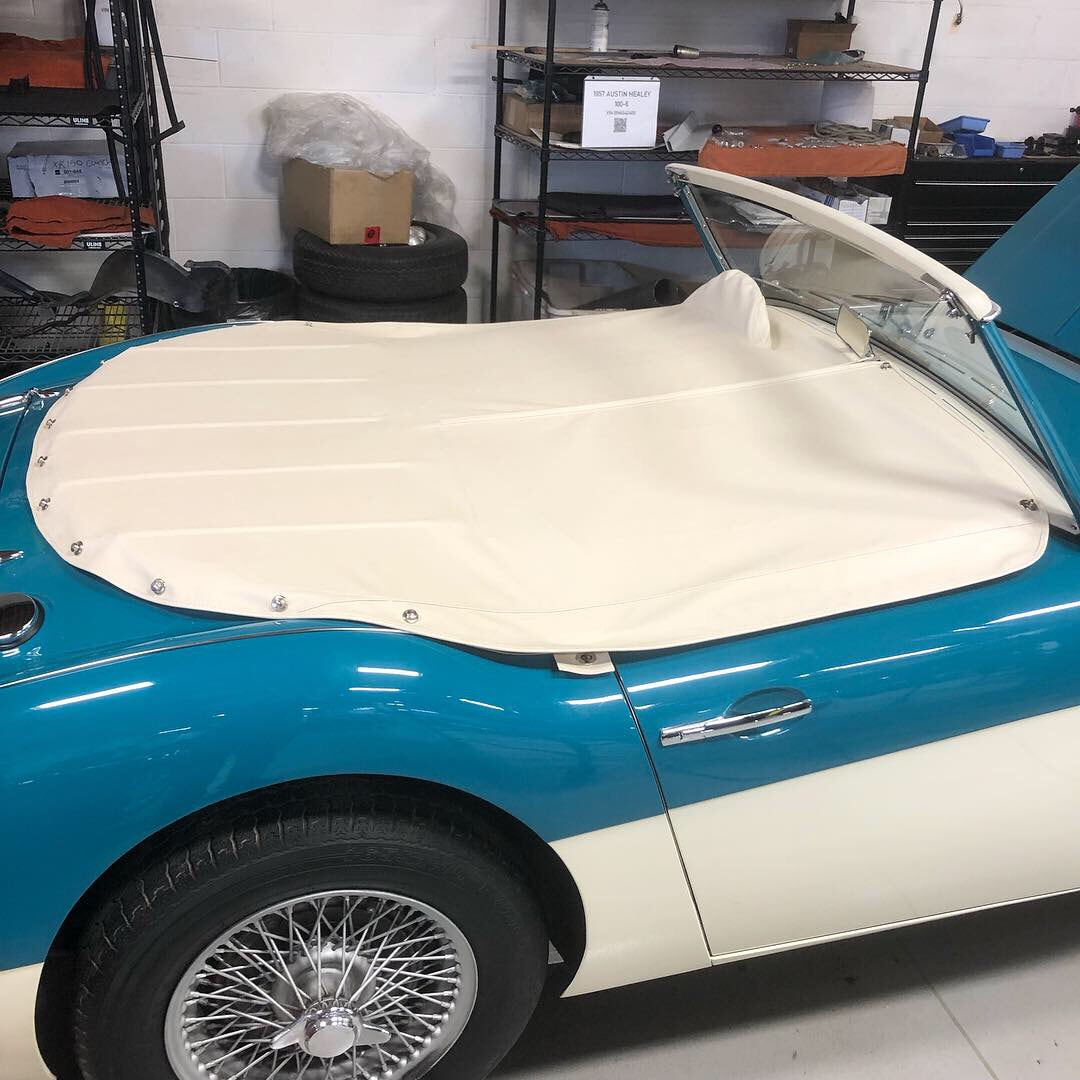
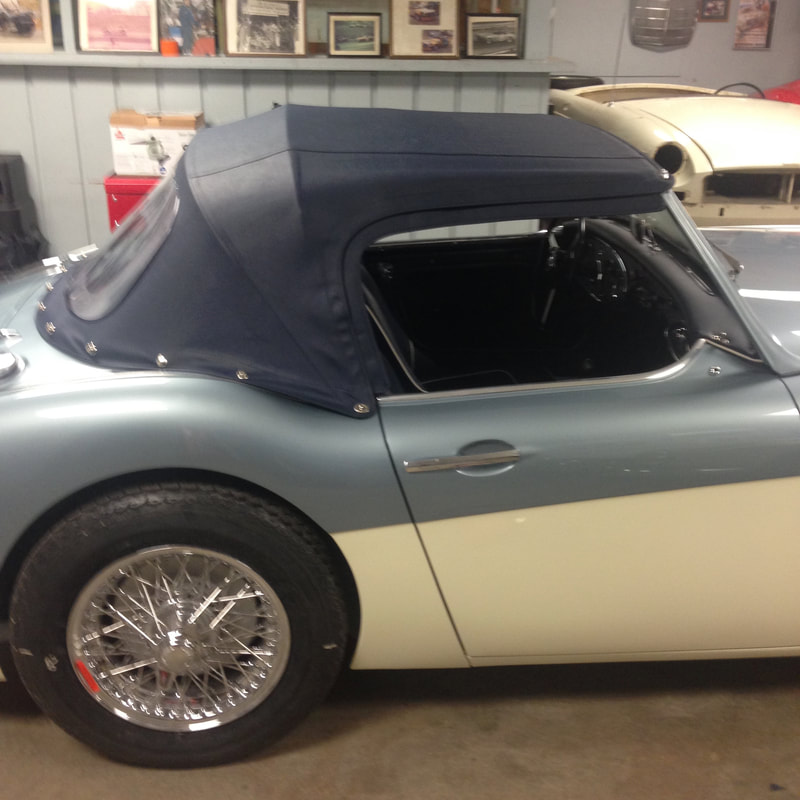
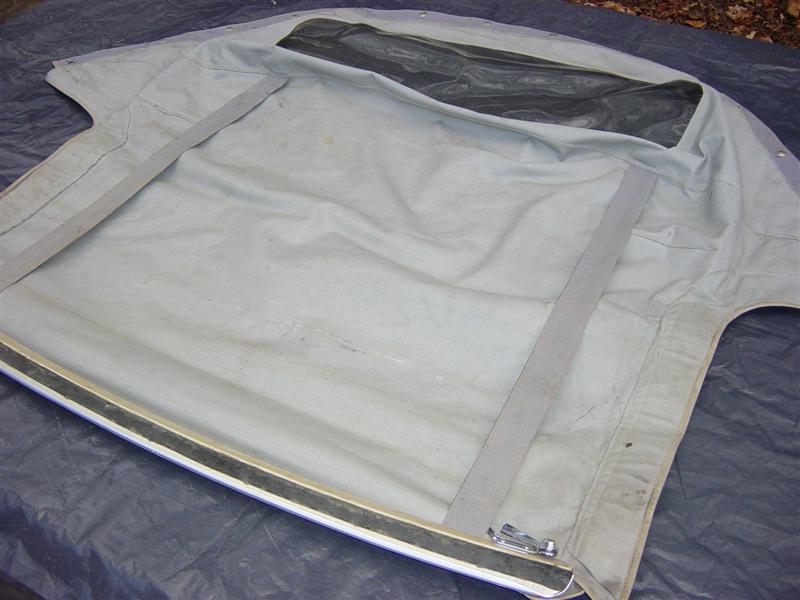
The top and top frame designs changed a few times over the years of production. The early Longbridge BN4s had a sliding folding frame that remained fixed to the car. When folded upright, it had a little hook that snapped into a rubber clip and gave it some support while the top was being unfolded and snapped in place. 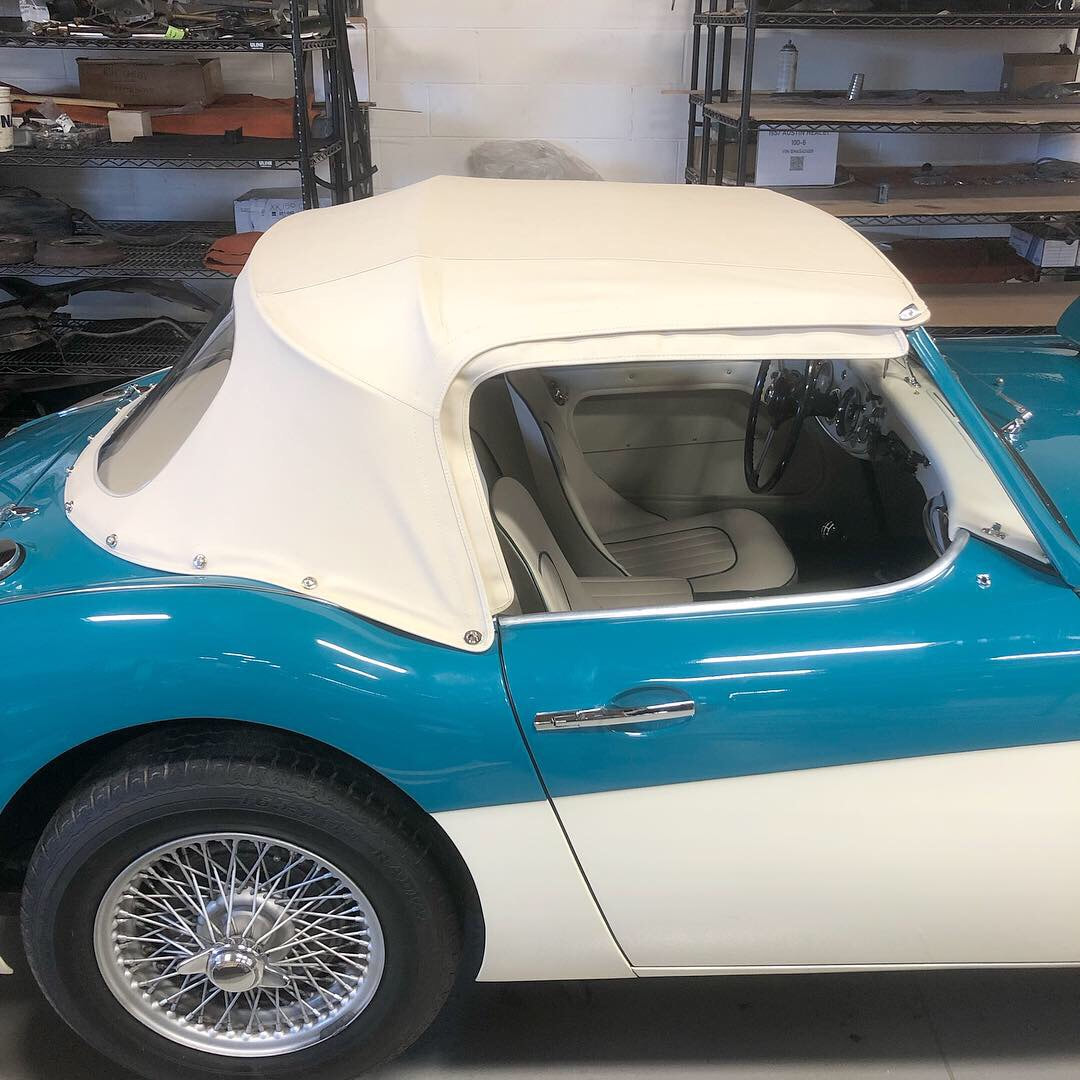 After the return to production at Abingdon, later BN4s had a separate removable top frame that would be inserted into corresponding sockets just behind the door openings when erected. The frame changed again slightly during BT7 production with the lower frame arms being straightened and relocated further back along the top of the wheel arch to provide better stability. 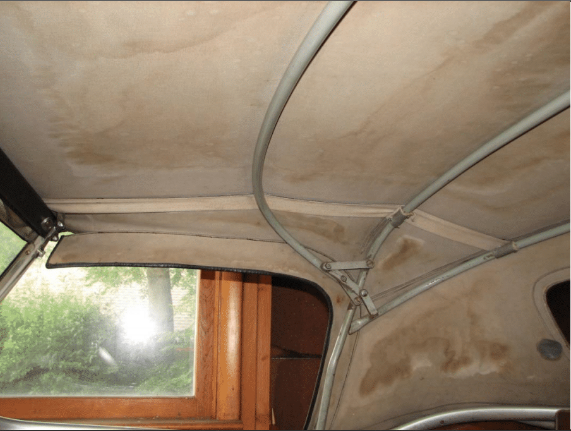 The tops themselves had a few slightly different pattern changes corresponding to the different frame designs. The front edge was secured to a vinyl trimmed wooden header rail with tacks and hidem. The header rail had an aluminum lower edge with a rubber seal that sealed along the top of the windshield, and had a pair of hinged securing hooks that fastened the rail securely to the windshield. ..
The later BT7 style of top frame was a simpler and heavier style of frame that remained separate from the top and removable from the car. It slotted into corresponding sockets over the rear wheel arches.
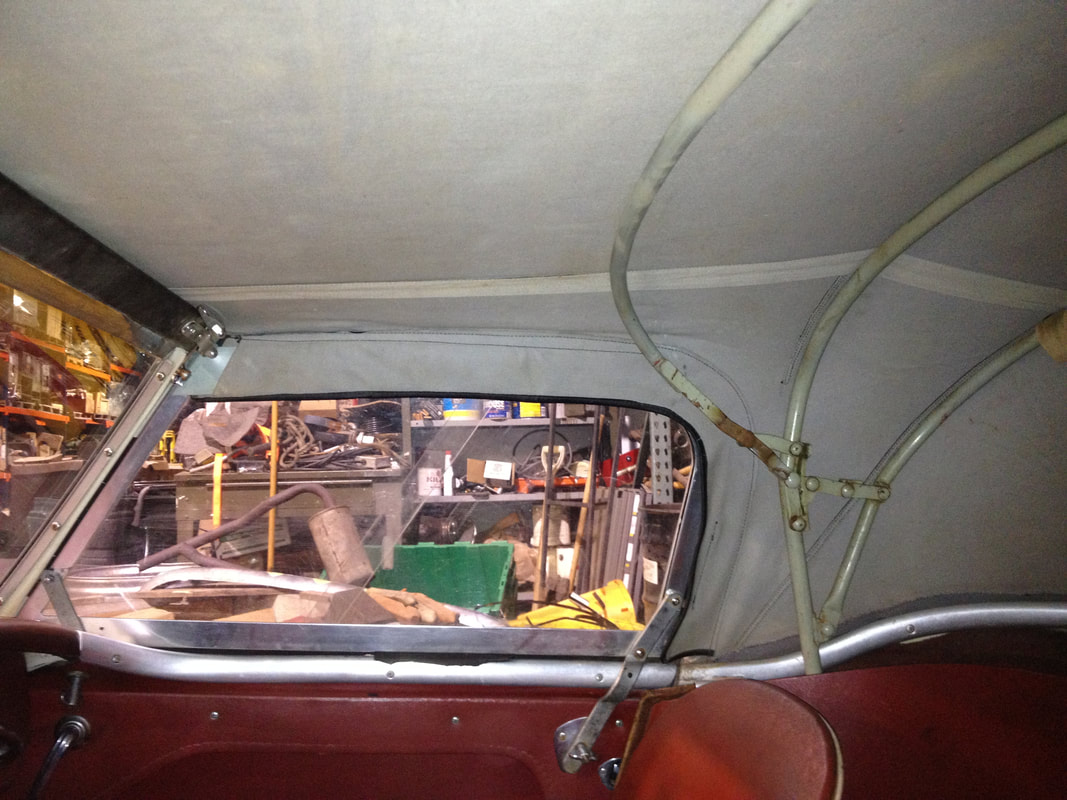
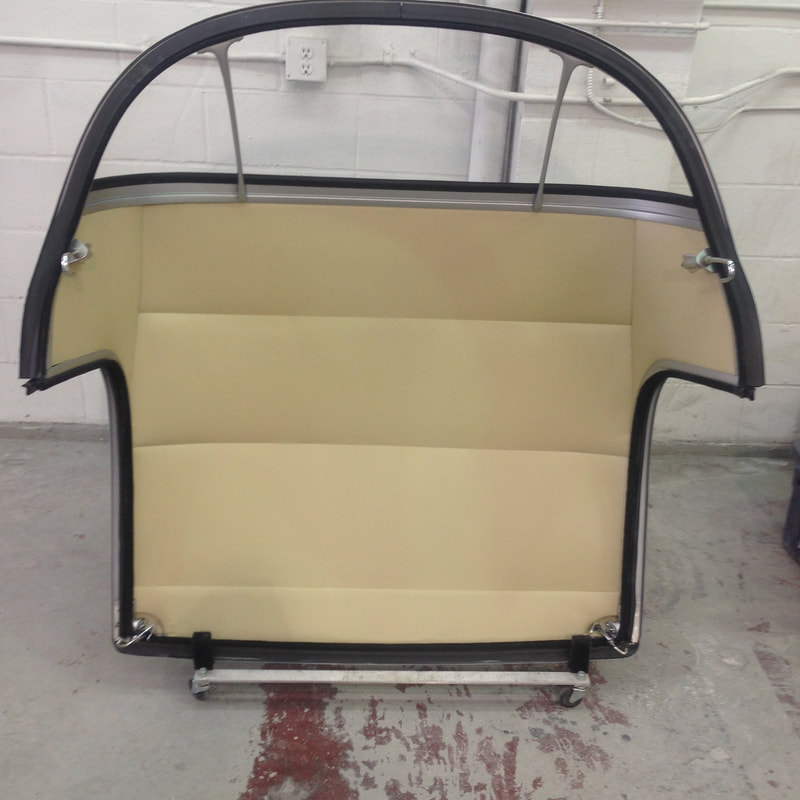
 There was also of course a factory available hard top available for all 6 cylinder models. They came painted in either matching body colour, Old English White or Black. It was made of fiberglass with a molded plexiglass rear window, aluminum trim, rubber seals and a came finished with a nice cream coloured patterned vinyl headlining:
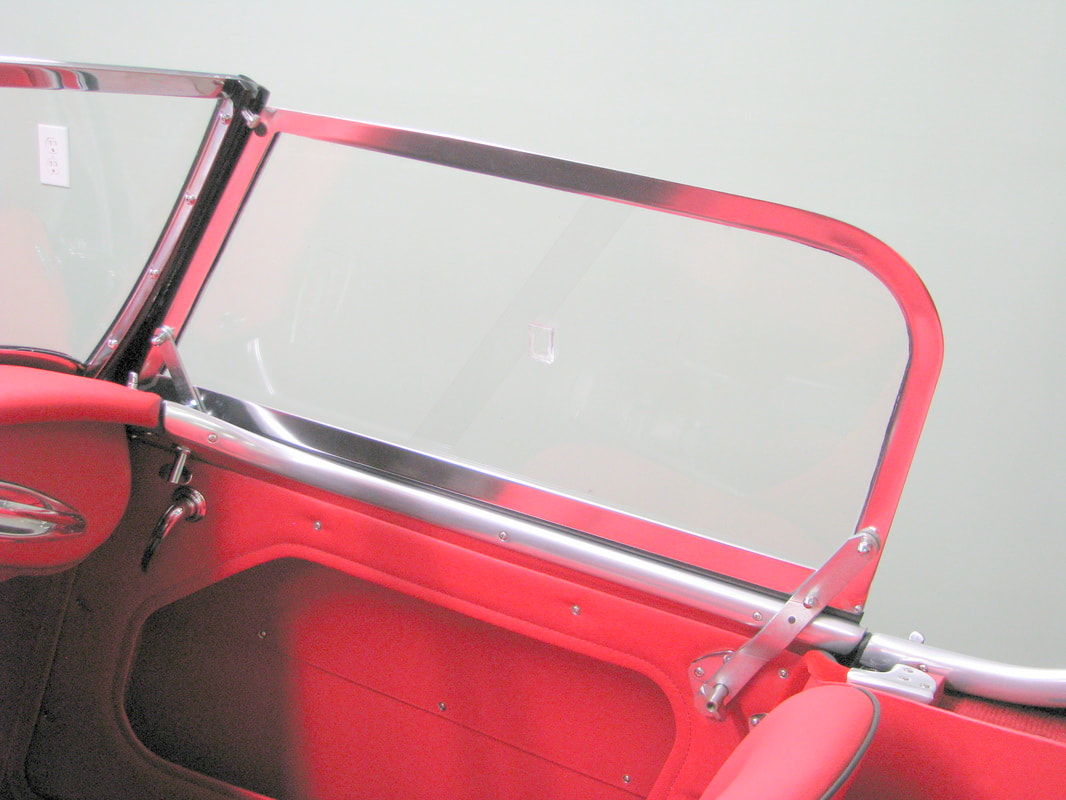
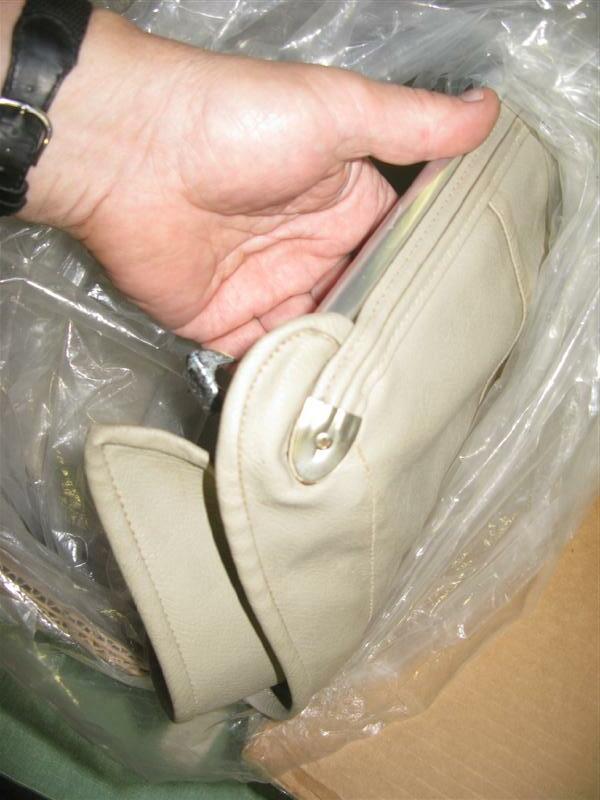
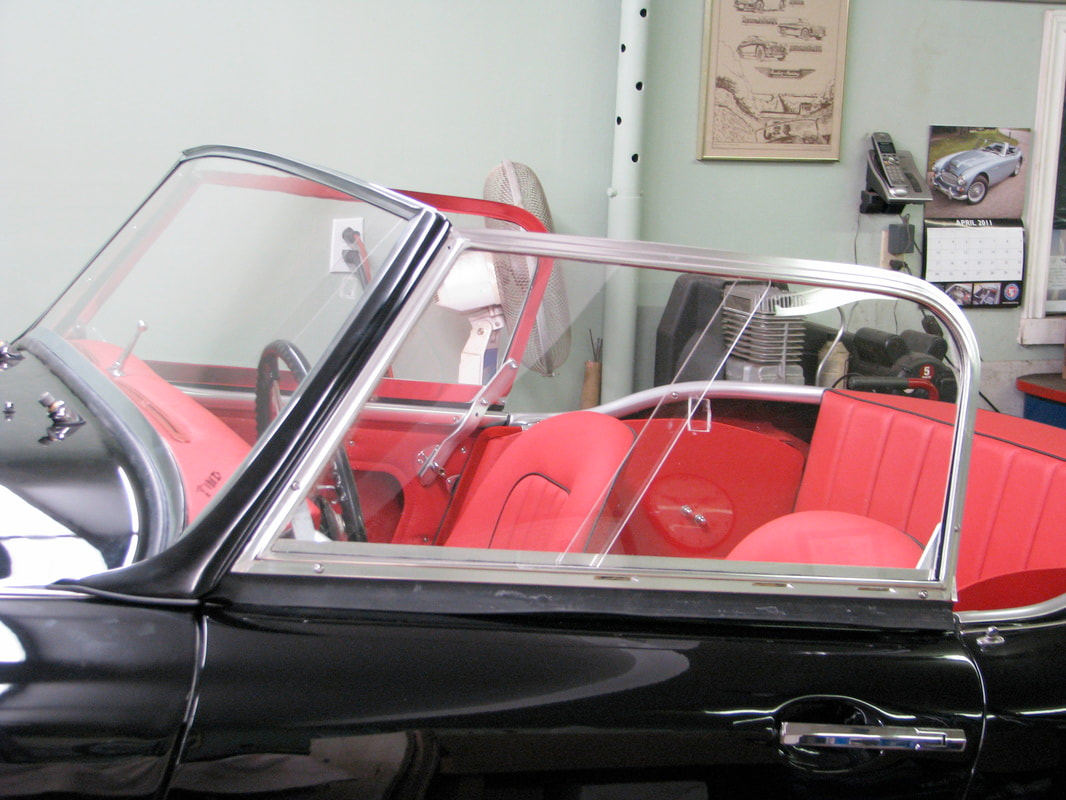
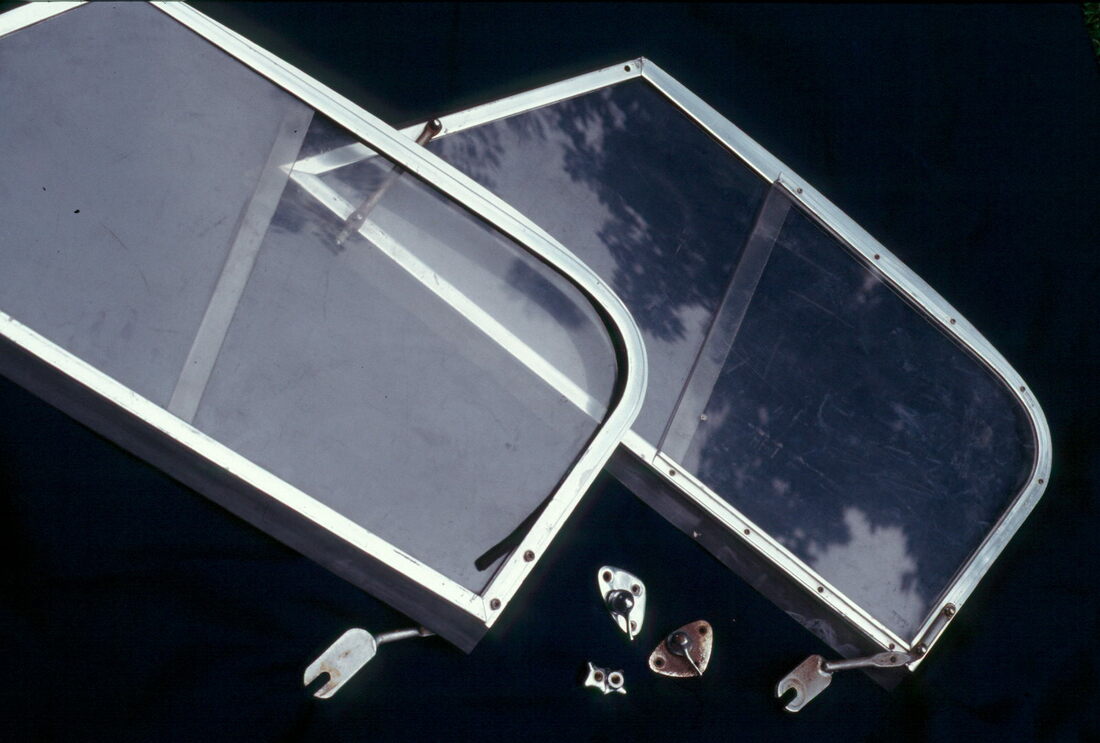
The last thing I haven't mentioned in this article is of course the side screens, unlike the earlier BN2s, these were not upholstered and instead were made of plexiglass with an aluminum frame. They were stored in a neat protective bag with a divider sewn into it so they wouldn't scratch each other. The bag could be stored in the boot compartment when not in use.
 And there you have it! everything you need to know about Austin Healey BN4 & BT7 interior trim. Of course if there are any of these trim components you're needing for your Healey you can contact me through Rightway Heritage Trimming as I offer all of the various styles of Austin Healey interior trim as it evolved Until next time -
3 Comments
Richard Gray
3/7/2020 08:56:10 pm
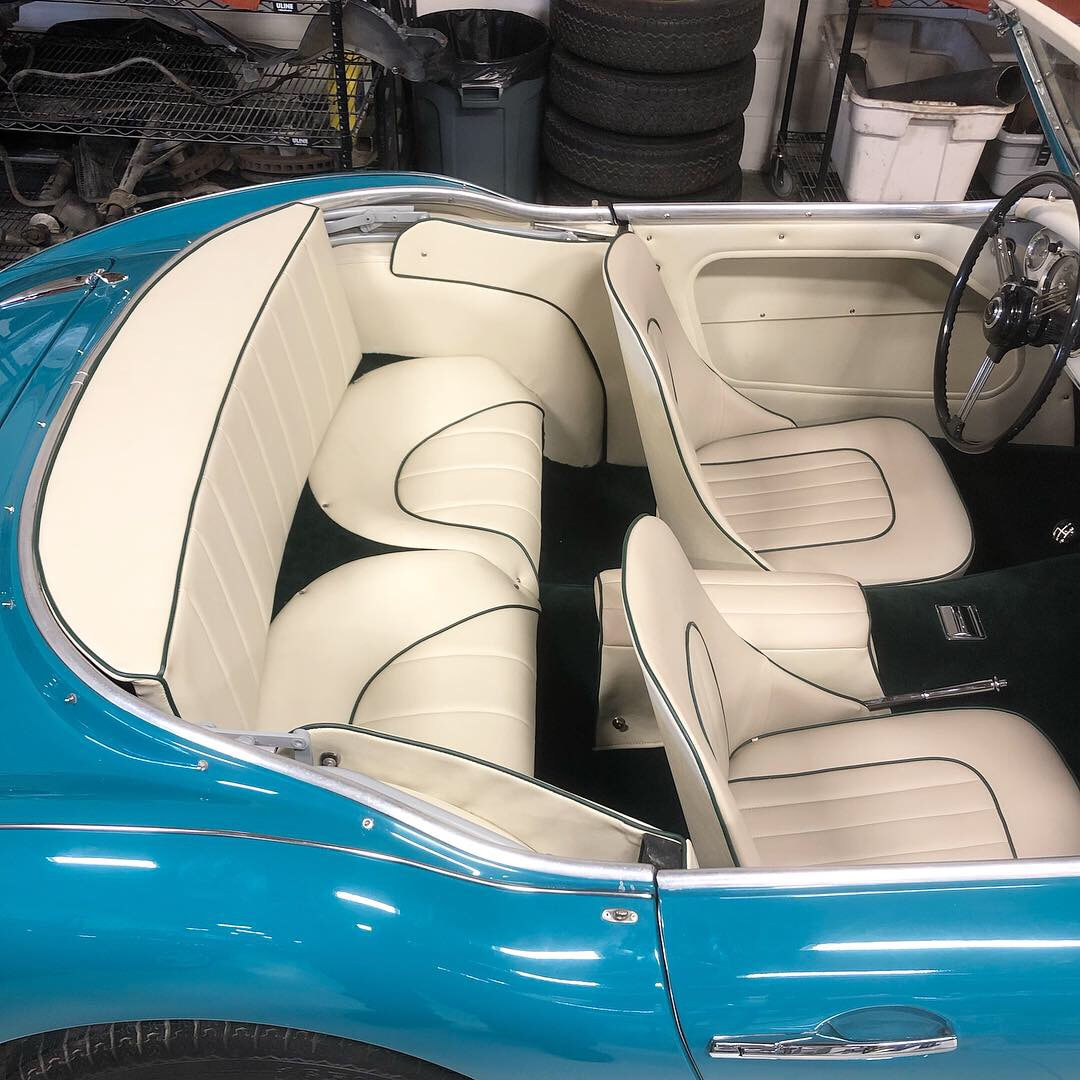
Delighted to see a Pacific Green/OEW Healey here. I owned a 1960 BT7 in the late 1960s in those colors; the interior was an off- white with dark green piping and carpet. I have never seen another one on the road, but I think it is a stunning combination.
Chris Arneson
5/22/2021 06:47:44 am
When trimming the doors of a BN4 you talk about hand painting the edges of the door. The picture you show also includes a strip of red paint it appears at the top of the door that may have been sprayed. Is that common? I’ve never seen that on another restored car but mine was in rusty pieces when I got it so I don’t really know.
Geoff Chrysler
5/23/2021 06:44:53 am
Chris: the red area you're referring to in the pic is the upper door vinyl cover - not paint. Your comment will be posted after it is approved.
Leave a Reply. |

Archives
December 2023
|


 RSS Feed